I love small projects that refresh a room without a big overhaul. These DIY home decor upgrades are the kind of fixes that bring texture, color, and a personal touch to living rooms, kitchens, bedrooms, and entryways.
They work because they focus on materials and placement—fresh paint, new hardware, textiles, and a little repurposing can make a space feel more lived-in and thoughtful.
Each idea here grew from weekend experiments, thrift finds, or simple material swaps. Expect ideas that brighten narrow halls, anchor messy corners, and give tired furniture a fresh personality with minimal fuss and a bit of imagination.
Painted accent wall with stencil pattern
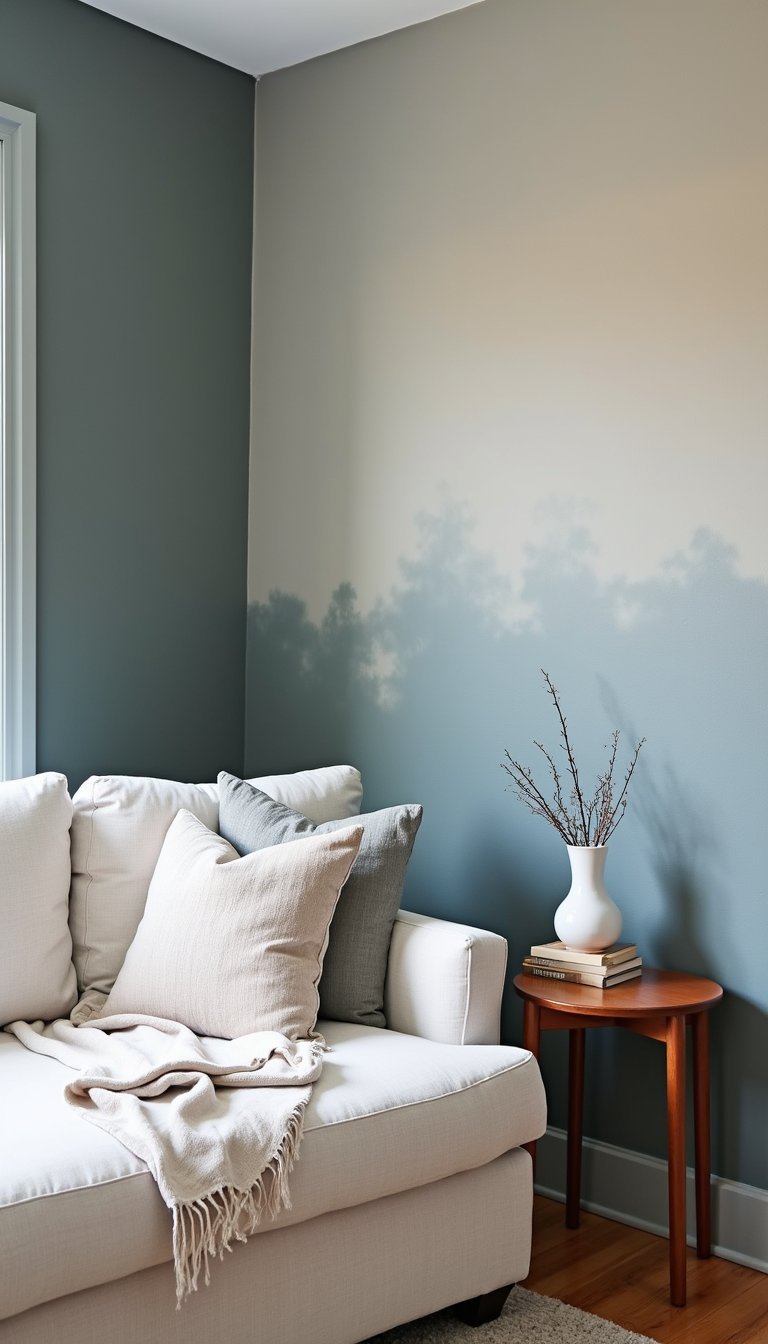
A painted accent wall with a hand-stenciled pattern gives a room instant personality without replacing anything major. Use chalky or matte wall paint in a muted base (soft gray, warm cream) and a slightly darker or contrasting tone for the stencil—think slate blue over dove gray or terracotta over warm beige. Materials include a durable wall primer, a reusable stencil made from mylar, a small foam roller for crisp edges, and painter’s tape. Surfaces read as texture rather than loud pattern when paired with natural wood furniture and linen textiles.
Styling Tips
- Test the stencil in an out-of-the-way spot first to check scale.
- Keep surrounding decor neutral so the pattern feels intentional, not busy.
- Add one accent color from the stencil into pillows or vases to tie the room together.
Open shelving from reclaimed wood planks
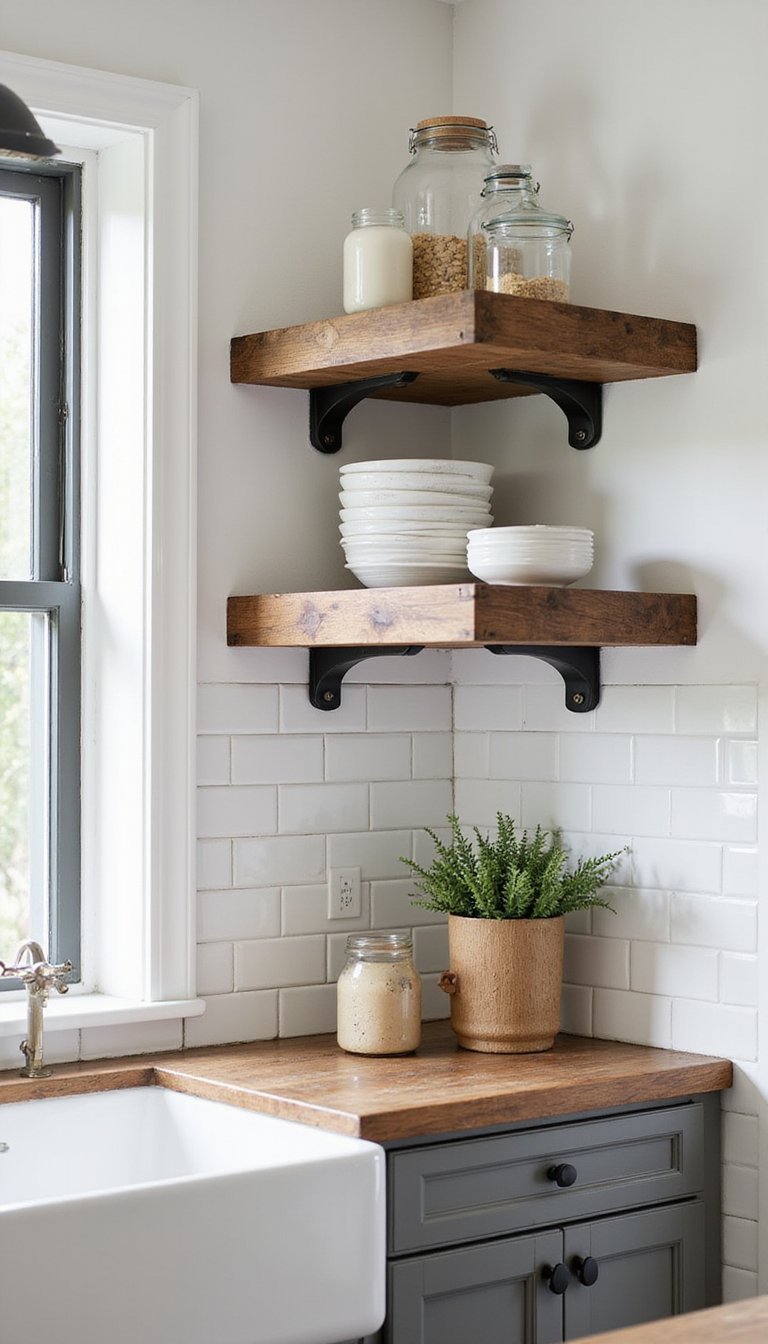
Floating open shelves made from reclaimed wood add warmth and an artisanal touch to kitchens, bathrooms, or entryways. Choose planks with visible grain and a lightly sanded finish to keep a tactile feel; seal with a clear matte oil to protect against splashes. Pair the wood with matte black metal brackets for an industrial-meets-cottage look, or conceal hardware for a floating effect. Styling leans on stacked ceramics, small potted plants, and a mix of closed jars and accessible daily dishes to balance function and visual calm.
Styling Tips
- Space items out—negative space makes shelves look curated rather than cluttered.
- Group objects in odd-numbered clusters for visual flow.
- Anchor the display with a larger piece like a framed print or a tall jar.
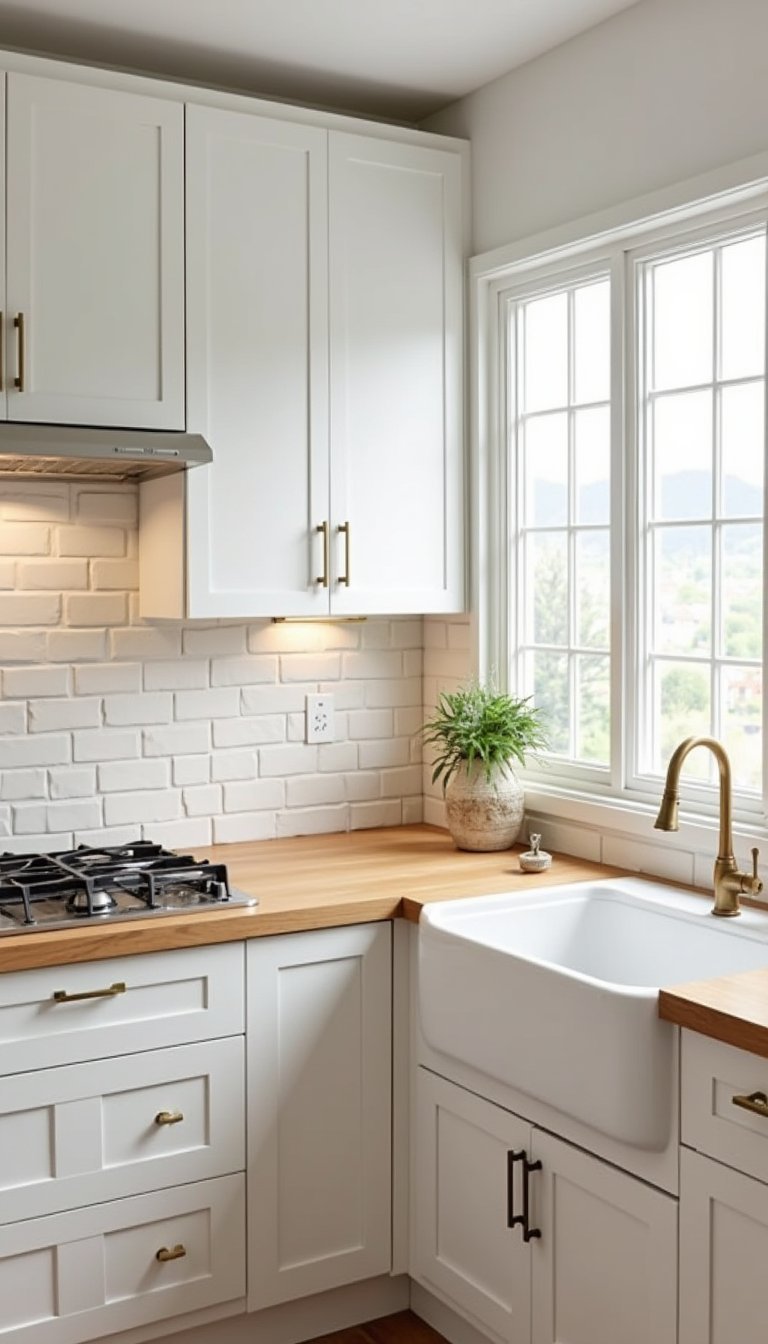
Swap cabinet hardware for instant refresh
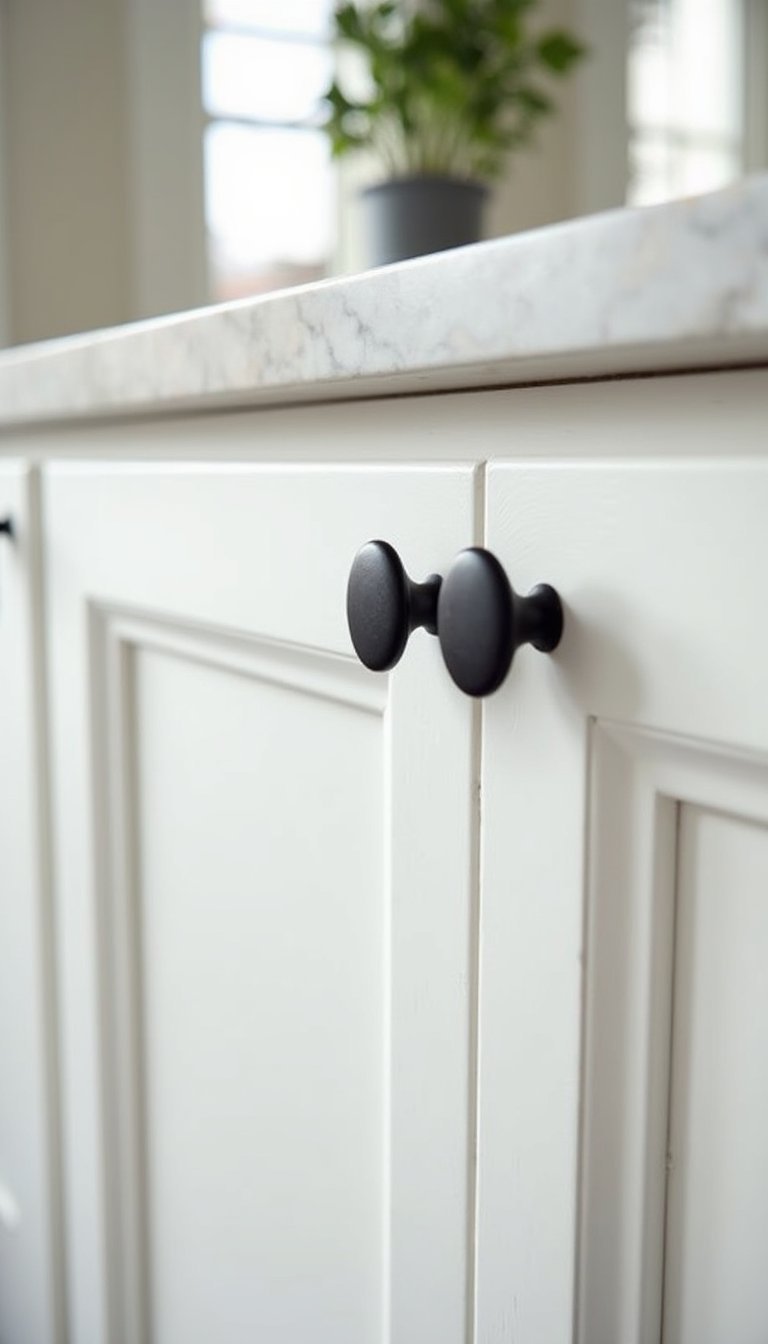
Changing drawer pulls and knobs is a surprisingly impactful decor upgrade that changes the whole mood of a room. Swap out dated brass or mismatched hardware for cohesive finishes—brushed nickel for modern minimal, oil-rubbed bronze for cozy traditional, or matte black for graphic contrast. Consider mixes: uniform knobs with longer pulls on larger drawers. Materials include a drill, replacement screws, and measuring tape to ensure holes align. This small update pairs well with clean countertops, woven placemats, and a new hand towel to complete the look.
Styling Tips
- Bring an old knob to the hardware store to match finish and scale before buying.
- Replace one row at a time to keep the kitchen functional during the swap.
- Mix metals subtly—introduce a trim or lamp that echoes the new finish.
How to build floating shelves with hidden brackets?
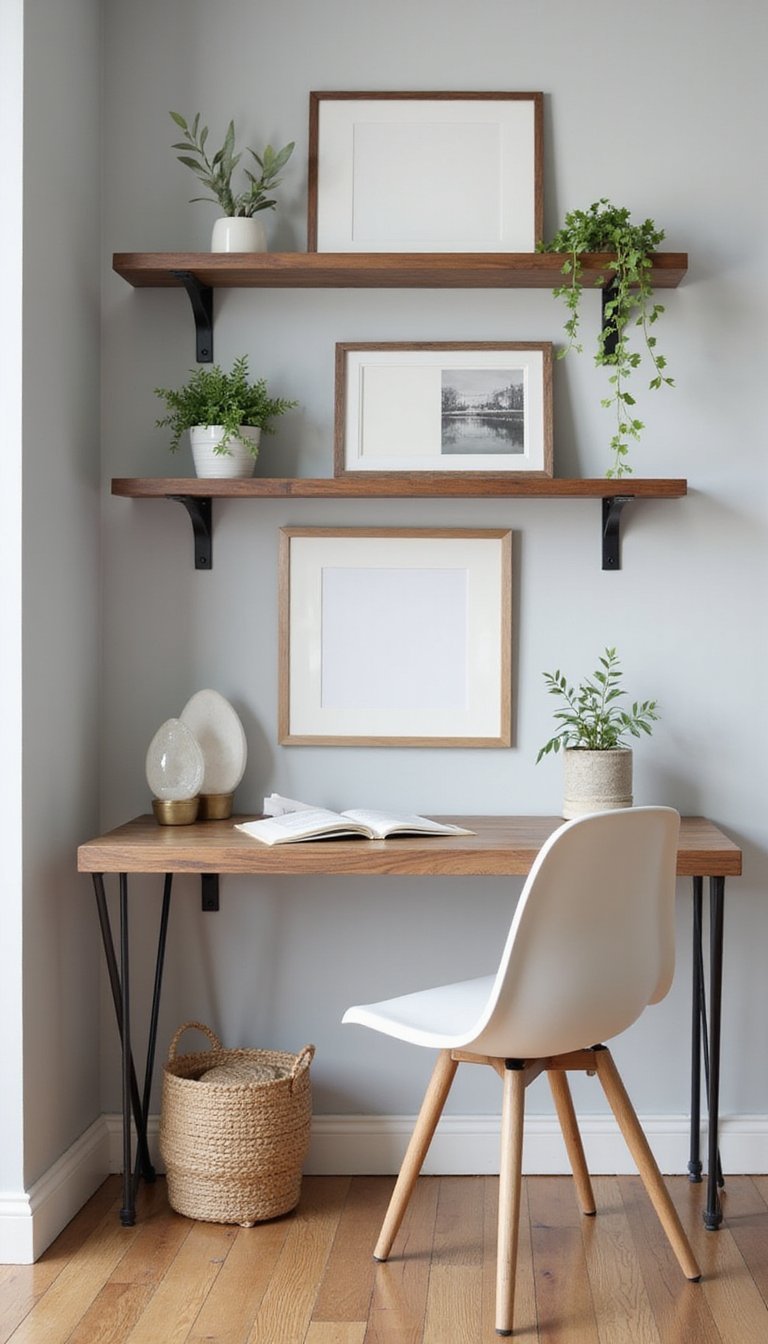
Hidden-bracket floating shelves create a clean, minimalist shelf line that looks custom-built. Use solid wood boards—walnut, oak, or painted poplar—and drill internal pockets for steel bracket rods that slide into the wall. Finish the boards with a clear satin or a soft matte paint to match your room palette. These shelves are great for living rooms and home offices because they showcase books and small sculptures without visible hardware. The tactile wood grain against a soft painted wall creates a calm, collected backdrop for everyday items.
Styling Tips
- Check studs and use anchors for heavier loads like cookbooks or pottery.
- Vary heights and depths to accommodate framed photos and plants.
- Leave breathing room between objects to emphasize each piece.
Update lampshades with fabric and trims
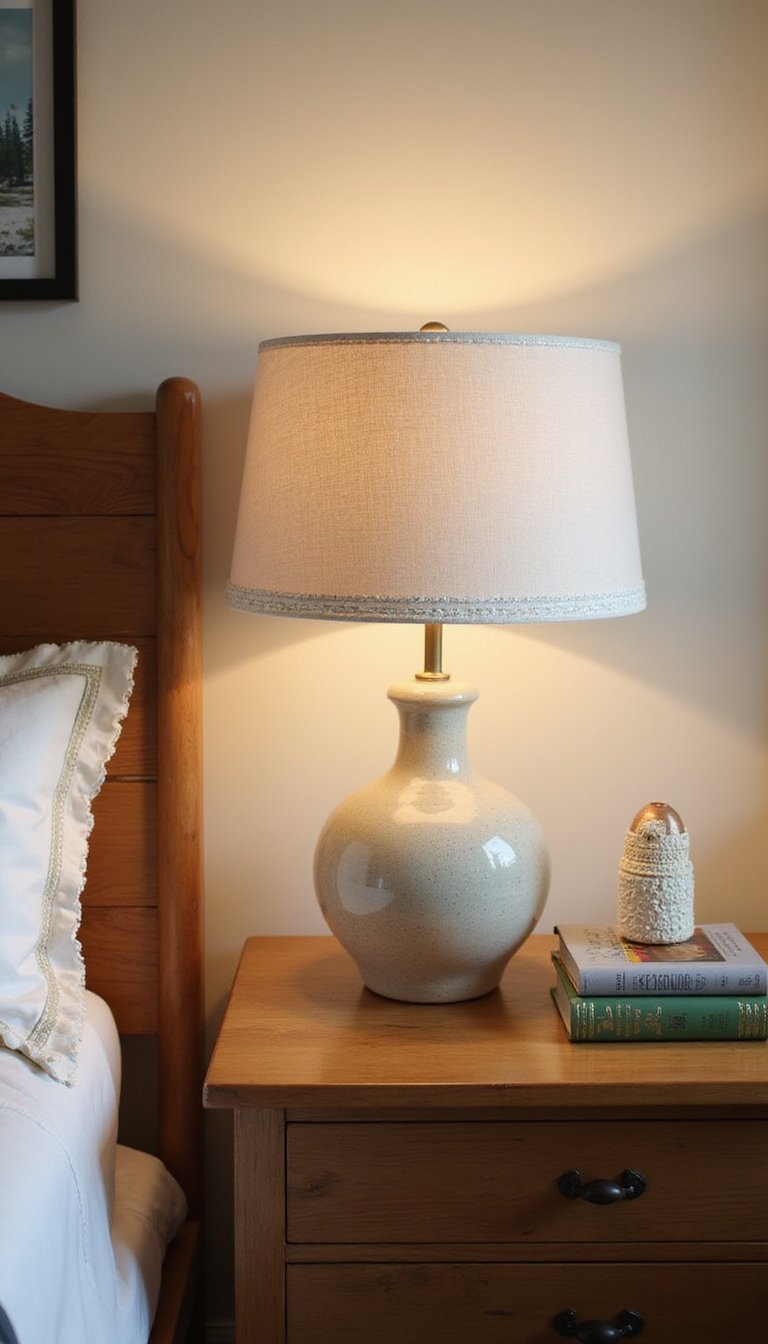
Replacing or recovering lampshades is an instant mood changer that plays with light and texture. Choose heavyweight cotton or linen in a neutral tone for soft diffusion, or pick a patterned fabric for a focal pop. Add a small trim—rope, pom-pom, or hand-stitched bias tape—to echo pillows or curtains. Staple and glue methods secure the fabric inside the shade, while a small hot-glue hem keeps edges neat. The result is warmer, more intentional light that flatters wood tones and woven rugs across living rooms or bedside tables.
Styling Tips
- Match shade fabric texture to nearby textiles like curtains for cohesion.
- Use a tone-on-tone pattern for subtle interest under soft light.
- Test the shade on the lamp before finishing to check light diffusion.
Peel-and-stick tile for kitchen backsplash refresh
Peel-and-stick tiles are a hands-on way to refresh a backsplash without redoing grout or demolition. Choose textured vinyl or thin faux ceramic tiles in a soft white, matte black, or encaustic pattern to complement the counter and cabinetry. Clean, degrease, and measure the wall carefully to avoid bubbles and misalignments. The adhesive backs make application forgiving for beginners, while the visual result reads like a more permanent surface when paired with under-cabinet lighting and bronze or brass accents for warmth.
Styling Tips
- Start at the center and work outward for balanced seams.
- Trim tiles with a sharp utility knife on a straightedge for neat edges.
- Add a narrow shelf above the backsplash for herbs or decorative jars.
DIY upholstered headboard with button tufting
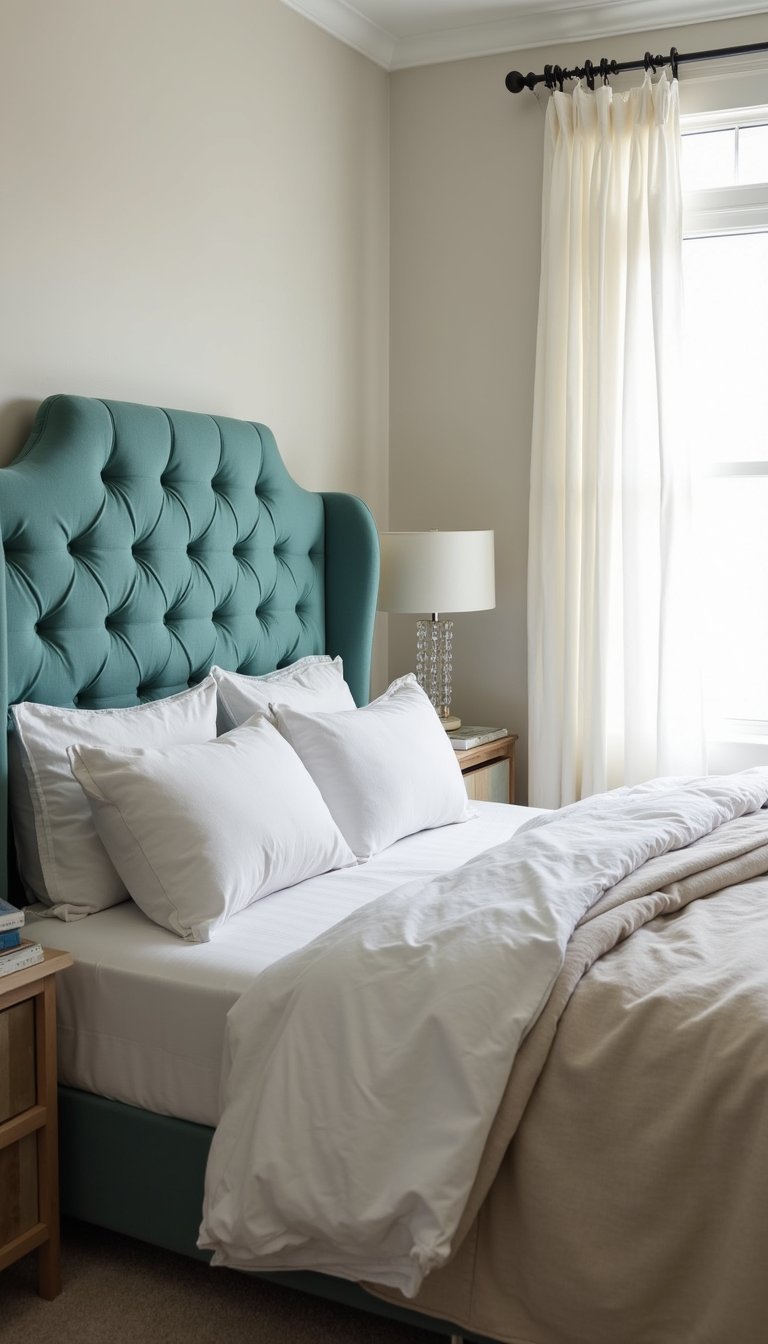
An upholstered headboard anchors a bedroom and gives the bed a tailored feel without replacing the frame. Construct a plywood base, layer dense foam and batting, and upholster in soft linen or velvet. Button tufting adds an old-house charm—tools include a strong upholstery needle and twine for pulling buttons tight. Choose calming jewel tones like muted teal or warm blush for a cozy palette, or a classic neutral for versatility. Pair with crisp cotton sheets and a textured throw at the foot to complete the layered look.
Styling Tips
- Use fabric samples to see how color shifts in morning light.
- Match button fabric to the headboard for a seamless look.
- Keep bedside tables low to keep the headboard as the focal point.
Layered rugs to define zones and add texture
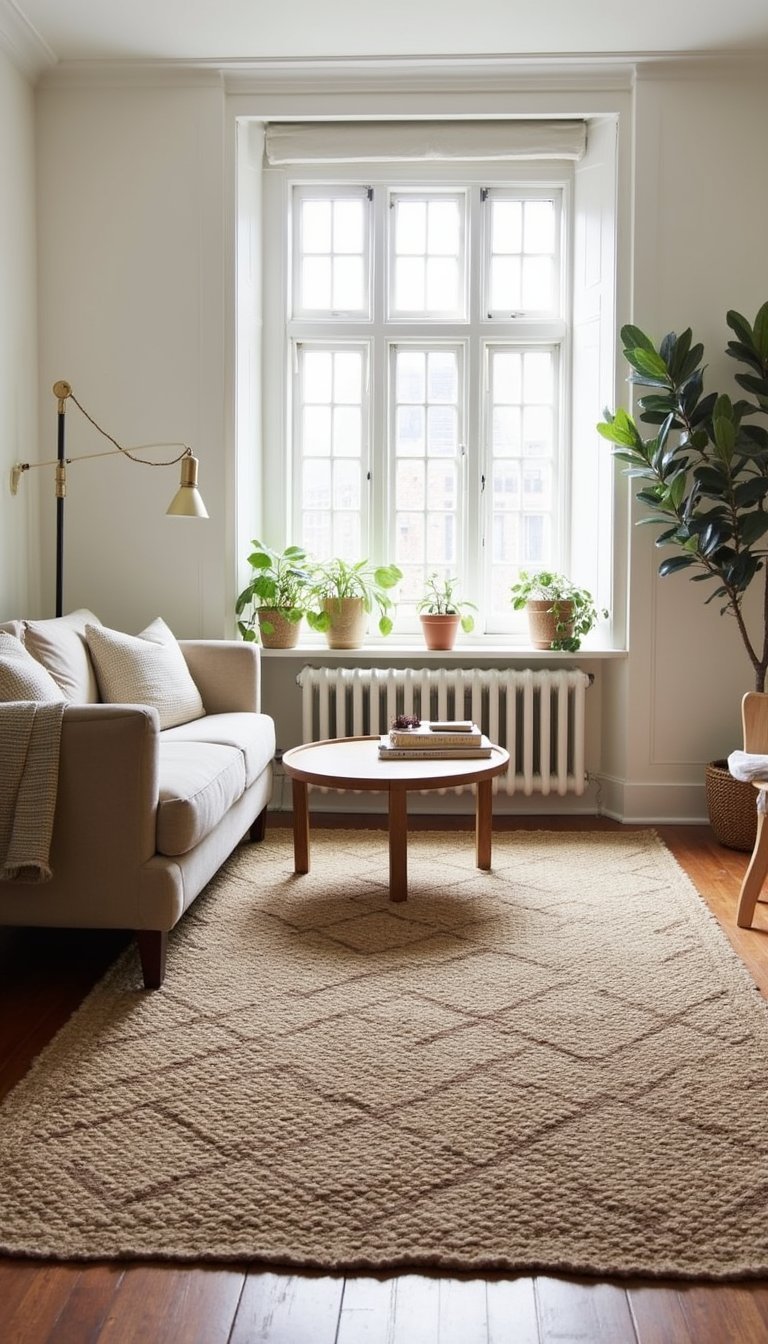
Layering rugs brings depth, pattern, and comfort to rooms that need visual grounding. Start with a large, neutral anchor rug—flatweave jute or sisal—then add a softer, patterned rug on top to create a cozy seating area. Mix textures: a low, tight weave under a plush wool runner works well. Choose palettes that echo accent cushions or art: warm earth tones with muted blues or monochrome layers in charcoal and cream. This method is great for open-plan living rooms, rentals, and odd-shaped spaces where a single rug can feel lost.
Styling Tips
- Let the bottom rug peek out around the edges for contrast.
- Keep the top rug slightly smaller than the furniture footprint to maintain scale.
- Secure layers with non-slip pads to prevent shifting.
Thrifted frame gallery wall makeover
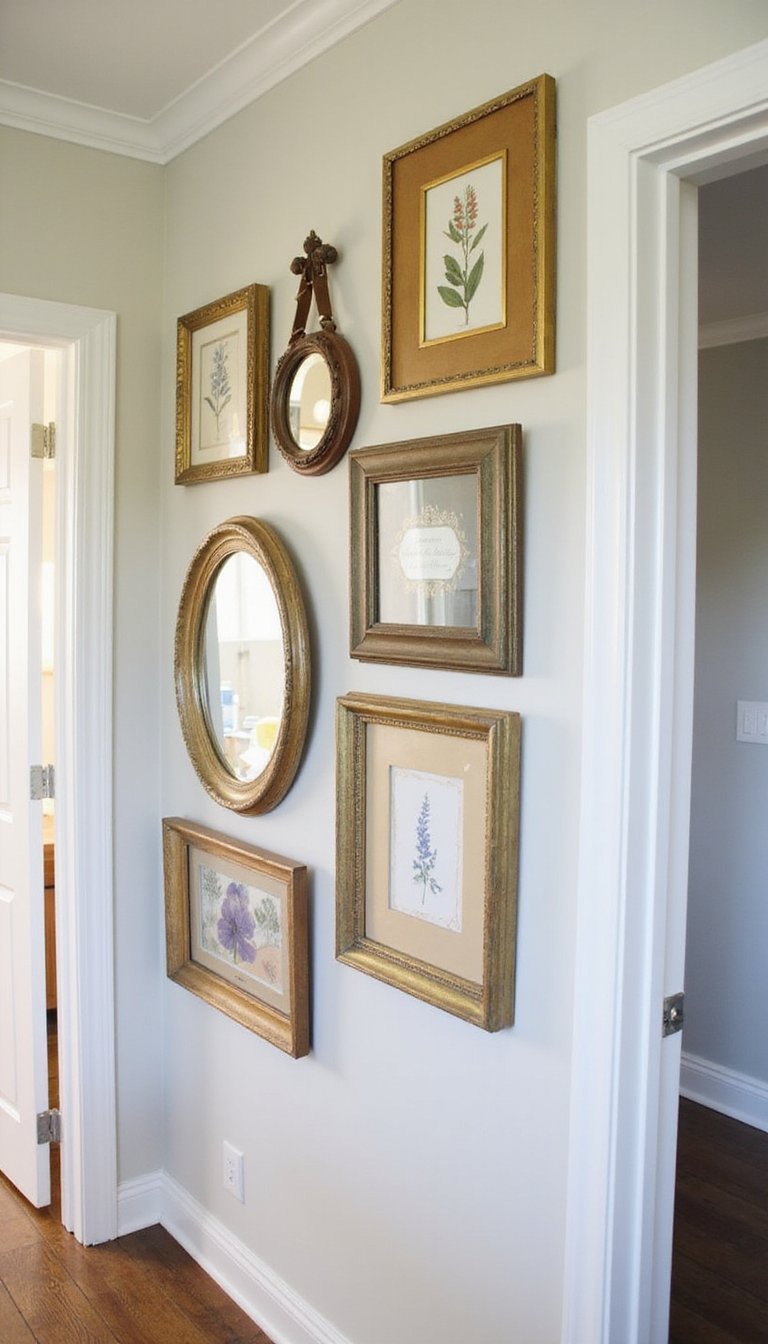
Turn thrift shop frames into a personalized gallery wall by repainting and matting art prints or photos. Use a cohesive palette—black frames with white mats or mixed woods painted in two coordinating tones—to unify the arrangement. Mix mirrors, vintage maps, and botanical prints for varied texture. Lay the layout on the floor first to arrange a balanced composition then transfer to the wall using paper templates. This touch helps a hallway, stairwell, or above-a-sofa space feel curated and touched by collected memories rather than a store display.
Styling Tips
- Create a central anchor piece and arrange others around it for flow.
- Vary frame widths but keep a consistent mat color for cohesion.
- Include three-dimensional items like a small shelf or shadow box for interest.
Add trim molding to plain doors and walls

Installing simple trim molding upgrades plain doors and walls with architectural detail that reads like custom millwork. Use MDF or primed pine for crisp lines; paint in the same color as the door for a unified, subtle elevation, or choose a contrasting color for a modern statement. Patterns can be minimal rectangles or a grid across a foyer wall. This approach uses minimal materials but adds shadow and rhythm, pairing nicely with brass switchplates, woven rugs, and warm wood floors to create a layered, thoughtful room.
Styling Tips
- Measure twice and use a level to keep lines perfectly straight.
- Caulk edges and paint over seams for a seamless finish.
- Coordinate trim height with furniture scale to balance the room.
Repurpose a ladder into towel or blanket storage
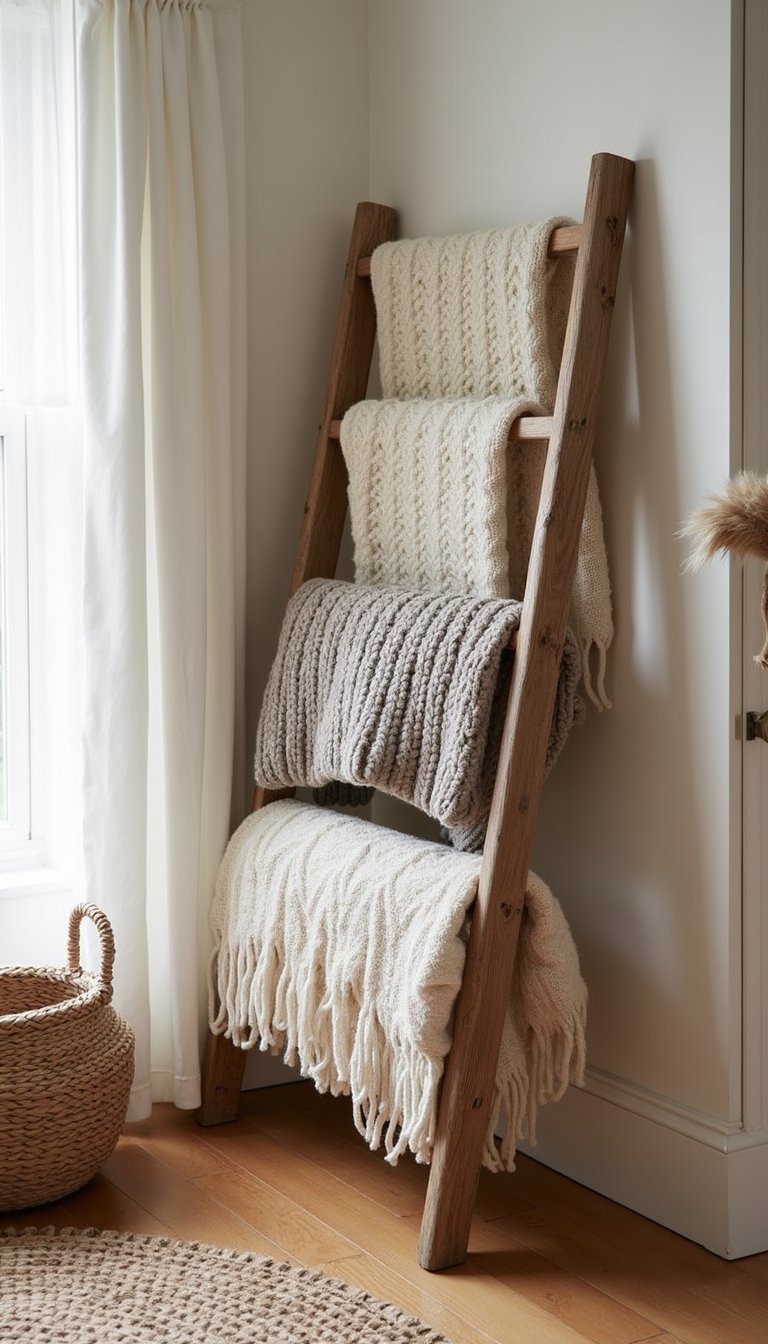
A simple wooden ladder leans against a wall to hold towels in a bathroom or cozy blankets in a living room. Choose a lightly distressed finish or sand and stain to match existing wood tones. Secure the ladder at the top if children or pets are around. The texture of rungs against plaster or shiplap creates a relaxed, collected aesthetic. Combine with woven baskets at the base for small items like magazines or toilet paper rolls, and add a plant nearby for organic softness.
Styling Tips
- Angle the ladder slightly away from the wall for stability and the right visual line.
- Drape textiles loosely for an effortless, lived-in feel.
- Pair with a tall floor vase or plant to balance height.
Concrete countertop paint for faux stone look
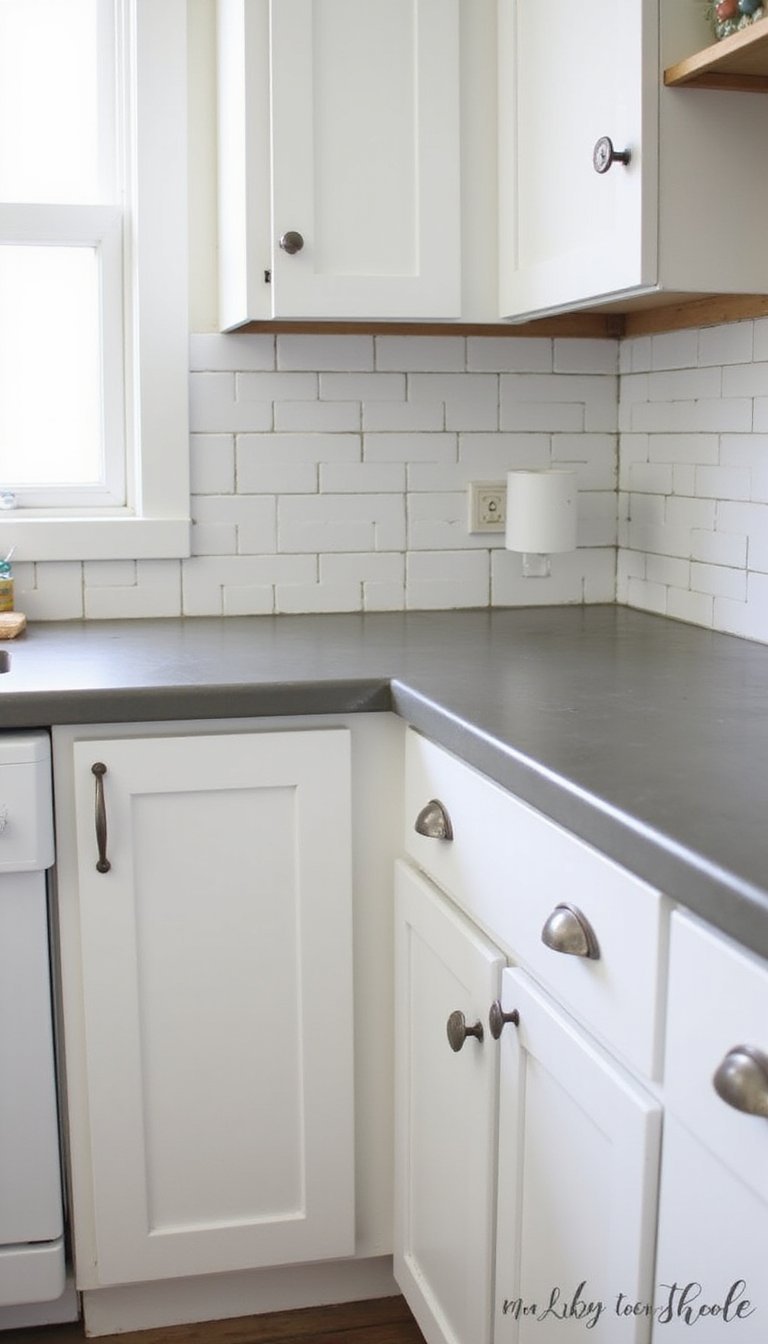
Concrete-style countertop paint can mimic stone without the cost or demolition. Choose a multi-step kit that includes primer, base coat, textured topcoat, and a sealer. Work in small sections with foam trowels and sponges to create subtle veining and mineral speckles in tones like warm gray, soft beige, or charcoal. Finish with a clear, heat-resistant sealer for daily use. Paired with matte cabinetry and a simple backsplash, this surface reads like a thoughtful material upgrade that holds up to everyday life when sealed properly.
Styling Tips
- Allow full curing time per product instructions before heavy use.
- Work with reference photos of real stone to guide veining and texture.
- Use a countertop protector for hot pans to preserve the finish.
Rattan screen used as a room divider
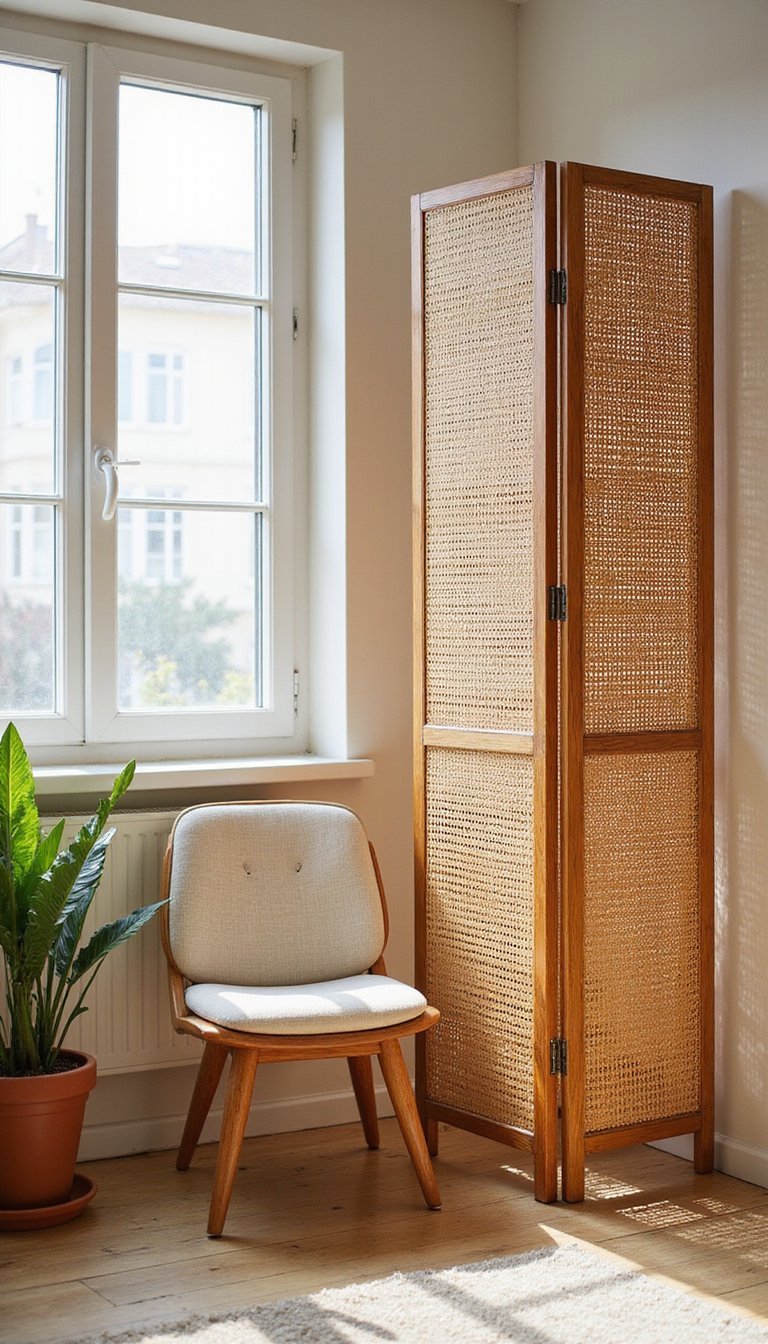
A rattan or cane screen brings a breezy, textural divider to studio apartments or family rooms that need defined zones. Choose a warm honey tone to complement mid-century furniture or a painted white screen for coastal-inspired interiors. The woven pattern filters light while adding visual privacy, and it pairs well with potted palms, woven rugs, and linen-covered seating. It’s an instant way to create a reading nook, separate a home office, or shield a bed in a studio without changing the footprint of the room.
Styling Tips
- Place the screen near a light source to take advantage of patterned shadows.
- Add a hanging plant on one side to soften the edge.
- Use it as a backdrop for a small console or lamp to create a vignette.
Painted stair riser patterns for a playful lift
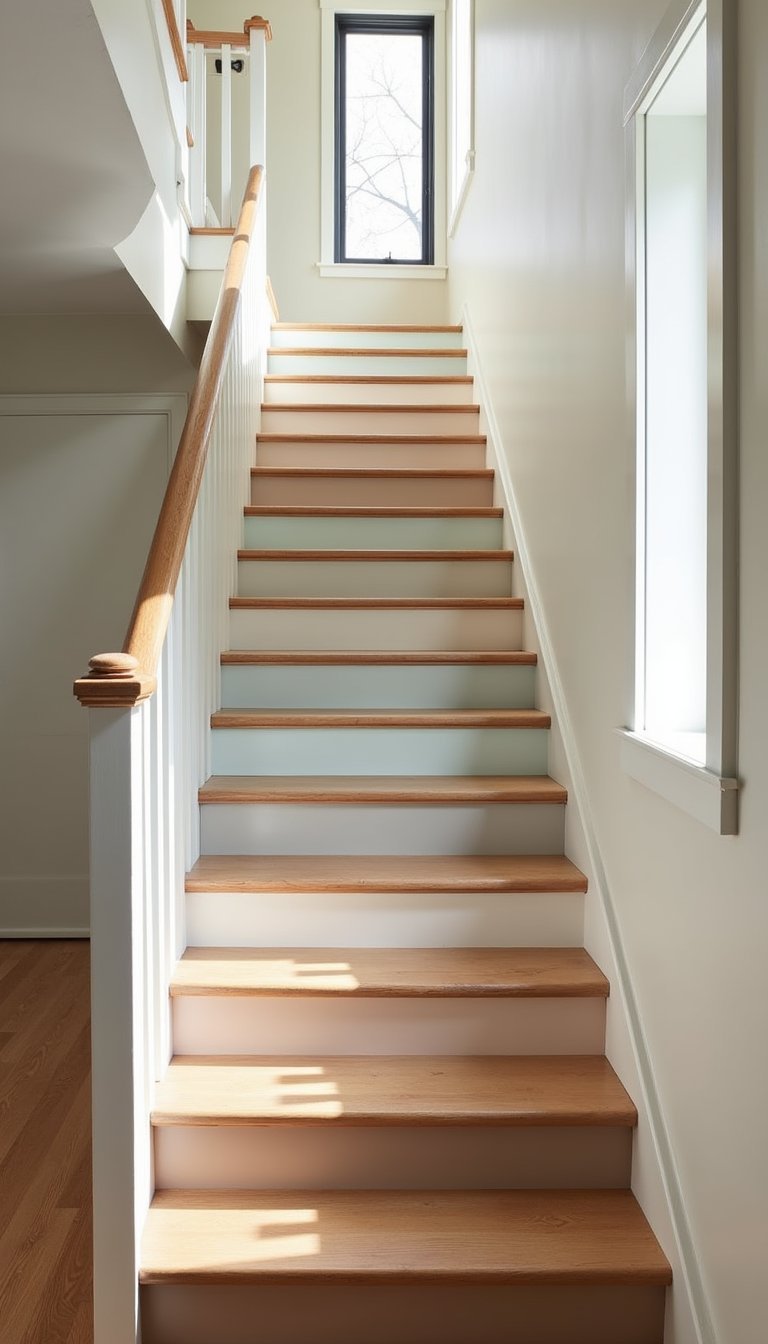
Painting stair risers with color or pattern gives a stairway personality without redoing treads. Choose geometric stripes, a repeating motif, or a graduated ombré across risers. Use durable stair paint and a clear protective topcoat for wear resistance. Soft neutrals paired with a single accent color read modern and calm, while a mix of earthy tones feels cozy. This small project adds rhythm to a hallway or landing and becomes a joyful surprise that connects upstairs and downstairs palettes.
Styling Tips
- Use painter’s tape for crisp lines and consistent spacing.
- Test color samples on a single riser to check how it reads in the staircase light.
- Keep treads neutral to avoid visual clutter underfoot.
Macramé plant hangers for vertical greenery
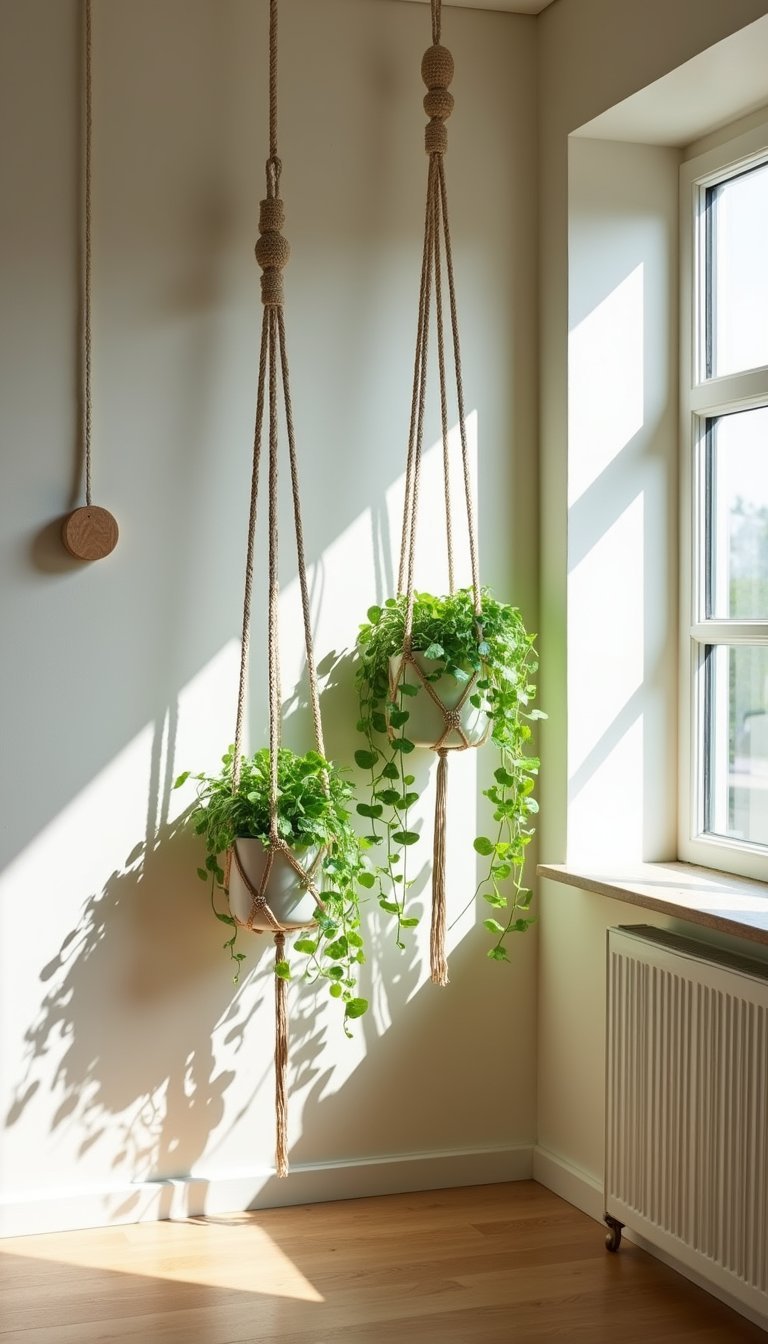
Macramé plant hangers add handmade texture and free up floor space with dangling greenery. Use cotton cord in natural cream or dyed tones to complement wall paint and pot finishes. Choose healthy trailing plants—pothos, string of pearls, or philodendron—to play into the vertical lines of the knots. Hang them at staggered heights near windows or over kitchen sinks for a lived-in, botanical look. The tactile knots and soft cords feel warm against plaster and wood, creating a cozy backdrop for everyday moments.
Styling Tips
- Vary pot sizes and textures—terracotta, glazed ceramic, and woven baskets mix well.
- Hang a cluster of three for dramatic impact without crowding.
- Check plant light needs before choosing the spot to hang them.
Cork bulletin board with fabric overlay
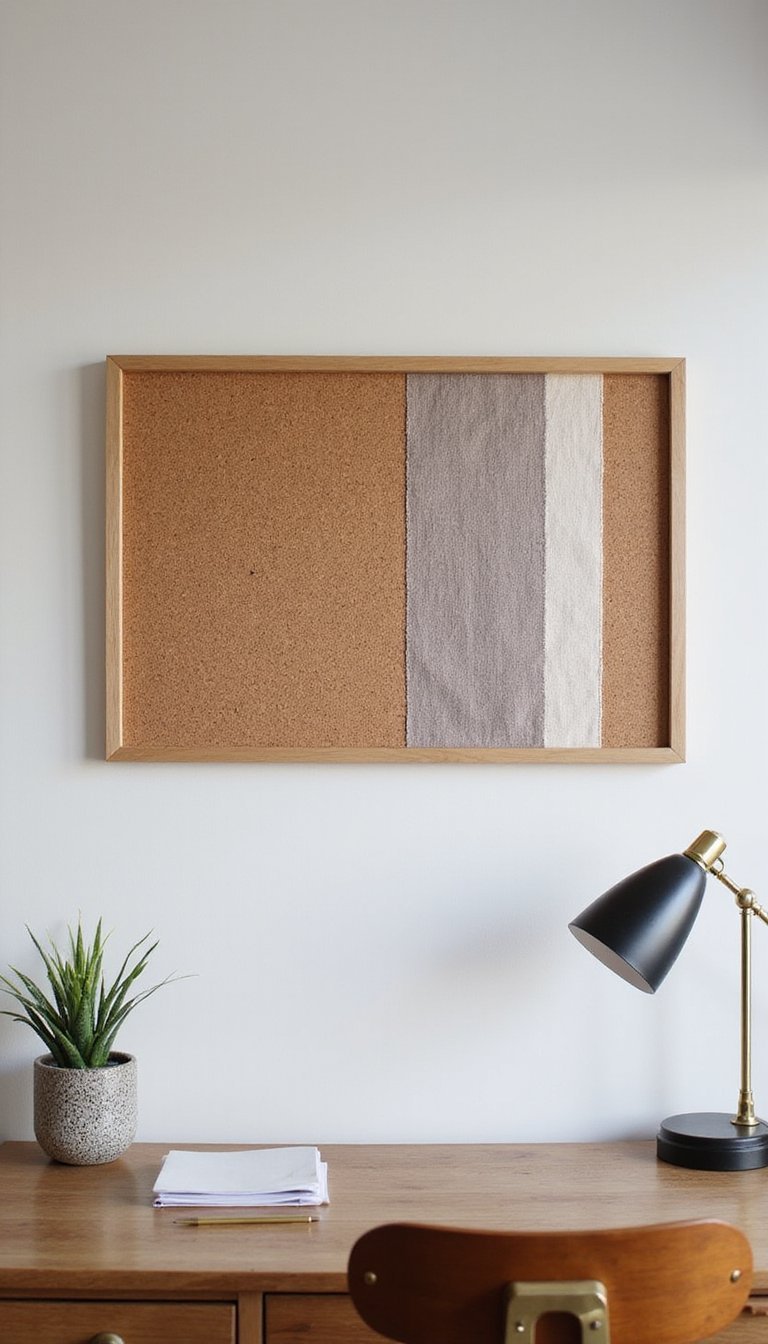
Covering a cork board with an upholstered fabric creates a pin-friendly, decorative surface for home offices or kitchens. Stretch heavyweight cotton or linen over the cork and staple it to the back; add a contrasting welt or ribbon to frame the edges. Choose a subtle pattern—muted stripes, small florals, or a tonal plaid—in colors that echo nearby textiles. This keeps notes and lists organized while contributing to the room’s palette and texture, and it’s easy to swap the fabric seasonally for a fresh look.
Styling Tips
- Add a slim shelf below for markers, clips, and fresh flowers.
- Use coordinated pins or clips to keep a tidy visual language.
- Create a gallery grid by making two or three boards in different sizes.
Salvaged window converted into mirror frame
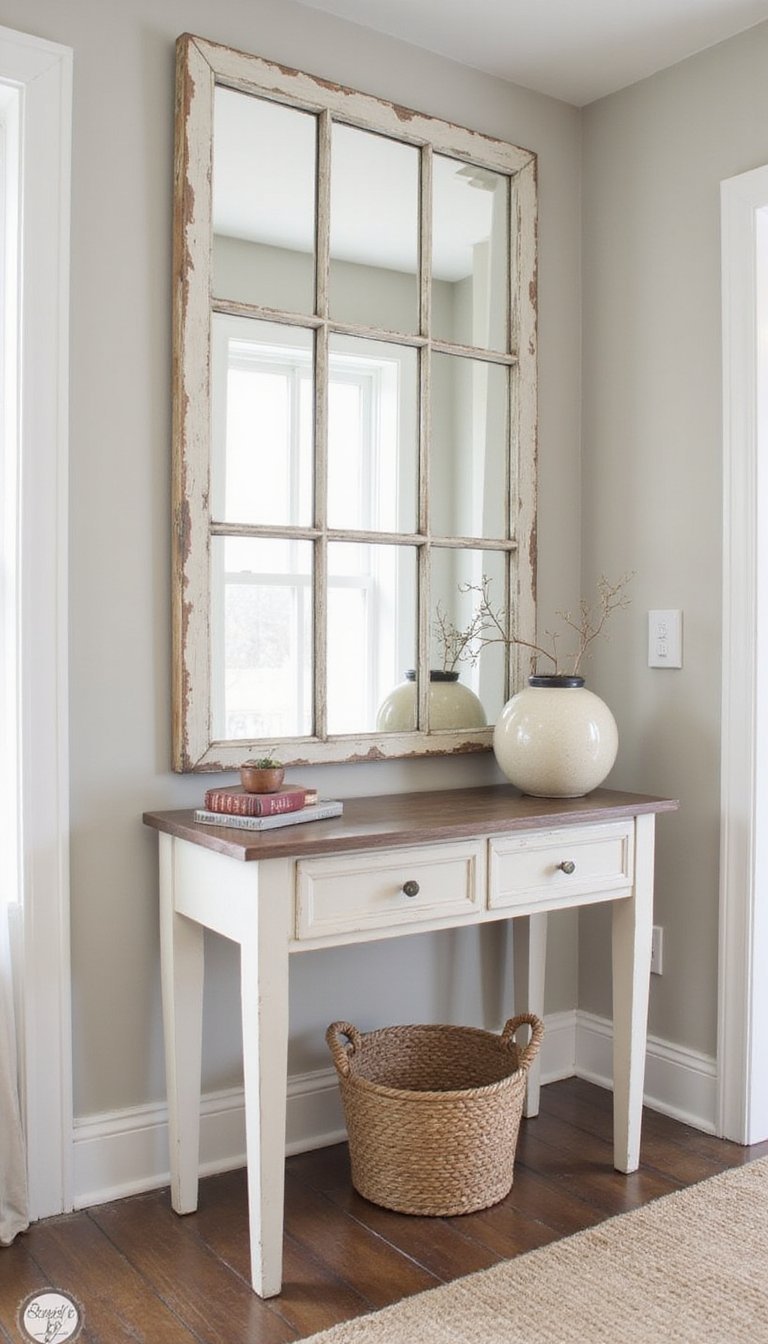
Turning a salvaged window into a mirror brings architectural charm to bathrooms, entries, or above mantels. Remove the glass panes and replace with mirror panels cut to size, or fit a single mirror behind the panes for a segmented look. Leave the wood distressed or sand and repaint to match the room’s palette—chalky white for cottage, deep navy for dramatic contrast. The resulting piece reflects light and creates the feel of an extra window, pairing beautifully with brass sconces and layered textiles nearby.
Styling Tips
- Seal the wood frame against moisture if placed in a bathroom.
- Hang at eye level and center above a console or sink for balance.
- Add a small wreath or garland seasonally for instant refresh.
Coffee table tray with tile inset
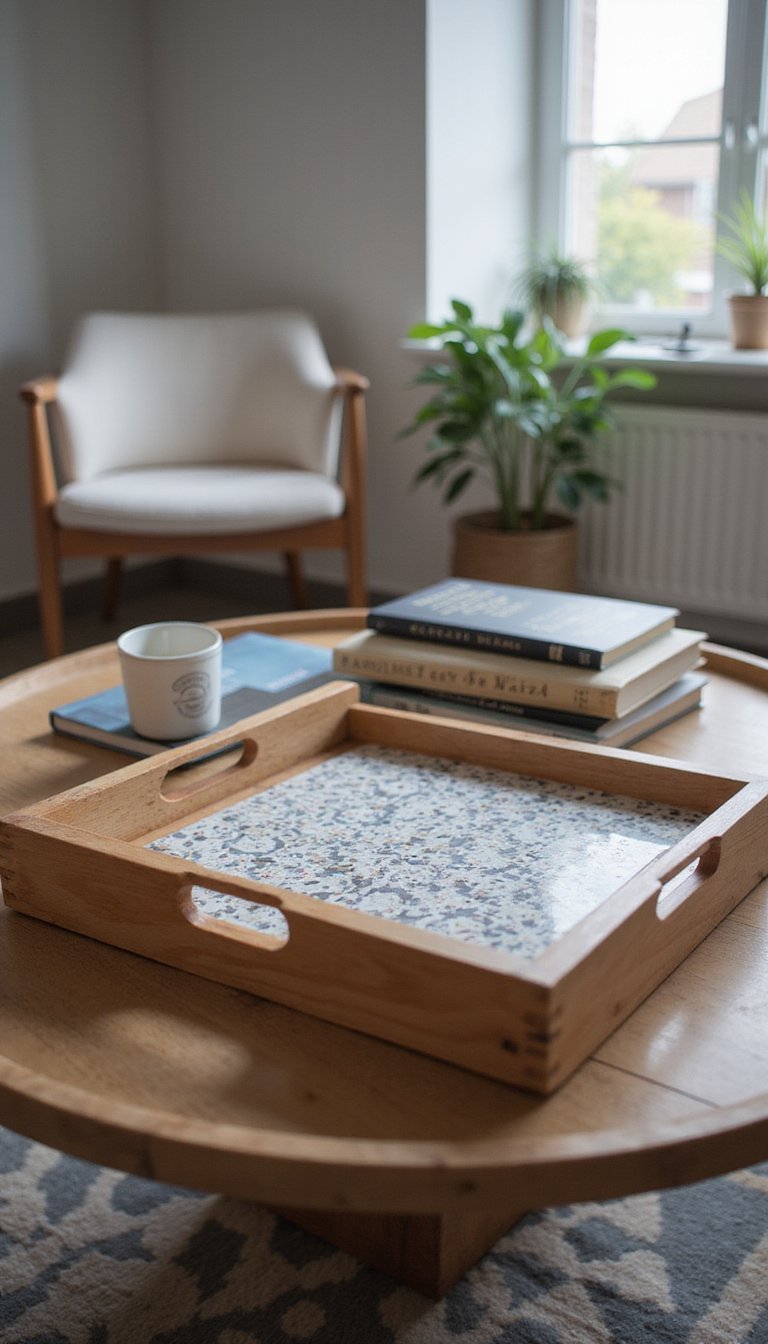
Creating a decorative tray with a tiled inset adds surface protection and visual interest to a coffee table. Use a shallow wooden tray, apply adhesive board, and inset patterned or mosaic tiles—think muted encaustic motifs or simple geometric porcelain. Grout and seal thoroughly, then sand edges smooth and add felt pads underneath to protect furniture. The tile surface is great for holding candles and cups and reads like a custom tabletop detail that complements leather-bound books, a woven rug, and a simple vase of stems.
Styling Tips
- Match grout color to tile tones for a seamless look.
- Keep tray contents grouped to maintain a collected feel.
- Use a tray to corral remotes and coasters for a tidier surface.
Refinish an old dresser with chalk-style paint
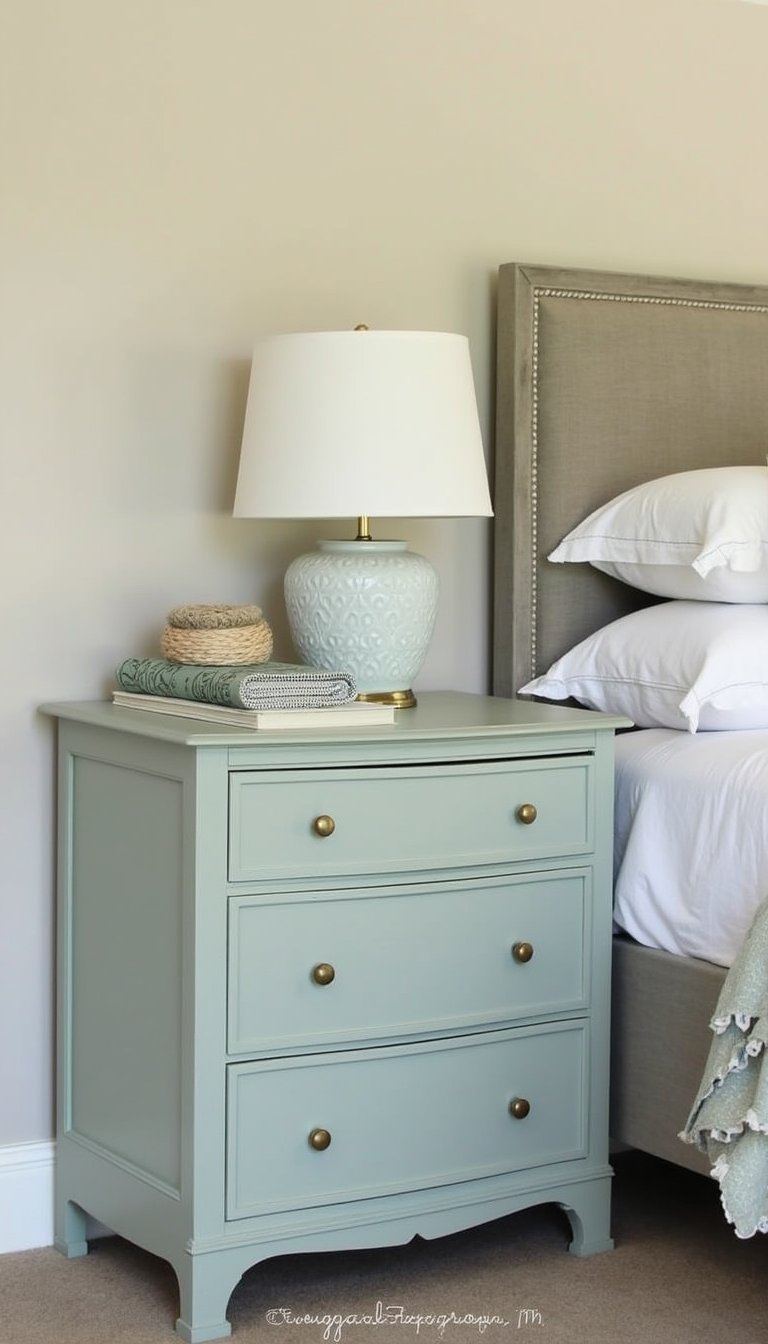
Refinishing a dresser using a matte, chalk-style paint creates a soft, tactile surface that feels lived-in and updated. Sand lightly, prime if needed, then apply two thin coats and finish with a clear wax or matte sealer. Add new drawer pulls or keep original hardware for a collected look. Choose colors like warm sage, muted navy, or soft greige to coordinate with bedding and curtains. The painted finish invites layered textiles on top—folded throws, a woven basket, and a lamp—to complete a peaceful bedroom vignette.
Styling Tips
- Remove drawers to paint interiors for a thorough refresh.
- Distress edges gently with sandpaper for a relaxed finish.
- Seal with wax for durability and a soft sheen.
Peel-and-stick wallpaper on a small accent nook
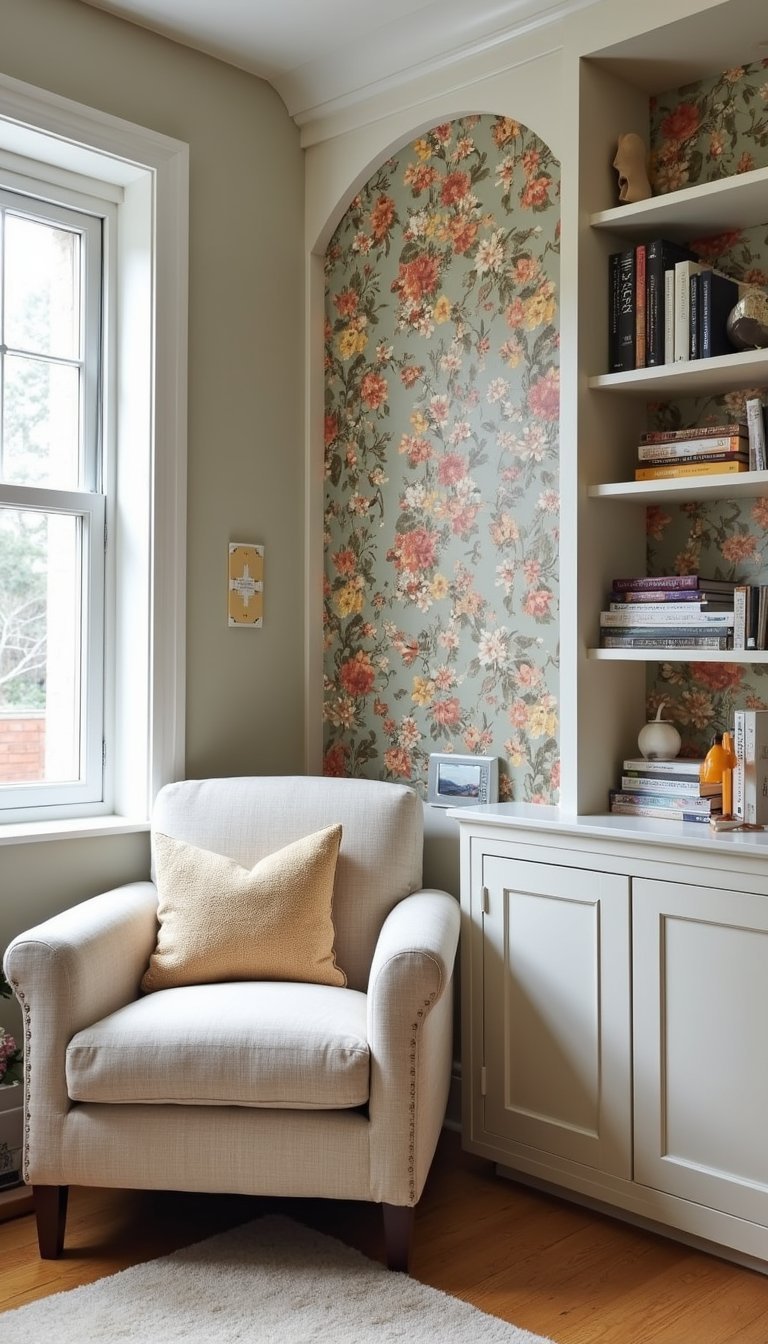
Applying peel-and-stick wallpaper to a small alcove or the back of a bookcase adds pattern without overwhelming a room. Choose a removable vinyl with a textured finish in a scale that fits the space—small geometrics for shelves, larger botanicals for a reading nook. Smooth application and careful trimming produce a near-seamless result, and removal later leaves paint intact. Pair the wallpaper with simple shelving, matte frames, and neutral upholstery so the pattern reads as a calm focal point rather than a competing visual element.
Styling Tips
- Prep the surface by cleaning and smoothing before application.
- Align repeat patterns carefully to avoid mismatched seams.
- Use the wallpaper as an accent, not the whole room, for a balanced look.
Upgrade entryway with layered lighting and rug
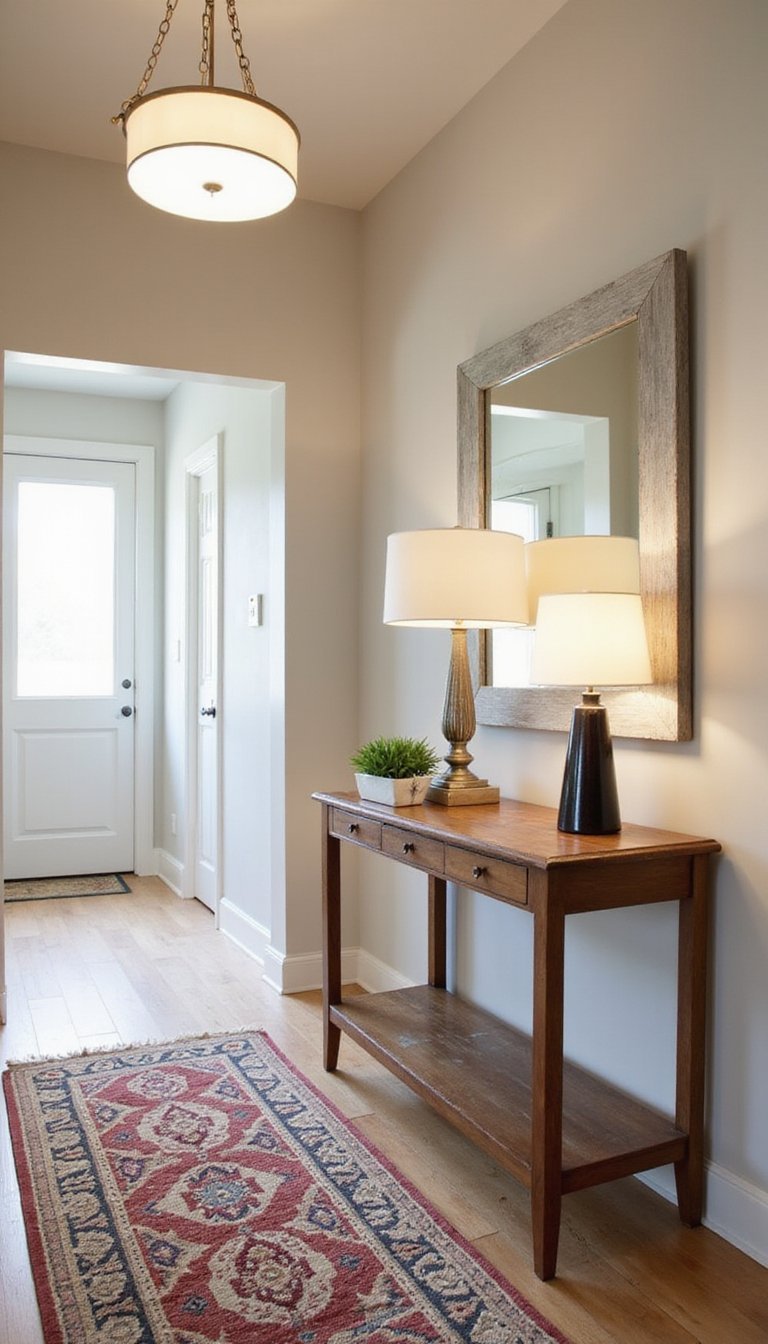
Refreshing an entry with layered lighting and a runner rug creates a welcoming path that balances function and decor. Combine a statement pendant or small chandelier with a table lamp or wall sconce to add depth. Choose a narrow runner in a durable flatweave with a pattern that hides traffic wear—a mix of warm ochre, navy, or muted rust works well. Add a slim console table and a decorative bowl for keys to complete the setup. The resulting vignette feels considered and ready for daily comings and goings.
Styling Tips
- Scale lighting to ceiling height; keep pendants centered above the console.
- Use a runner with a low pile for easy cleaning.
- Add a mirror above the console to bounce light and open the space.