
DIY Advent Calendar Crafts bring December to life with tiny surprises and daily magic. I’ve loved crafting homemade advent calendars since childhood, when paper envelopes and hand-drawn numbers turned a bookshelf into a countdown wonderland.
Advent calendar DIY ideas feel festive, warm, and full of personality, whether they gleam in metallics or lean cozy with felt and twine.
These DIY Advent Calendar Crafts invite playful materials and nostalgic details. Advent calendar DIY projects can hang across a mantel, cluster into a village, or stack into tiny drawers.
My family still swaps jokes, tea bags, and chocolate in our homemade advent calendars, and the ritual makes every morning feel like unwrapping a story.
Kraft Envelope Garland Advent Across The Mantel

A line of numbered kraft envelopes drifts across a mantel like holiday bunting, with twine, mini clothespins, and sprigs of greenery adding a quiet woodland mood. The palette leans warm and organic, with touches of gold wax seals, plaid washi tape, or red baker’s twine for a playful accent.
Small notes, tea sachets, stickers, and flat candies tuck inside without adding bulk. Display stretches across a fireplace or bookshelf, trailing fairy lights for soft glow.
Gifting works beautifully for roommates or newlyweds, as the envelope format suits cozy spaces and keeps the countdown tidy and charming.
Steps
- Cut twine to span the mantel and secure it with removable hooks.
- Number kraft envelopes and decorate with washi tape, wax seals, or stamping.
- Fill envelopes with flat treats or notes and clip them to the twine with mini clothespins.
- Tuck in sprigs of cedar or eucalyptus and weave a string of fairy lights along the garland.
Muslin Bag Countdown With Evergreen Charm
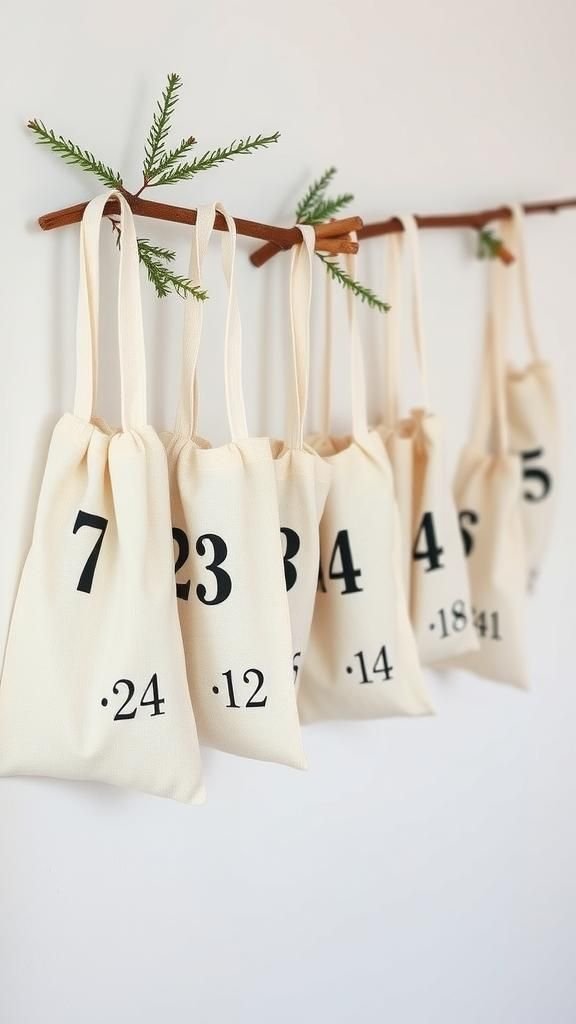
Tiny muslin drawstring bags create a tactile, neutral base that suits farmhouse, Scandinavian, or minimal interiors. Numbers appear through stencils, stamps, or iron-on vinyl in earthy black, spruce green, or cranberry red.
A single pine cone, cinnamon stick, or felt star can embellish each bag for aroma and texture. Display on a wooden dowel, a driftwood branch, or cabinet hardware in a gentle cascade.
Inside, tiny ornaments, lip balm, or handwritten jokes feel thoughtful and easy to personalize. Wrapped as a hostess gift, the set doubles as reusable packaging for future holidays, adding sustainability and charm.
Steps
- Stamp or iron numbers onto muslin bags and let them dry.
- Thread a long ribbon or cord through each bag’s drawstring loops to create a hanging line.
- Fill the bags with small trinkets and notes, then knot the line at both ends.
- Hang the strand on hooks or a branch and add evergreen sprigs for fragrance.
Matchbox Drawer Tower With Vintage Numbers

Stacked matchboxes become tiny drawers, inviting miniature candies, charms, or folded messages. Patterned papers with gingham, holly, or ledger print bring a nostalgic flavor, while metal brads or pearl stickers mimic drawer pulls.
The palette can swing from rich burgundy and forest green to black-and-white graphic motifs. Arranged as a tower, pyramid, or grid, the structure sits nicely on a desk or console table and charms guests with its playful scale.
Layered labels and hand-lettered numbers feel collected and timeworn. Presented in a shoebox lid, it travels well as a crafty gift to brighten a colleague’s workspace.
Steps
- Wrap each matchbox sleeve with decorative paper and glue the ends.
- Attach small brads or beads as drawer pulls to the sliding trays.
- Number each box front with stickers or stamps.
- Stack and glue the boxes into a tower or grid, keeping faces aligned.
Paper House Village With Hidden Surprises

A tabletop village of cardstock houses creates a storybook countdown, with doors, windows, and rooftops in frosty whites, muted pastels, or midnight tones dusted with glitter. Each building hides a small treat or message, turning the scene into a daily treasure hunt among snowy bottlebrush trees.
Display along a windowsill, mantel, or low shelf, where tea lights cast gentle shadows through tiny window cutouts. Metallic foils, vellum windowpanes, and embossed patterns introduce delicate sheen.
Wrapped as a gift, the set packs flat and assembles into a picturesque vignette that evokes winter streets and cozy front stoops.
Steps
- Print or draw simple house templates on cardstock and cut them out.
- Score and fold the walls and roofs, adding tabs for gluing.
- Cut window openings and back them with vellum if desired.
- Glue houses into shape, number them, and place small treats inside.
Tin Can Countdown With Chalkboard Labels
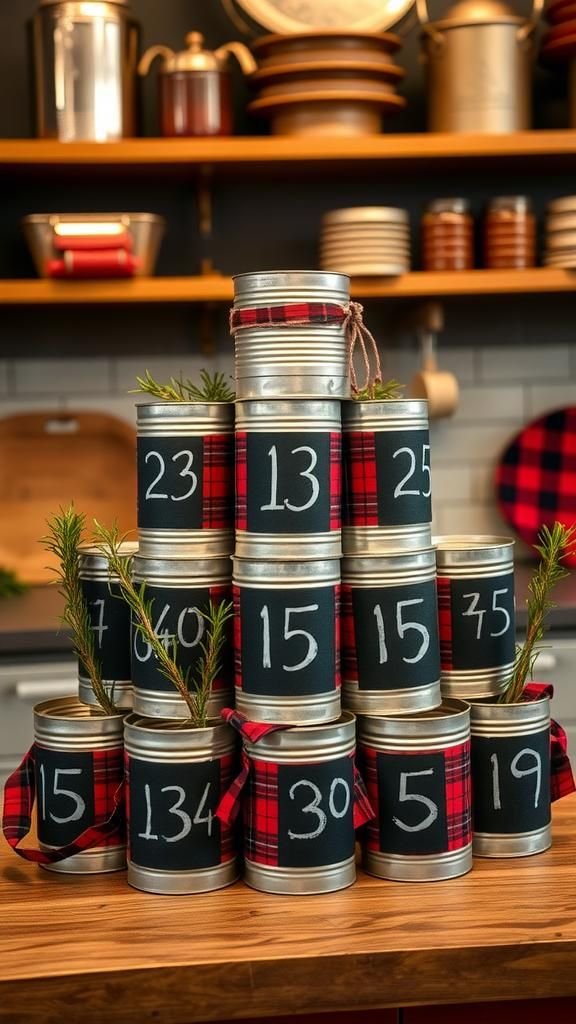
Reclaimed food tins gain new life with chalkboard-painted panels and handwritten numbers. The mix of matte black and brushed metal feels industrial and cozy, pairing well with red plaid ribbon or sprigs of rosemary.
Filled with cocoa packets, washi tape, or loose chocolates, the cans stack in a pyramid or line a shelf on a kitchen wall. Magnet-backed lids transform the display into a vertical feature on a metal board.
Gifting works well for coffee lovers or crafters who enjoy reusable containers after the season, turning storage into a cheerful accent long after the countdown ends.
Steps
- Clean and remove labels from tins, then coat sections with chalkboard paint and let dry.
- Write numbers with a chalk marker and tie ribbon or twine around the rims.
- Place treats inside and add lids; stick magnets to lids if a metal board is planned.
- Arrange the tins in a pyramid or mount on a magnetic surface.
Wooden Peg Tree With Hanging Parcels
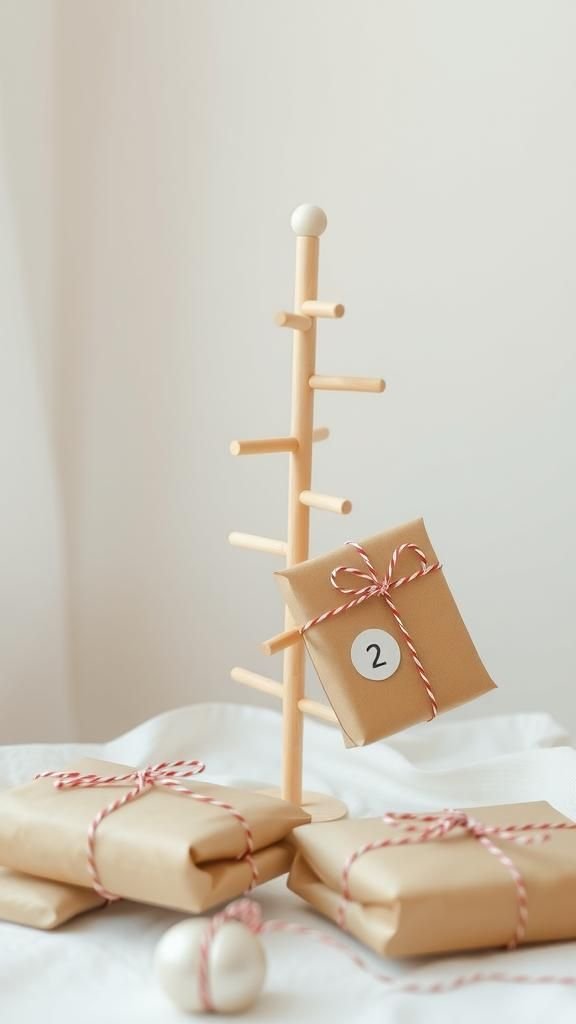
A slim wooden tree with staggered pegs turns parcels into ornaments, bringing Nordic warmth to small spaces. Natural pine, whitewashed finishes, or charcoal stain create distinct moods, while paper parcels in kraft, tartan, or metallic wrap set the tone.
Little bells, pine cones, and felt tags add sound and texture. The freestanding silhouette works beside a fireplace or in an entry, and parcels can hold snacks, mini candles, or tiny toys.
As a gift, the flat-pack structure appeals to design lovers and apartment dwellers who enjoy seasonal decor with a sculptural twist.
Steps
- Cut a vertical wooden spine and perpendicular dowel pegs to desired lengths.
- Drill holes for pegs, glue them in place, and attach a simple base.
- Stain or paint the tree and apply number tags to small wrapped parcels.
- Hang the parcels from the pegs and add a star topper if desired.
Chalkboard Frame With Mini Buckets
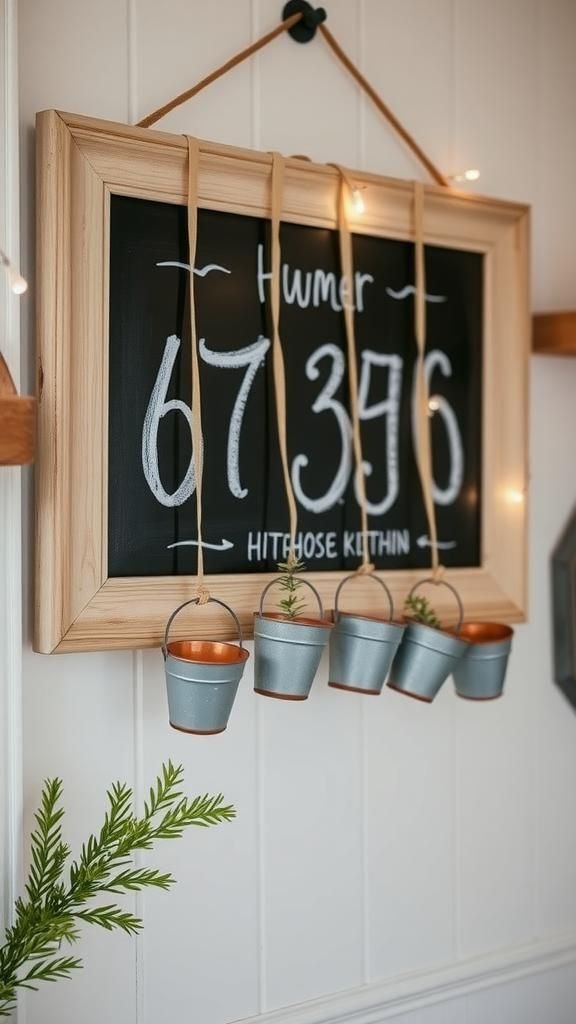
A framed chalkboard becomes a bold backdrop for dangling mini zinc buckets or enamel cups. White chalk numerals pop against matte black, while ribbon tails and cedar sprigs add freshness.
The containers hold wrapped sweets, tiny erasers, or folded poems, making the countdown feel interactive. The whole piece hangs in a kitchen nook or hallway, where quick morning stops become part of the routine.
Color accents shift with ribbon choices, from candy cane stripes to navy velvet. As a gift, the set doubles as a memo board after December, keeping the charm in daily life.
Steps
- Mount a chalkboard inside a wide frame and add hooks along the top edge.
- Write numbers across the board in a mix of playful fonts.
- Fill mini buckets with treats and tie them to the hooks with ribbon.
- Add cedar sprigs and a small string of lights around the frame.
Storybook Advent Stack For Cozy Readers
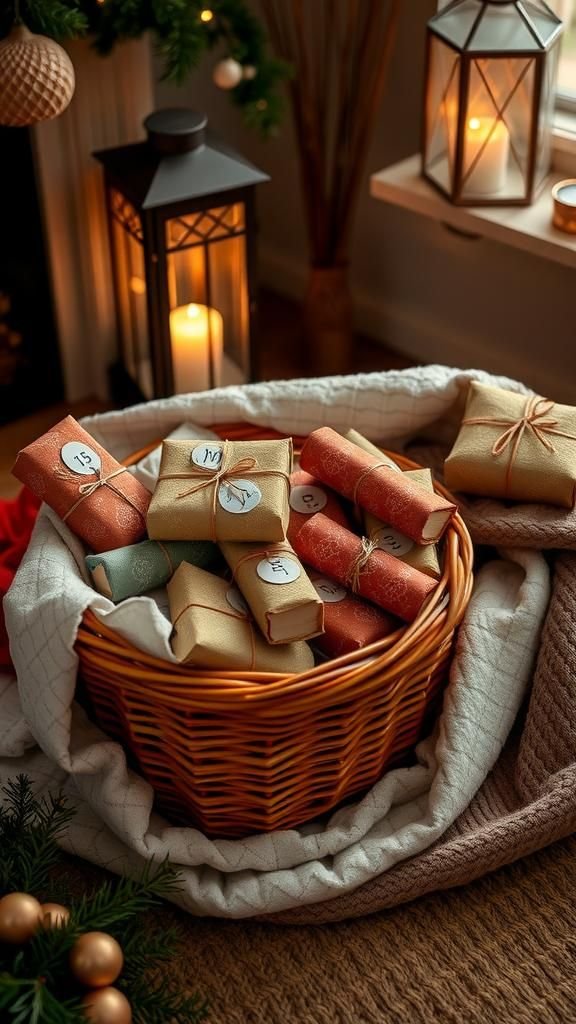
A stack of wrapped children’s books or slim novels transforms story time into a countdown ritual. Papers range from kraft with twine to starry foils and velvet ribbon, and each package wears a bold number tag.
The stack sits in a basket near a reading chair, with a blanket and lantern completing the snug vignette. Themes can lean winter classics, adventure tales, or family favorites, mixing thrift finds and new picks.
This approach suits families who value moments more than candy, gifting the entire set to new parents or book-loving friends who cherish quiet December evenings.
Steps
- Select 24 books in assorted sizes and wrap them individually.
- Create number tags and tie them onto each package with ribbon.
- Arrange the stack in a sturdy basket with a throw blanket.
- Add a small note inside each book with a prompt or riddle.
Cookie Cutter Countdown With Tucked Notes
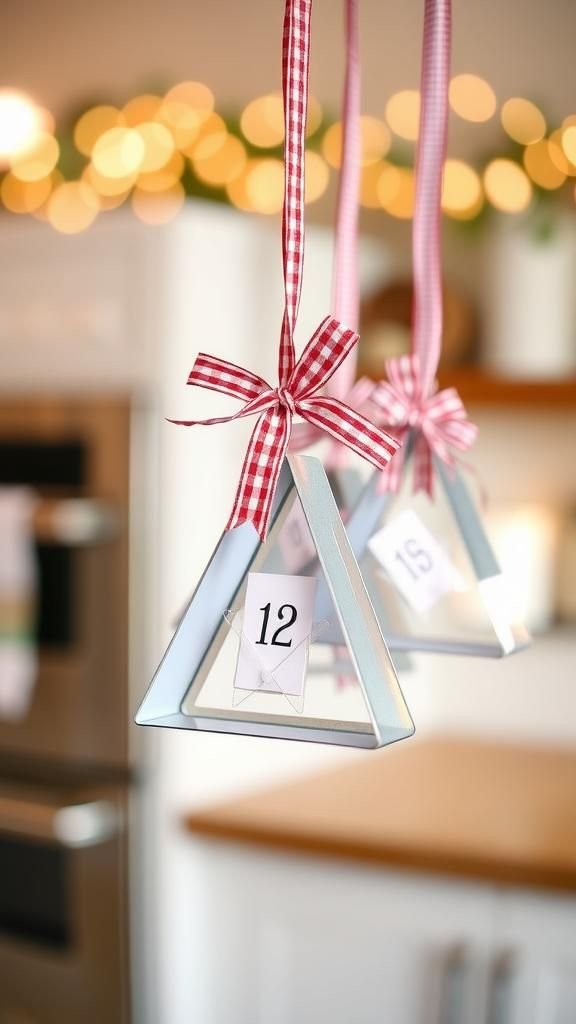
Metal cookie cutters become outlines for tiny envelopes or fabric pouches, bringing a kitchen-friendly twist to the countdown. Stars, trees, and gingerbread shapes pair with gingham fabric, linen scraps, or polka-dot cardstock.
A long ribbon or dowel rod carries the cutters at staggered heights, catching sparkle in the light. Notes promise baking nights, cocoa breaks, or carol playlists, shifting the focus toward experiences.
Colors swing from candy-bright to farmhouse muted, depending on ribbon and paper choices. Wrapped as a hostess gift, the set charms bakers who appreciate whimsical tools that still function after the season.
Steps
- Tie short lengths of ribbon to cookie cutters and add numbered tags.
- Create tiny envelopes or pouches sized to nest within each cutter.
- Slip notes or flat treats into the envelopes and place them inside the cutters.
- Suspend the cutters from a dowel or branch and hang the display.
Embroidery Hoop Wall Pockets With Felt
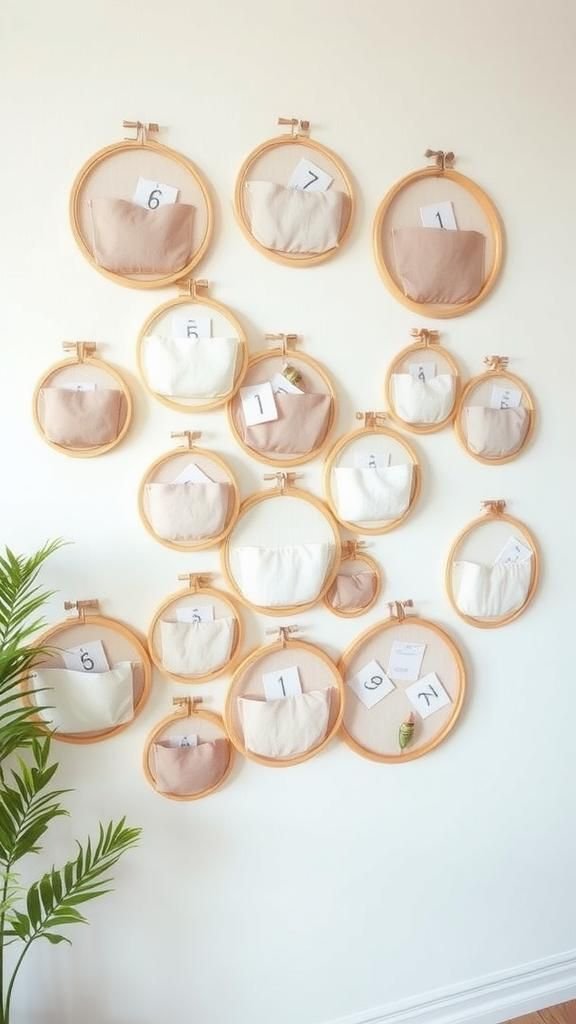
Embroidery hoops frame curved felt pockets, creating a grid of soft, tactile compartments. Each hoop carries a number tag, while the felt palette drifts from blush and pine to charcoal and cream.
Subtle embroidery stitches or blanket-stitched edges add craft texture without fuss. The arrangement works as a wall installation that doubles as decor, with tiny toys, candies, or kindness prompts nestled inside.
Gold clips, leather tabs, or tassels add polish. As a gift, the set packs down into a slim box, appealing to apartment dwellers who enjoy artful displays that shift easily with the seasons.
Steps
- Cut felt circles and matching crescent pockets sized to each embroidery hoop.
- Stitch the pocket edges and secure them between the hoop rings.
- Add number tags or felt numerals to each hoop.
- Arrange the hoops on a wall in a grid and fill the pockets.
Felt Mitten Garland With Cozy Stitching
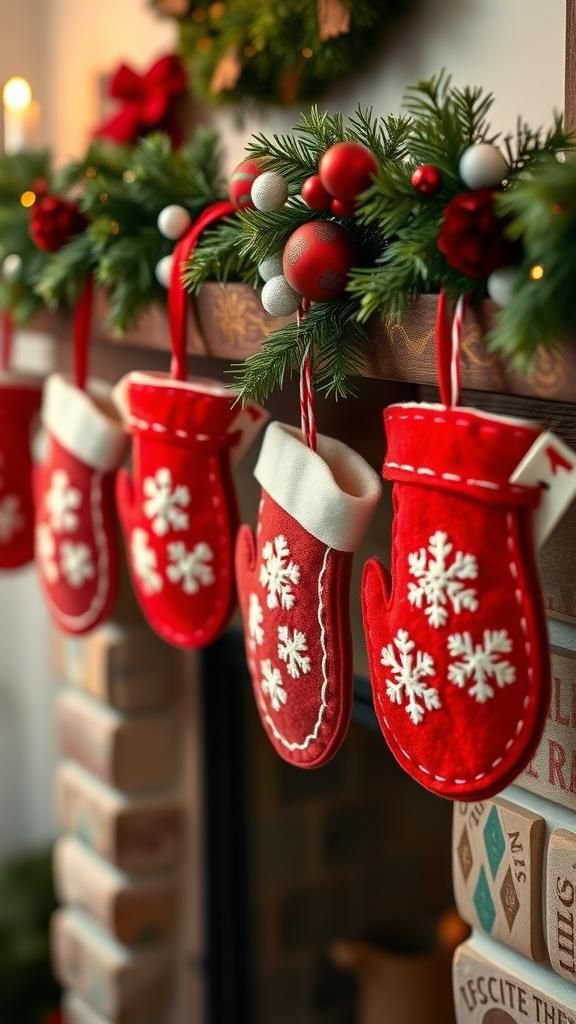
Pairs of tiny felt mittens dangle from twine, each palm hiding a little treasure. Color stories range from Nordic red and white to woodland moss and chestnut, with embroidered snowflakes, buttons, or pom-poms for whimsy.
The garland suits a mantel, doorway, or stair rail and invites a tactile moment each morning. Treats stay light, like sweets, bracelets, or paper coupons promising movie nights.
Gifting the finished strand feels heartfelt for families with young kids or anyone craving soft textures during winter. After December, the mittens store in a tin, ready to reappear next year.
Steps
- Trace and cut mitten shapes from felt, two pieces per mitten.
- Blanket-stitch around the edges, leaving an opening at the cuff.
- Add embroidered motifs or buttons and sew on number tags.
- Thread the mittens onto twine and space them evenly along the line.
Brown Paper Bag Grid On A Feature Wall
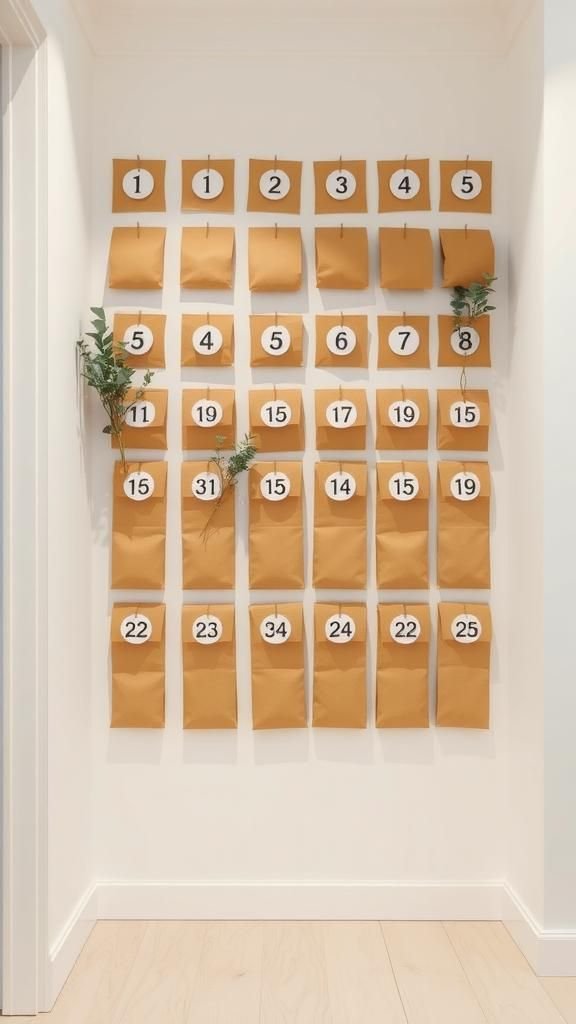
A tidy wall grid of mini brown paper bags turns a blank space into a celebratory installation. Each bag gains a number circle, a sprig of greenery, and a hint of ribbon or washi stripe.
The look balances rustic and graphic, especially when the grid aligns with painter’s tape guides for crisp spacing. Treats can be lightweight snacks, stamps, or craft supplies.
The display works over a console or in a hallway, where the daily pull adds a flutter of movement. As a gift, pre-filled bags in a labeled box invite an easy, ready-to-hang gesture.
Steps
- Measure and mark a grid on the wall with light guidelines.
- Number the paper bags and add simple embellishments.
- Place treats inside and fold the tops; punch holes for hanging if needed.
- Mount small nails or hooks and hang each bag in the grid.
Magnetic Spice Tin Calendar On A Baking Sheet
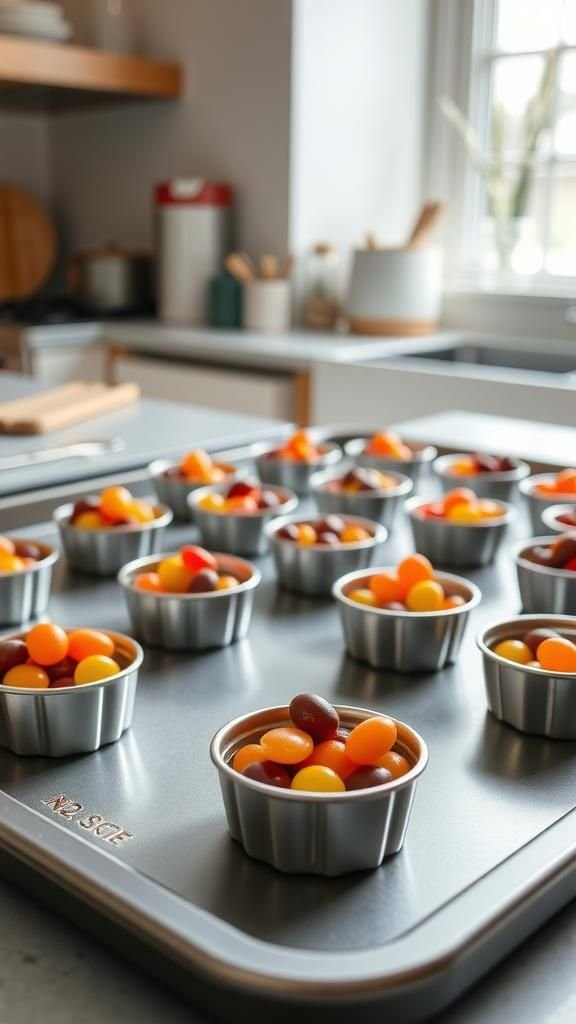
Shallow spice tins become sleek capsules for treats, mounted on a painted baking sheet or metal board. Clear lids reveal confetti and ribbon snippets, while vinyl numbers or stamped tags add crisp order.
A palette of black, white, and metallics feels modern, or shift to candy colors for a playful kitchen vibe. The display leans functional and compact, perfect for apartments and dorms.
Surprises range from chocolate coins to tiny stationery, with space for a folded note beneath. Packaged as a gift, the whole set travels safely and transforms a fridge into a festive hub.
Steps
- Paint a baking sheet in a coordinating color and let it cure.
- Apply numbers to the spice tin lids and fill the tins with treats.
- Place magnets on the back of each tin if needed for extra hold.
- Arrange the tins on the baking sheet and hang the board.
Toilet Paper Tube Starburst Advent
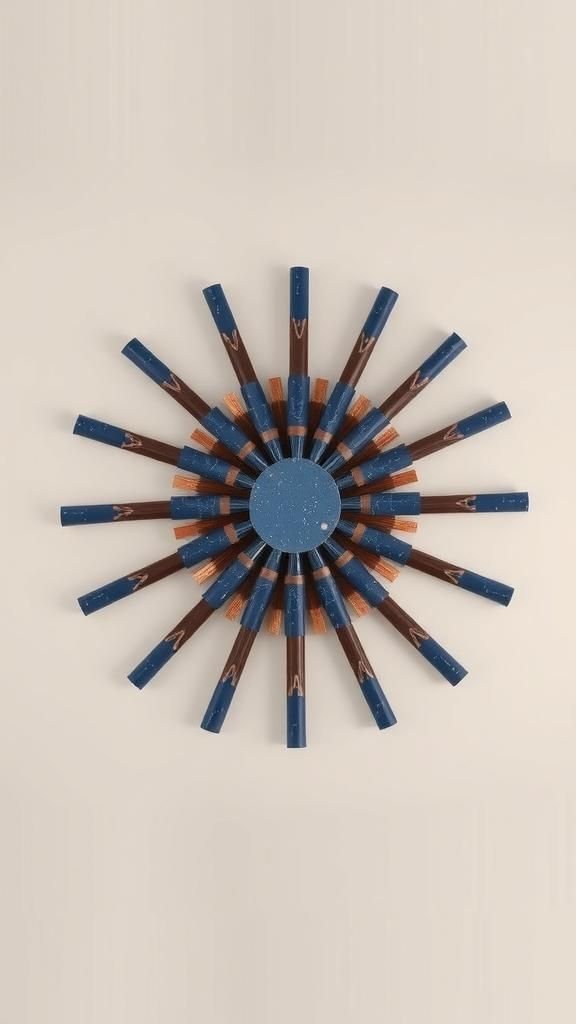
Cardboard tubes transform into a geometric starburst, where each segment hides a tiny surprise. Paper wrappers in midnight blue, copper foil, and cream create a celestial theme, while dotted or constellation prints enrich the pattern.
The star mounts on a wall or door, delivering a bold graphic moment. Small toys, wrapped sweets, or folded affirmations fit snugly.
Numbered stickers radiate from the center, providing visual rhythm. As a gift, the flat, lightweight parts pack easily, making it a fun craft for teens or eco-minded friends who enjoy turning recyclables into decor with unexpected drama.
Steps
- Cut tubes into equal rings and pinch two sides of each to form petals.
- Glue petals into clusters, then assemble the clusters into a large starburst.
- Wrap sections with decorative paper and add numbered stickers.
- Insert treats from the back and mount the star on the wall.
Wine Crate Cubby Advent With Rustic Flair
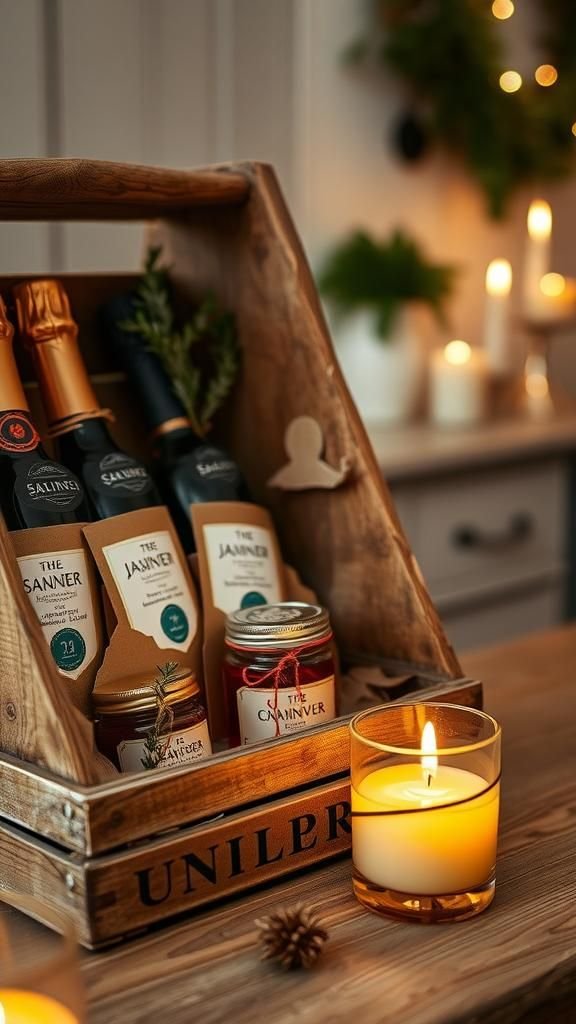
A reclaimed wine crate gains dividers to form a tidy set of cubbies, each with a numbered tag. Stained wood contrasts beautifully with linen ribbon, brass tacks, and sprigs of juniper.
The crate sits on a console with candles and a ceramic village, blending storage and display. Goodies range from small jams and teas to travel-size lotions, making it a thoughtful household gift.
Numbers can appear on enamel plaques or stamped kraft disks for different moods. After December, the crate houses mugs or bar tools, keeping the spirit of the countdown in daily routines.
Steps
- Measure the crate interior and cut thin wood for vertical and horizontal dividers.
- Glue and nail the dividers into a grid and sand rough edges.
- Stain or wax the wood and add numbered tags to each cubby.
- Fill the cubbies with treats and set the crate on display.
Branch Mobile With Wrapped Paper Cones
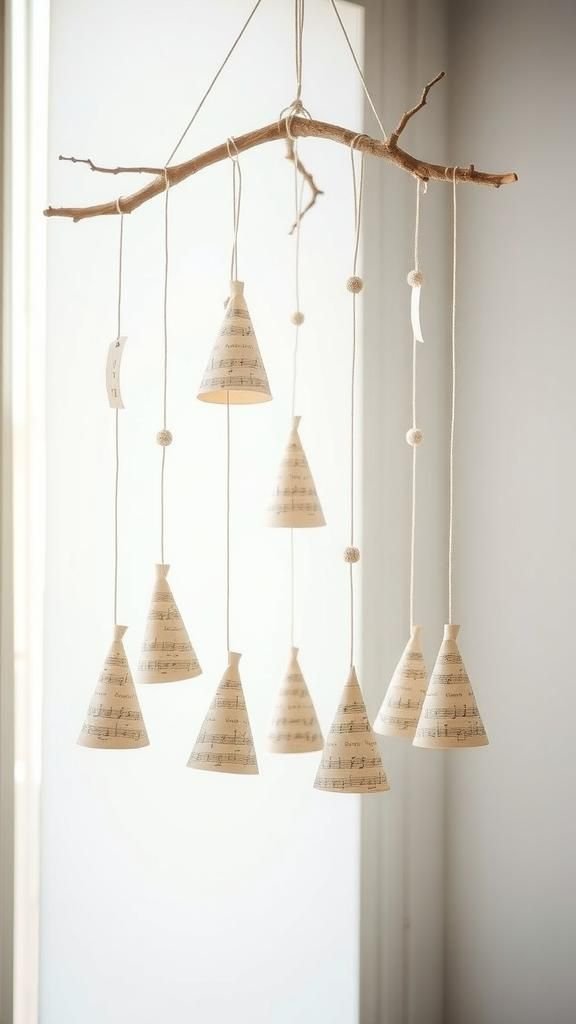
A found branch becomes a natural mobile, dotted with paper cones that sway gently. Cone wrappers range from music sheets and newsprint to metallic foils and kraft, offering texture and shine.
Numbers dangle from thin cord or tiny tags, while pine needles and feathers introduce forest notes. The piece floats in a corner above a reading chair, catching light from a nearby window.
Small chocolates, confetti, or folded coupons tuck inside. As a gift, the mobile packs flat, inviting the recipient to hang it in a hallway or bedroom for a breezy, artful countdown.
Steps
- Clean and seal a sturdy branch and tie hanging cord at both ends.
- Form paper cones, secure the seams, and punch small holes near the top.
- Thread cord through each cone and tie on numbered tags.
- Suspend cones from the branch at varying lengths and mount the mobile.
Photo Envelope Advent On A String Grid
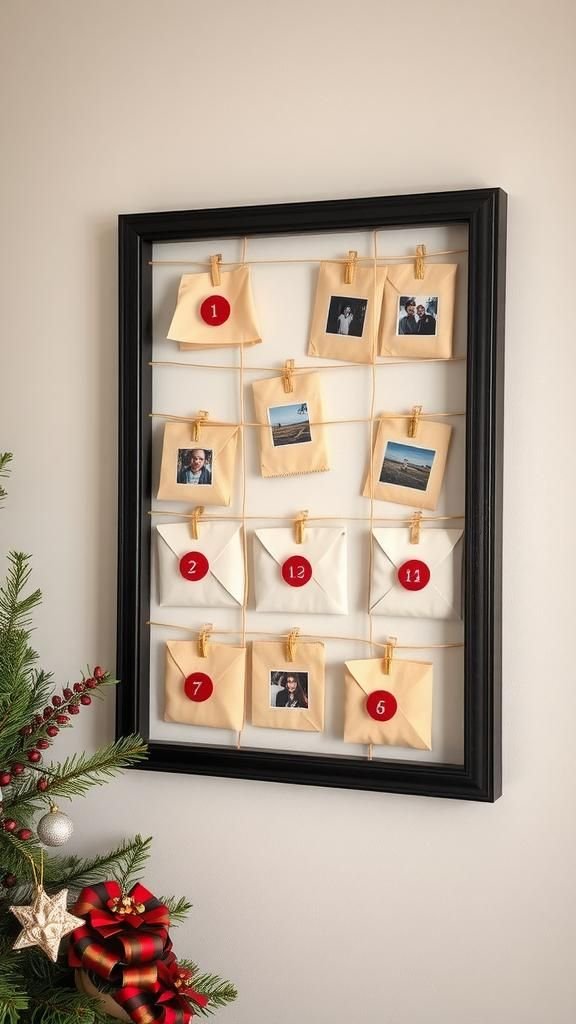
Printed family photos become envelope seals, blending memory-keeping with the countdown. Neutral envelopes and monochrome prints create a calm gallery effect, or switch to saturated snapshots for a cheerful burst.
The envelopes clip to a string grid framed on a wall, punctuated by mini wreaths and star charms. Inside, notes reference the photos or suggest small activities that match the moment.
The piece works in hallways and living rooms, sparking conversation with guests. As a gift, a starter kit with envelopes, clips, and printed numbers invites loved ones to fill in their own memories.
Steps
- Print photos as small squares and adhere them to envelope flaps.
- Stamp or stick numbers on each envelope.
- Create a string grid within a simple frame or on hooks.
- Clip the envelopes to the grid and add small accents like stars or mini wreaths.
Cone Tree Forest With Numbered Bases
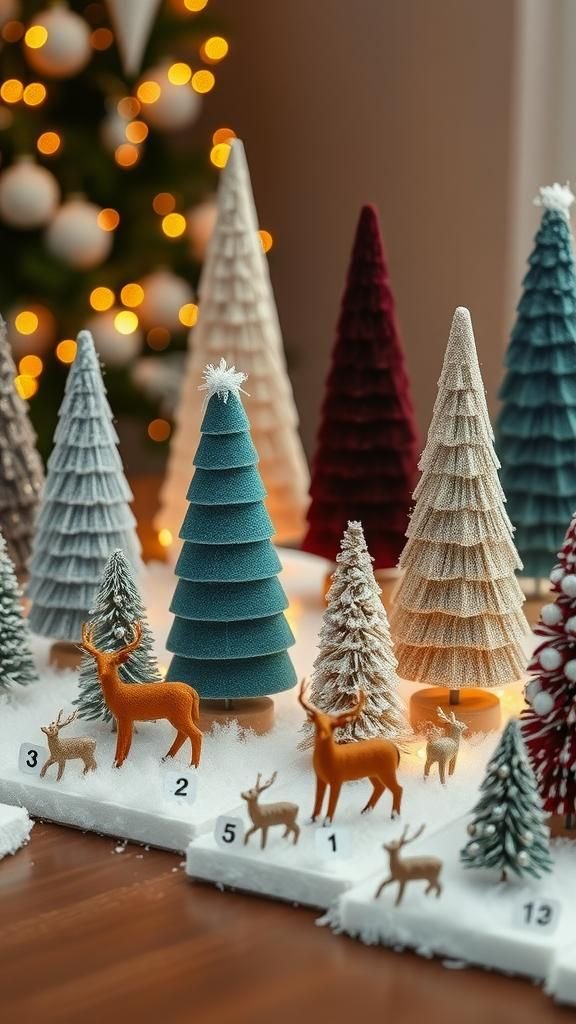
A cluster of paper or felt cone trees forms a tabletop forest where each tree’s base hides a treat. Textures shift from velvet and wool felt to glitter cardstock and embossed patterns, creating depth under twinkle lights.
Numbers appear on tiny wooden rounds or foil-stamped labels at the base. Arranged on a tray with faux snow and miniature deer, the forest sets a whimsical scene on a coffee table or sideboard.
Goodies can be bracelets, candy canes, or folded promises. Gifting the forest packaged flat invites easy set-up in small apartments and offices.
Steps
- Cut arcs from felt or cardstock and roll them into cones, securing the seam.
- Create small bases with hidden compartments using cardstock circles.
- Attach numbered labels to the bases and place a treat inside each.
- Arrange the cone trees on a tray with faux snow and fairy lights.
Mason Jar Tray With Tagged Surprises
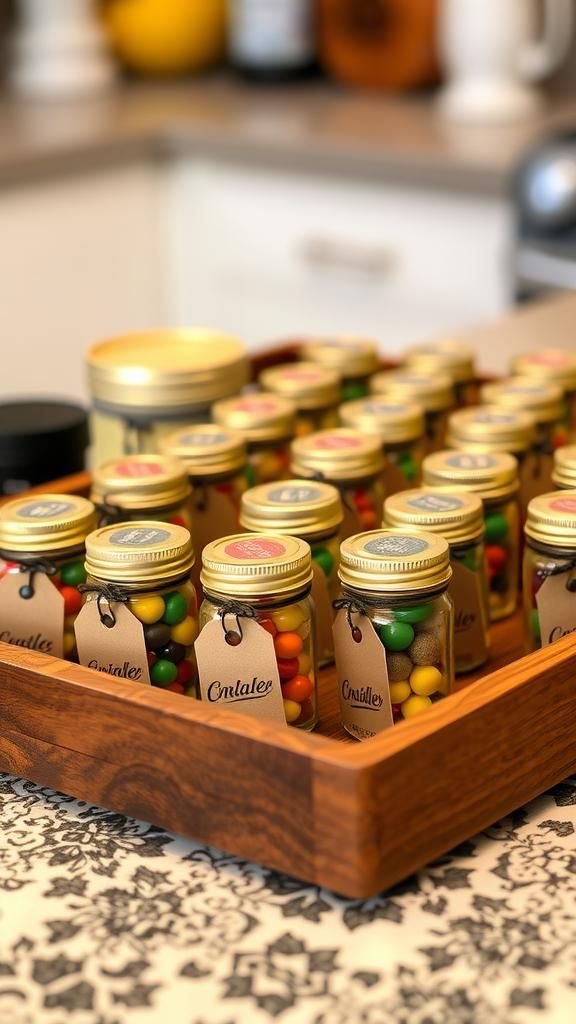
A wooden tray holds a neat row of mini mason jars, each with a numbered kraft tag and ribbon collar. The glass showcases color-coded candies, tiny ornaments, or folded prompts.
Lid finishes can be brushed gold, matte black, or classic silver to match different decor moods. The tray parks on a kitchen island or entry console, where the sparkle of glass meets the warmth of wood.
As a gift, jars transition to pantry storage in January, making the set feel thoughtfully reusable and tidy in small homes.
Steps
- Clean mini mason jars and spray lids in the chosen finish.
- Tie numbered tags to each jar with ribbon or twine.
- Fill the jars with treats, notes, or trinkets.
- Arrange the jars in a wooden tray and add a sprig of greenery.
Lego Mini-Build Advent For Playful Makers
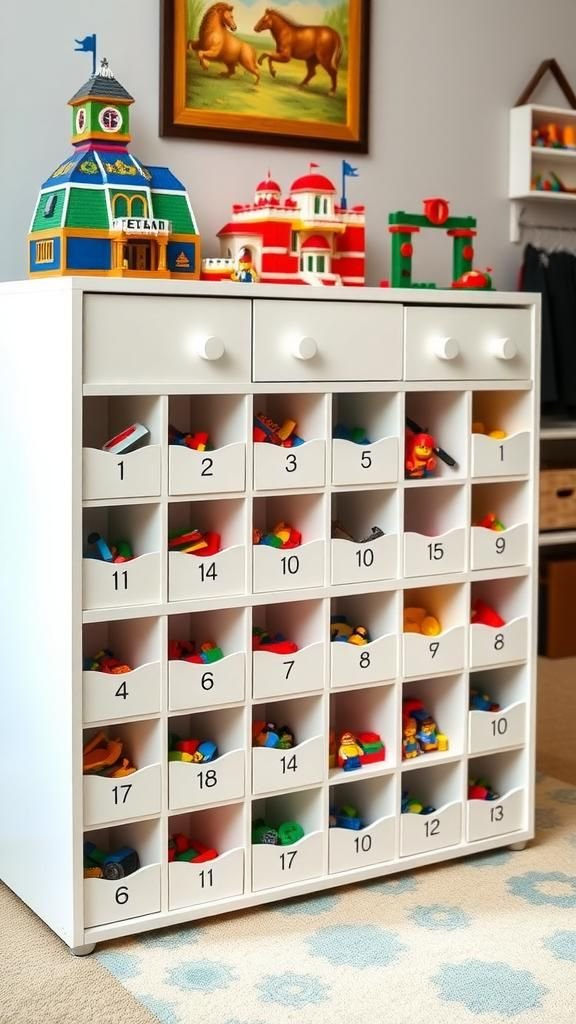
Small compartments deliver daily Lego mini-builds and prompts, inviting quick creativity. A neutral backdrop of white cubes or clear drawers lets colorful bricks stand out, while number tiles or stickers mark each day.
Color themes can echo winter scenes, space adventures, or pastel palettes. Display on a bookshelf, where finished builds gather on the top shelf like a growing gallery.
Packed as a gift, the set delights kids and nostalgic adults who enjoy a daily spark of making and a tidy place to store pieces when the season ends.
Steps
- Sort Lego pieces into 24 small sets that build simple objects.
- Label each drawer or box with a day number.
- Place a tiny instruction card or image with the pieces.
- Arrange the drawers in a grid and reserve the top shelf for finished builds.
Mini Stocking Line With Mix-And-Match Fabrics

A line of petite stockings stitched from mismatched fabrics brings patchwork charm. Flannel, velvet, corduroy, and linen play together with stripes, checks, and florals.
Each stocking bears a number charm and a loop for hanging from a garland or dowel. Treats like hair clips, coins, or wrapped truffles nestle inside.
The palette can skew jewel-toned and moody or light and Scandinavian. Gifted in a keepsake box, the set becomes a family tradition that grows with new stockings added over the years, each one telling a color story of its own.
Steps
- Cut stocking templates from assorted fabrics and sew around the edges.
- Add cuffs, loops, and number charms near the top.
- String a cord across a wall or mantel.
- Hang the stockings and tuck in the surprises.