I remember collecting empty bottles after a neighborhood cleanup and feeling oddly excited to turn them into something useful. On Earth Day I tried a few quick projects with a friend, and the clinking of plastic became a small kind of celebration.
The idea of Earth Day Recycled Plastic Bottle Crafts felt surprisingly playful and practical at the same time.
There is a quiet satisfaction in seeing a translucent bottle neck become a little planter or a cheerful lantern. Earth Day Recycled Plastic Bottle Crafts have a way of making me notice texture, sunlight, and small repairs that brighten a corner of my home.
Whimsical planters from plastic bottle halves
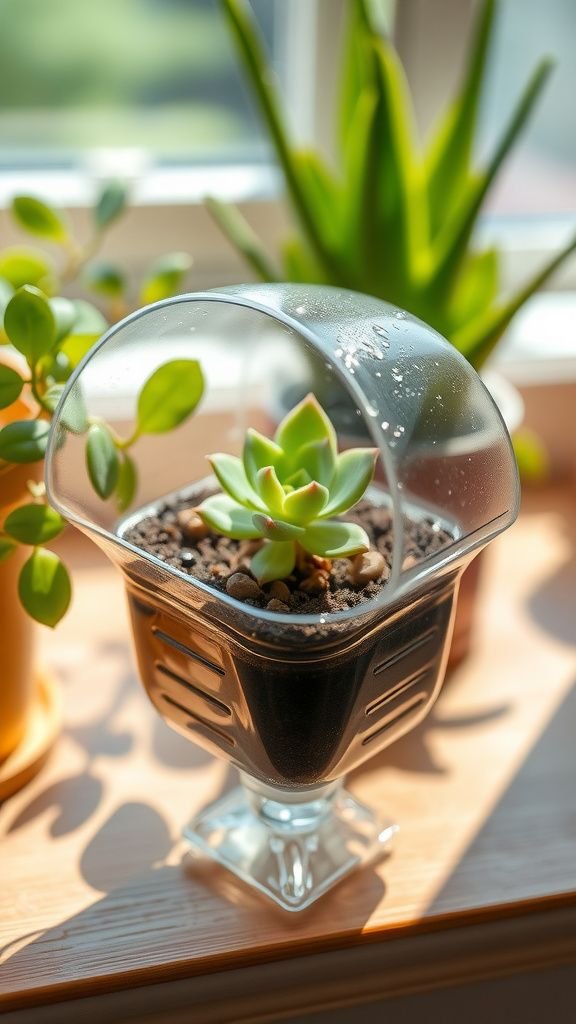
I love the way the smooth plastic surface catches morning light when a bottle is turned into a tiny planter. There is a pleasant contrast between the cool slick rim and the warm loamy soil, and the faint smell of damp peat brings the project to life.
I often tuck a small succulent into a rounded bottle base and watch water beads gather along the curved walls. The sight of a living green sprout cradled in clear plastic makes a small indoor windowsill feel unexpectedly cozy and hopeful.
Steps
- Gather a clear plastic bottle, scissors or a craft knife, and pebbles for drainage.
- Cut the bottle about one third from the bottom to form the planter base, smoothing jagged edges.
- Add a layer of pebbles followed by potting soil, then nestle a succulent or small plant into place.
- Position the planter in bright indirect light and water sparingly to maintain healthy moisture levels.
A hanging herb pocket for tiny kitchen gardens

I remember the first time a cluster of bottle pockets hung by my kitchen window, each one holding basil or thyme and scenting the air when I passed. The crisp plastic edges glint in the light and the aroma of herbs creates a welcoming warmth.
There is a rhythm to arranging pockets at different heights, the colors of soil and leaves against recycled plastic feeling oddly festive. I enjoy peering into each pocket, noticing little root tips and the faint traces of condensation that promise growth and slow, steady care.
Steps
- Collect several plastic bottles and a length of sturdy twine or cord for hanging.
- Cut openings into the sides of each bottle to create pockets and punch small drainage holes at the bottom.
- Fill pockets with potting mix and gently place herb seedlings inside, tamping soil for stability.
- Tie cords through the bottle necks and hang the pockets at staggered heights near a sunny window.
Simple bird feeder from a plastic bottle — will birds come?
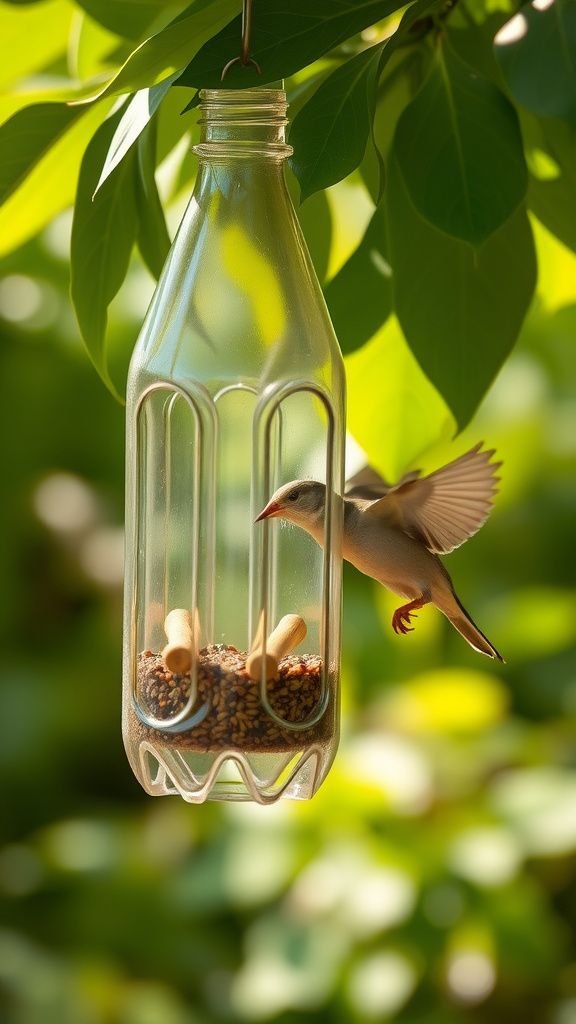
There is a small thrill in setting out a bottle feeder and waiting for the first bird to arrive. The clear plastic body holds seeds like a tiny glass banquet, and the soft scraping of beaks against the rim is unexpectedly musical.
I often watch from a distance as sparrows hop to the tiny perch and steady themselves, scattering seeds with energetic flicks. The feeder becomes a lively focal point, with feathers and sunlight combining into restless motion.
It feels like a modest invitation to wildlife that livens a backyard afternoon.
Steps
- Find a medium sized plastic bottle and two wooden dowels or sturdy sticks for perches.
- Cut small openings opposite each other near the base and insert dowels through the bottle to form perches.
- Make a few small seed dispensing holes above the perches and fill the bottle with birdseed.
- Secure a hanging cord through the neck and hang the feeder from a tree branch at a comfortable height.
Rustic watering funnel for plant care routines
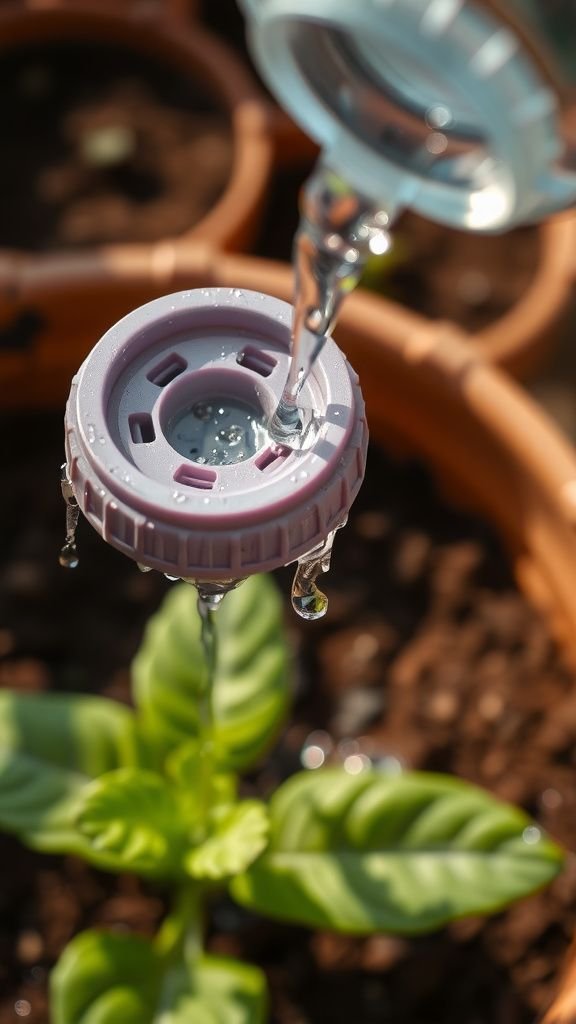
The simple curve of a bottle neck works surprisingly well as a little watering funnel, and I appreciate the soft whoosh of water passing through familiar plastic. The trickle that finds its way into terracotta pots feels controlled and steady, and the cool wet scent of soil rises as water settles.
The clear neck lets me see flow patterns and the tiny rivulets that run down the sides. It has become a small ritual to fill the funnel and watch droplets bead along the rim before they join the thirsty earth below.
Steps
- Select a sturdy plastic bottle and trim the top portion to form a funnel shape.
- Smooth the cut edge and fit the funnel into the mouth of a watering container or use it directly.
- Pour water slowly through the funnel to control the flow and prevent soil disturbance.
- Rinse the funnel after use and store it near the gardening area for easy access.
Mini greenhouse from clear plastic bottle sections
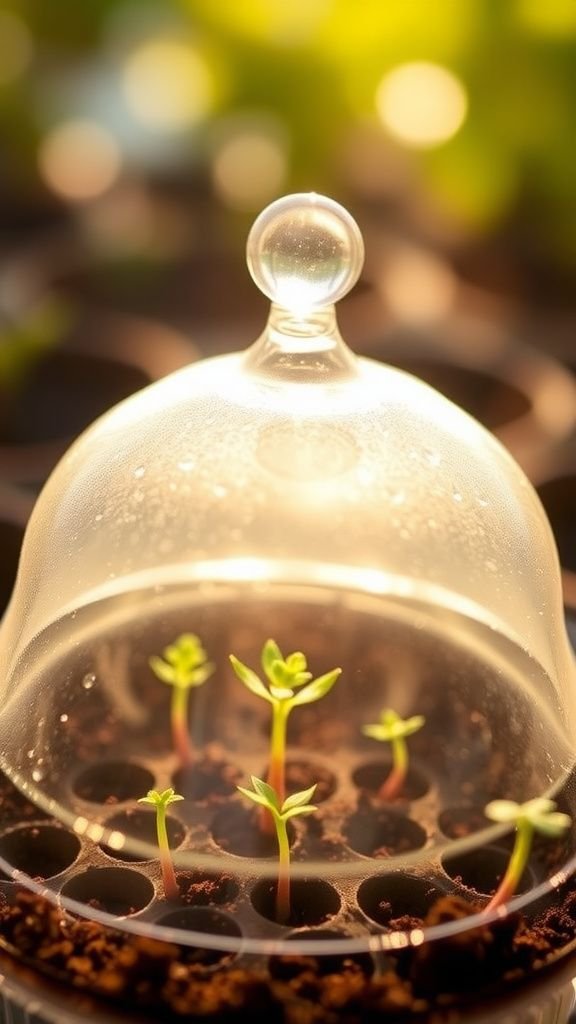
I found that a bottle dome creates a gentle microclimate that makes seedlings feel swaddled and safe. The smooth plastic magnifies sunlight in a warm, comforting way and the faint scent of damp earth mingles with the fresh air trapped beneath.
I enjoy lifting the dome to check tiny leaves and seeing the soft fog of condensation that signals thriving humidity. The translucent curve offers a miniature world to observe, where growth seems to take on a private pace and each leaf unfurls with quiet ceremony.
Steps
- Cut the top third off a large clear bottle to create a dome and leave a small cap for ventilation.
- Place the dome over seed trays or individual pots to trap warmth and moisture.
- Open the cap occasionally to allow air exchange and monitor soil moisture to prevent mold.
- Remove the dome once seedlings show mature leaves to acclimate plants to ambient conditions.
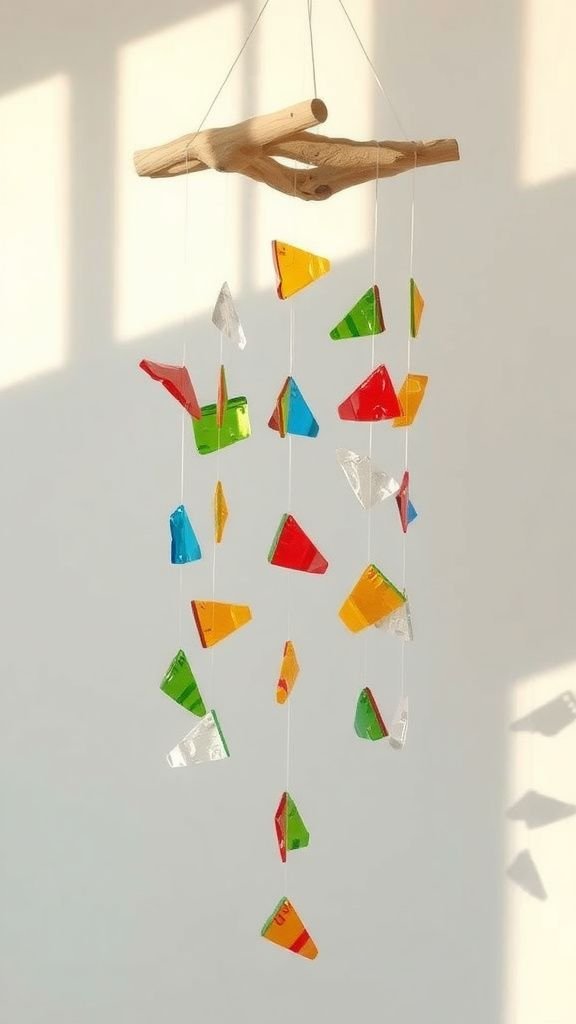
Tinkling wind chime made from colorful bottle bottoms
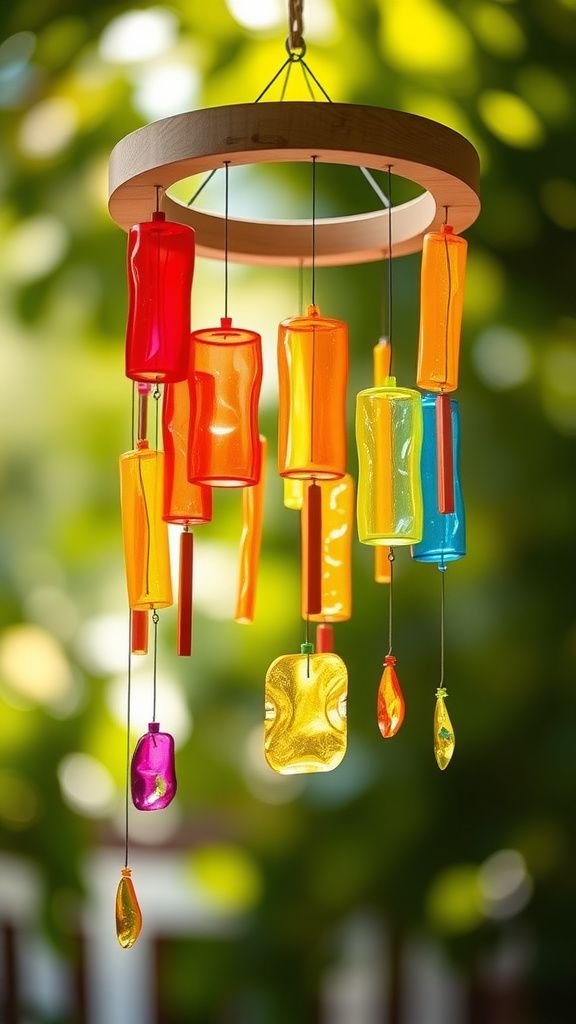
Hanging bottle bottoms on a porch rail produces a cheerful clatter that always makes me smile, as if the breeze has its own little choir. The cut edges catch light and flash like tiny stained glass, and the gentle metallic touch of the hanging strings adds to the sound.
I like arranging the pieces so they catch wind in slightly different tempos, creating a layered, playful melody. The weathered knick of sunlight and the tactile feel of smooth plastic remind me of slow summer afternoons and the uncomplicated music of the garden.
Steps
- Collect several plastic bottle bottoms in varying colors and punch small holes near the edges for hanging.
- Thread fishing line or thin wire through the holes and attach them to a wooden ring or driftwood base.
- Space the bottle pieces at different lengths so they can move freely and produce varied tones.
- Hang the wind chime where it will catch a gentle breeze and listen as it creates soft sounds.
Fairy lanterns for soft evening patio glow
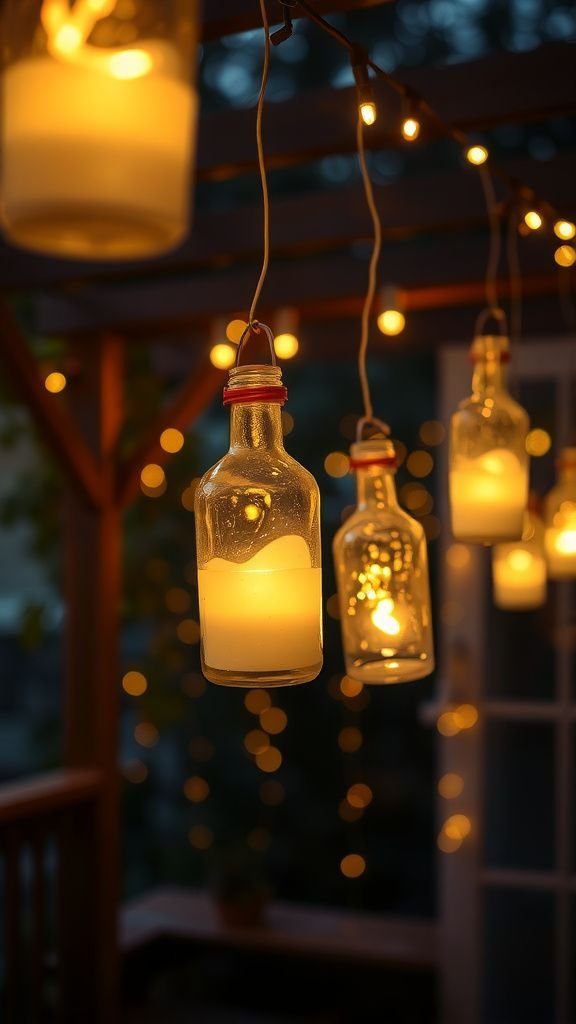
I enjoy the way small LED lights diffuse through frosted bottle walls, turning ordinary plastic into a warm, cozy glow. The cool touch of plastic moves into soft warmth as light plays across surfaces, and the quiet hum of evening becomes more intimate.
Arranging lanterns at different heights creates pockets of light that invite conversation and quiet reading. The tactile weight of a battery tucked inside and the muted clink when lanterns sway adds a playful note.
There is a gentle satisfaction in seeing recycled bottles brighten an outdoor corner after dusk.
Steps
- Choose opaque or frosted plastic bottles and remove labels to create smooth surfaces for light diffusion.
- Insert small battery-powered LED lights into the bottle bases and secure batteries so they stay in place.
- Create hanging loops with twine or wire around the necks and hang lanterns at varied heights.
- Arrange lanterns on tables or hang from branches to create a layered evening glow.
Cheerful desk organizer from upcycled bottles
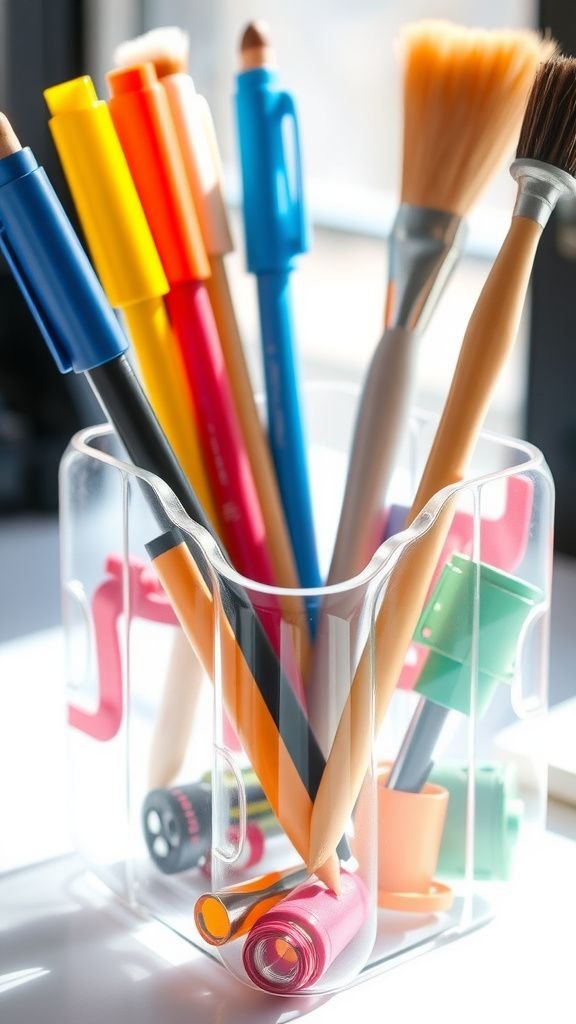
A cluster of bottle tops and bottoms sorted into a tidy desk organizer brings a small thrill of order to my workspace. The slick plastic cups cradle pens and small tools with a satisfying snugness, while the muted clatter of metal pens against plastic is oddly comforting.
I like the way colors mix when different bottles are grouped together, creating a playful palette that brightens a busy corner. The texture contrast between smooth plastic and paper adds a layered feel, and the sight of organized tools makes it easier to settle into focused work.
Steps
- Gather a few plastic bottles of similar diameter and cut them to varying heights to create different compartments.
- Smooth any rough edges and, if desired, decorate the outer surfaces for a cohesive look.
- Arrange the compartments on a small tray or glue them together to form a grouped organizer.
- Populate the organizer with pens, brushes, and small office items and place it within easy reach on the desk.
Compact pencil holder made from bright bottle rings

There is something playful about stacking colorful bottle rings into a cheerful pencil holder on a cluttered table. The circular forms create a pleasing rhythm and the edges feel smooth beneath fingertips when reaching for a pen.
I enjoy the visual pop when translucent colors overlap, forming new shades that change with the light. The light thump of a pencil returned to its place has become a small, satisfying ritual.
It adds a bit of personality to a workspace and turns ordinary stationery into an unexpected little display.
Steps
- Cut the cylindrical midsections from plastic bottles to form rings of similar diameter.
- Stack the rings together to reach a desirable height and secure them with strong adhesive or binding.
- Smooth any rough edges and optionally decorate the outer surfaces for color unity.
- Place the completed holder on a desk and fill with pencils and markers.
Seed starter pods that encourage tiny new life
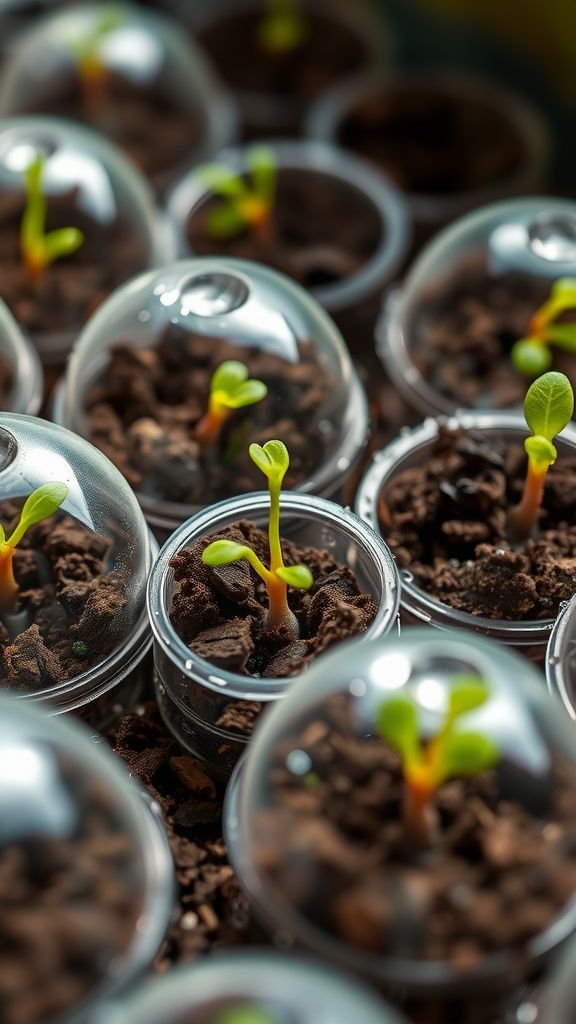
Watching a tiny seed push through dark soil under a bottle dome is quietly exhilarating. The clear plastic cradles a small, private world where moisture and warmth create a nurturing hush.
I often peer close to see threadlike roots and the tender green of a cotyledon unfolding. The faint earthy aroma seems amplified in that tiny chamber, and the condensation patterns on the plastic become little maps of humidity.
Starting seeds this way feels intimate and patient, a reminder of small rhythms and the slow, steady miracle of growth.
Steps
- Create small pods by cutting off the bottoms of plastic bottles and filling them with seed-starting mix.
- Sow seeds at recommended depth for each plant and gently firm the mix around them.
- Cover each pod with a clear bottle top or dome to maintain humidity and warmth.
- Place the pods in a bright spot and open the domes periodically to provide fresh air as seedlings emerge.
Playful hanging mobile with colorful bottle shapes
A mobile of bottle fragments turns breeze into gentle choreography, each piece rotating with an easy, measured pace. I like listening to the soft chime as plastic meets plastic, and watching reflected light trace moving patterns on nearby walls.
The tactile variety of ridges, smooth bases, and neck curves provides visual interest when the mobile slows to a still moment. Creating balanced clusters invites a kind of relaxed fiddling as shapes find harmony, and the whole piece brings a buoyant, childlike energy to a porch or bedroom corner.
Steps
- Cut bottle pieces into interesting shapes and punch small holes for hanging points.
- Thread nylon cord or fishing line through each piece and tie secure knots.
- Attach the pieces at varying lengths to a central hoop or driftwood base for balance.
- Hang the mobile where it can catch a gentle breeze and observe the moving composition.
Stained-glass suncatchers using bottle bottoms

Bottle bottoms refract sunlight in a charming way, creating jewel-like discs that glow against a window. The smooth curvature and the unexpected swirl of molded patterns become miniature stained glass when sunlight passes through.
I often arrange them in clusters so that overlapping colors mingle and cast soft colored reflections across a table. The tactile cool of plastic against skin when I hang a piece gives a small, direct pleasure.
Each suncatcher seems to hold a tiny slice of sky, and I enjoy watching the light shift across its surface through the day.
Steps
- Remove bottle bottoms and clean them thoroughly to reveal clear or colored plastic surfaces.
- Punch small holes near the outer rim and thread thin wire or fishing line through each hole.
- Group a few suncatchers together on a single hanger or string them individually for window display.
- Suspend them in a sunny window so light passes through and creates colored reflections.
Mosaic garden art with trimmed bottle rings
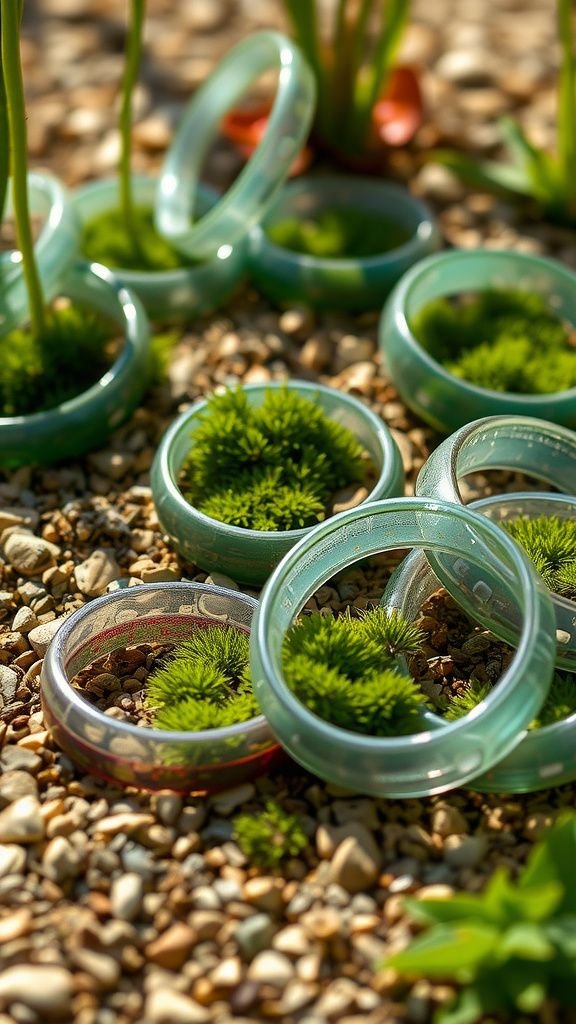
There is a satisfying rhythm to arranging trimmed bottle rings into a garden mosaic, the edges catching sun and forming a playful pattern underfoot. The smooth plastic contrasts with rough stone and soil, and the slightly raised rings give a tactile path that invites touch.
I enjoy stepping back and watching shifting colors change with light and angle, the whole piece feeling like a playful punctuation in the garden. The weathered sheen of recycled plastic blends with moss and lichen over time, creating a slowly evolving surface that feels alive with history.
Steps
- Cut bottle midsections into rings of consistent width and clean edges for safety.
- Arrange the rings on a prepared garden bed or stepping stone layout to create a pleasing pattern.
- Press the rings into soil or sand to stabilize them and fill gaps with gravel or mortar if desired.
- Allow the installation to settle and watch how light and weather interact with the mosaic surface over time.
Charming garden markers from bottle necks and labels
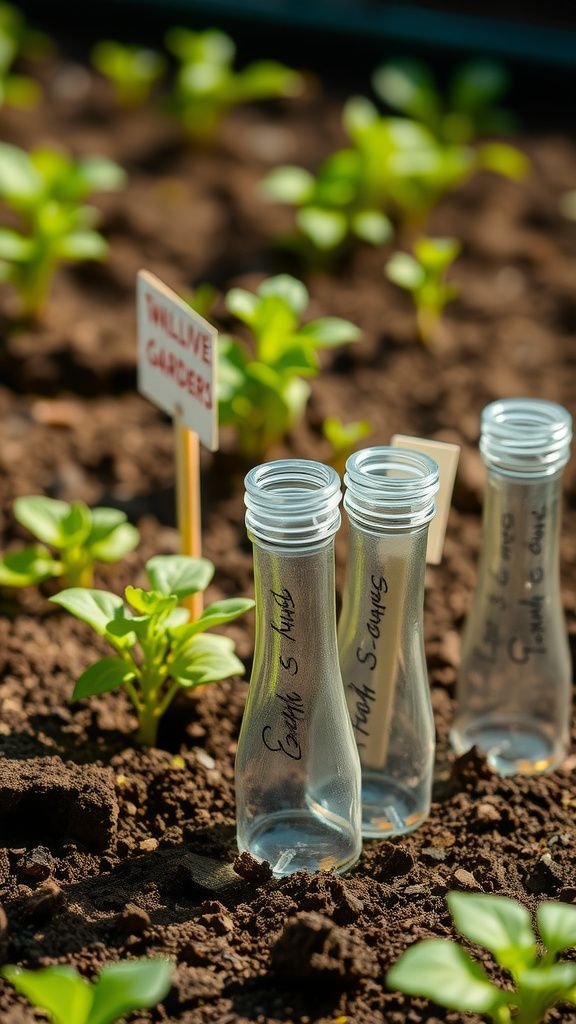
Turning bottle necks and labels into garden markers brings a playful, handmade feel to rows of seedlings. The bright plastic tops peek above soil and the texture of handwritten labels adds a lived-in charm.
I like the quiet practicality of seeing names bobbing gently in breeze, and the faint rustle of leaves around them. The markers age with the garden, picking up soil smudges and sun-bleached edges that tell of season-long care.
They feel like tiny signposts in a personal landscape that maps out intention and small hopes.
Steps
- Cut bottle necks from plastic bottles to form sturdy stake-like markers and clean any rough edges.
- Affix labels or write plant names on adhesive tags and attach them to the necks securely.
- Insert the markers into soil near seedlings or rows to identify plantings.
- Refresh labels as needed to maintain readability through the season.
Self-watering planter that stretches your watering routine

A bottle reservoir tucked beneath soil feels like a patient helper for thirsty plants, holding cool water that gently disappears into the earth. Observing the tiny trickle and the faint darkening of surrounding soil is quietly reassuring.
I appreciate how the clear plastic allows a quick glance to check remaining water, and the steady moisture creates a calm rhythm for plant roots. There is a tactile pleasure in feeling the weight of a filled reservoir and the soft slosh as water moves, a simple harmony between container and plant life.
Steps
- Prepare a bottle with its top inverted into the base to form a reservoir and wick system.
- Fill the bottom reservoir with water and ensure the wick material connects soil to the water source.
- Place potting soil and plant above the reservoir, adjusting wick placement for steady moisture transfer.
- Monitor reservoir levels and refill when water drops to maintain consistent moisture.
Festive party garland made from painted bottle rings

Stringing painted bottle rings into a garland feels playful and satisfying, like crafting miniature lanterns for a small celebration. The painted surfaces matte or glossy catch light differently, and the faint scent of drying paint mingles with laughter when friends stop by.
Draping the garland across a fence or balcony creates a cheerful rhythm of color that moves slightly in the evening breeze. I enjoy the tactile repetition of threading rings and the way the final strand seems to pull a space together, adding an improvised festive note to ordinary gatherings.
Steps
- Cut bottle sections into uniform rings and prepare their surfaces by cleaning and lightly sanding if needed.
- Paint or decorate each ring and allow surfaces to dry completely for a durable finish.
- Thread rings onto a strong cord or ribbon at intervals to create a flowing garland.
- Hang the garland across a fence, balcony, or party area to add colorful decoration.
Cozy luminaries for walkways and backyard edges
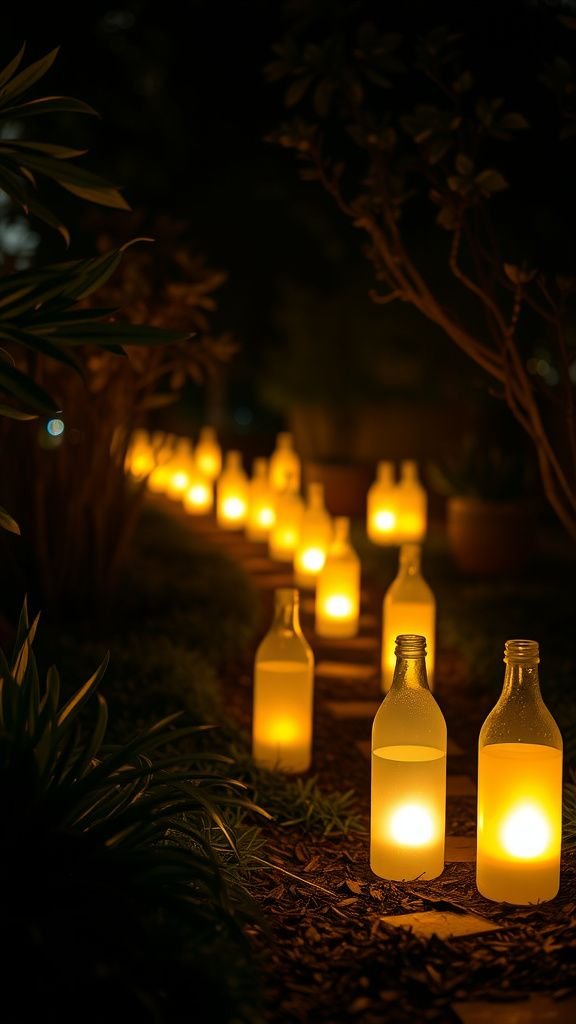
Line a pathway with glowing bottle luminaries and the whole yard feels a touch more intimate. The gentle halo from battery lights inside frosted plastic creates a soft corridor of warm color, and the muffled footfalls on grass mix with that steady glow.
I enjoy selecting bottles that produce different hues and watching how light pools on nearby plants. The cool night air seems less vast when dotted with these glowing markers, and the ritual of arranging them before an evening of outdoor conversation feels gently ceremonial and very comforting.
Steps
- Remove labels from clean bottles and frost or diffuse the surface for soft light scattering.
- Place battery-operated candles or small LED lights inside each bottle and secure them at the base.
- Position the luminaries along walkways or backyard edges at consistent intervals for visual flow.
- Activate lights before evening gatherings and enjoy the warm, subtle illumination they provide.
Mini succulent terrarium inside a bottle bottom
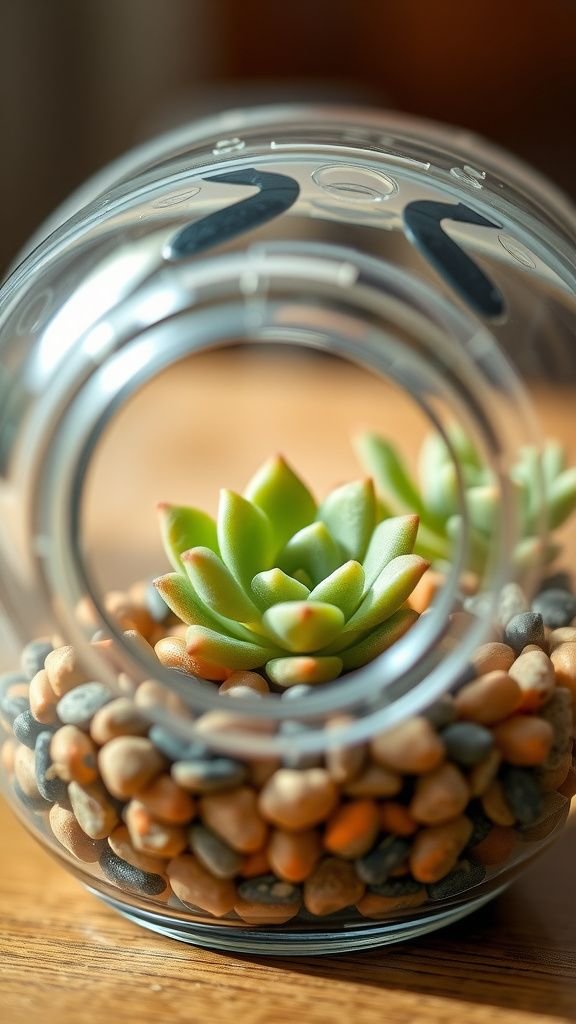
A tiny terrarium nestled in a bottle bottom feels like a secret landscape that fits on a shelf. The miniature scale invites close inspection and the little leaf textures become surprisingly dramatic against clear plastic.
I often tilt the piece toward the window and watch light create soft shadows that emphasize the sculptural shapes of succulents. The cool, slightly waxy scent of succulent leaves contrasts with the earthy smell of drained soil.
This compact green display makes a neat corner feel like a living artifact, cherished and quietly alive.
Steps
- Prepare the bottle bottom as a shallow container and add a drainage layer of pebbles or sand.
- Add a thin layer of potting mix suitable for succulents and gently place small succulent cuttings.
- Arrange decorative stones or moss around plants for aesthetic balance.
- Place the terrarium in bright light and water sparingly to keep soil just moist between checks.
Vertical herb garden for narrow balcony spaces
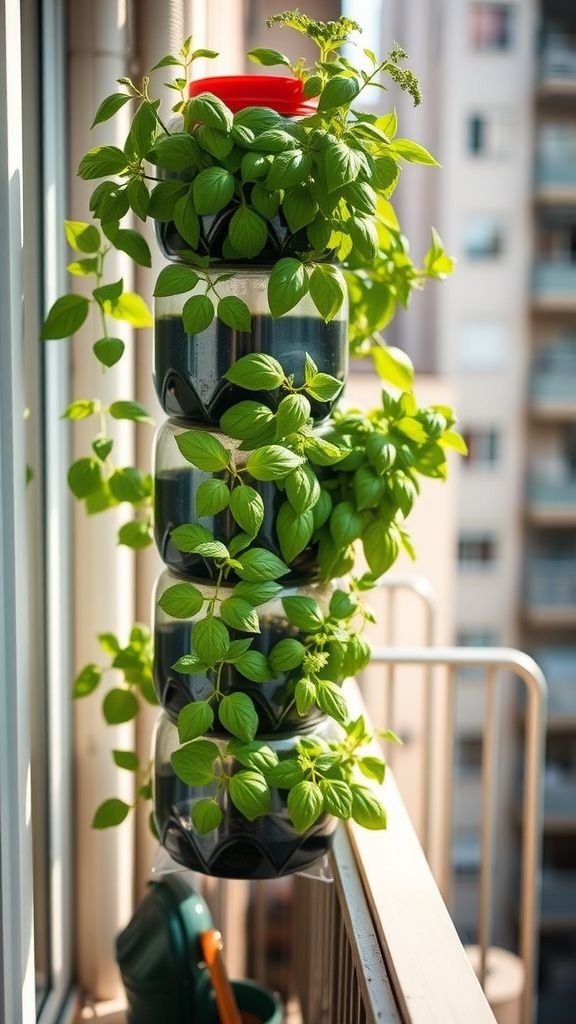
Creating a vertical herb strip from stacked bottles brought fresh greenery to a narrow balcony and changed how I use that small space. The scent of basil and mint rises upward, mixing with warm air and the faint metallic tang of a balcony rail.
Each bottle becomes a little scene of soil and leaf, and the vertical arrangement draws the eye upward in a satisfying way. I like leaning against the rail and harvesting a sprig, the rustle of leaves and soft green crumbs on my fingertips adding to the sensory pleasure of an urban garden.
Steps
- Prepare several bottles by cutting openings and creating drainage holes, then mount them vertically on a sturdy backing or frame.
- Fill each bottle with potting soil appropriate for herbs and plant seedlings or transplants in each pocket.
- Space plantings to allow access and airflow between containers and water as needed to maintain even moisture.
- Place the vertical garden in a sunny location on the balcony and harvest herbs as they mature.
Quirky jewelry organizer from bottle rings and hooks
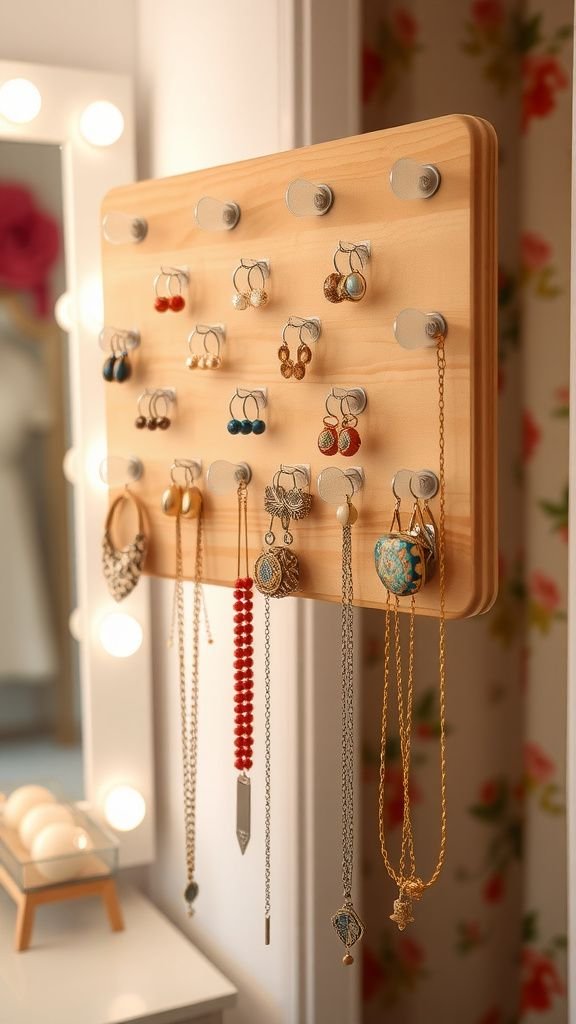
Turning bottle rings into a jewelry organizer added a whimsical touch to my dressing area, each loop holding a pair of earrings or a thin chain. The plastic rims form neat circles that catch light and make small pieces feel ceremonially displayed.
I enjoy the tactile contrast of metal jewelry resting against smooth plastic and the soft clink when pieces are removed. The organizer feels like a tiny cabinet of curiosities, where everyday adornments rest in plain sight and become part of the room’s texture rather than tucked away out of mind.
Steps
- Cut bottle rings to uniform size and mount them onto a wooden board or inside a frame for structure.
- Affix small hooks or pins inside each ring to hold earrings, necklaces, and bracelets securely.
- Arrange the rings aesthetically and attach the board to a wall or place it on a dressing table.
- Hang jewelry on the hooks and adjust spacing for comfortable access and visual balance.
Bright kite tails that flutter through summer skies

Long strips of plastic bottle material make light, durable tails that bring a kite’s arc to life. The whisper of material in the wind has a faint papery sound, and the bright colors flash against sky in a play of motion and light.
I remember running across a field and watching the tail stream like a ribbon, feeling the breeze tug at fingertips. The tactile drag of fabric against skin and the visual sweep across blue makes flying a kite a small ecstatic ritual that links simple materials with big open air.
Steps
- Cut plastic bottles into long strips or fringed ribbons to form colorful kite tails.
- Secure the strips to the kite’s frame or tail attachment point with strong tape or cord.
- Ensure tails are balanced and of appropriate length to avoid tangling during flight.
- Fly the kite in an open area with steady wind and enjoy the lively motion of the tails.