
Colorful tables, fluttering banners, and handmade centerpieces bring a warm neighborhood spark to life when planning Fourth of July Patriotic Party Decor Crafts for a backyard celebration. Scented candles, frayed burlap, and crepe paper textures layer with sunset glow and the distant rumble of sparklers.
I remember a humid evening when string lights and paper stars turned a driveway into a tiny festival; that night made Fourth of July feel like a holiday built from small projects, drifting smoke, and laughter that kept circling the block.
Mason jar luminaries with star cutouts and glow
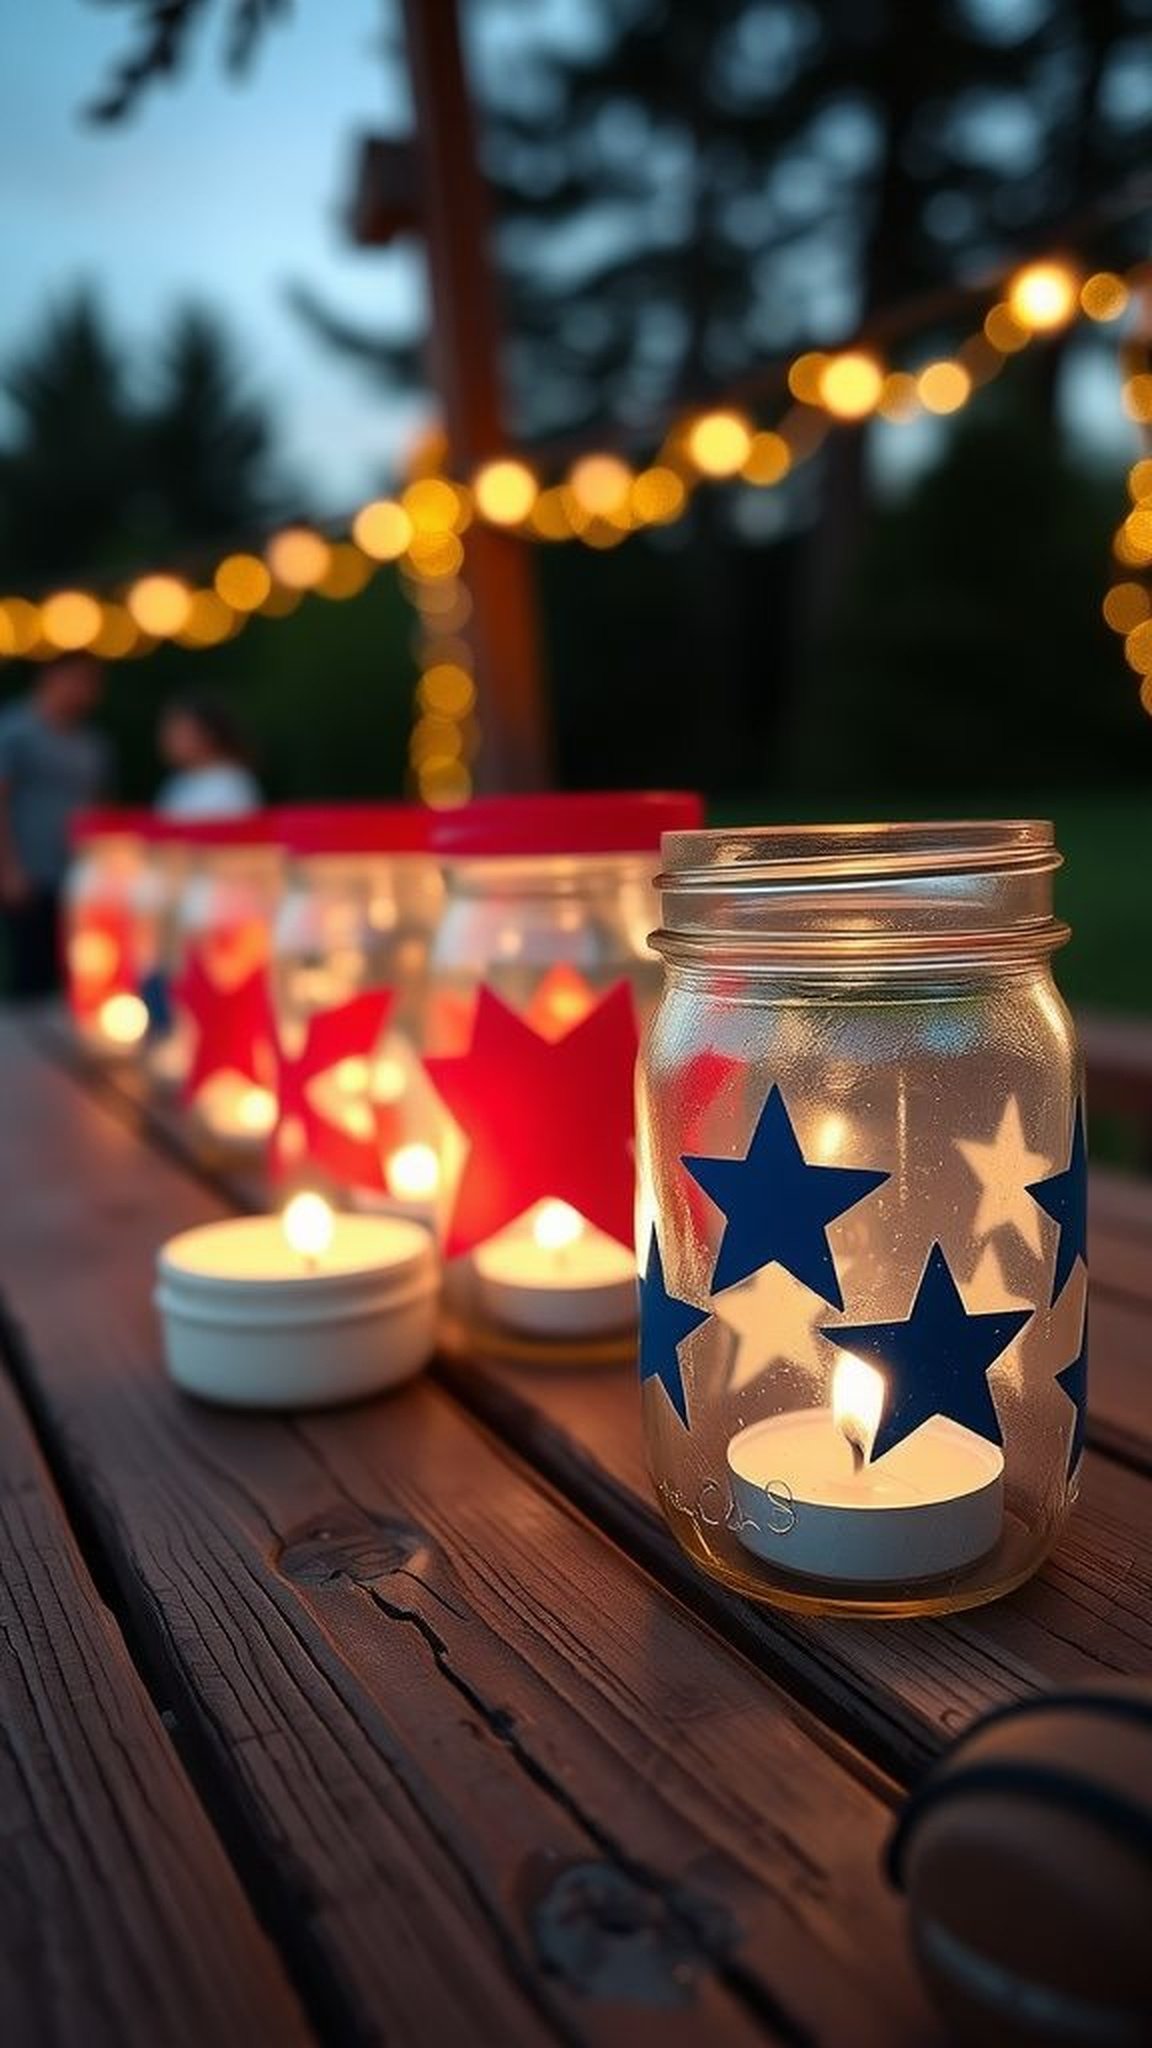
I still pull these out every summer because the jars keep a soft, honeyed glow that feels like a collected evening. The star cutouts throw playful shadows across a picnic table and the rim of glass catches the last light.
The jars have a faint metallic smell when a candle warms the rim, and when lined up they create a little river of light. Guests tend to linger near them, drawn by the quiet warmth and the way the light flickers against painted stripes.
Steps
- Gather cleaned jars and punch star shapes into thin metal or paper sleeves that will slip inside each jar.
- Place small candles or battery-operated tea lights into the jars and nestle the star sleeves so they stand upright.
- Arrange the lit jars along pathways or the center of a table to create a soft, glowing line.
- Swap in a scent-safe candle when an aromatic touch is desired for a richer evening ambiance.
Hand-sewn burlap runner with stitched star accents

The coarse, comforting texture of burlap gives a handmade table a relaxed porch feeling. Hand-stitched stars in faded navy thread sit like little stitches of memory across a runner, and the occasional unruly fiber catches a breeze and twitches like a fringe mustache.
When laid across a picnic table, it absorbs the heat of a sunny tabletop and softens clatter from plates. I find the slight scent of earth and fiber nostalgic, and the runner invites people to set down cold drinks and linger over conversation.
Steps
- Cut a length of burlap to fit the table and trim edges to create a natural fringe.
- Sketch star shapes along the runner and hand-sew them with contrasting thread using simple running stitches.
- Gently press the sewn runner to settle the stitches and lay it across the table, smoothing any rough patches.
Flag bunting garland that flutters in warm breeze

A string of small flags catches the smallest breath of air and translates it into motion that feels celebratory. The fabric flags carry the faint smell of sun-warmed cotton and rustle with a soft papery whisper when the wind picks up.
Hung above a doorway or along a fence, the triangular pennants gather dust and sunlight, slowly softening their colors into a lived-in palette. I like watching them during quiet moments when conversation drifts, because the movement keeps the scene alive without demanding attention.
Steps
- Cut uniform pennant shapes from cotton fabric in alternating red white and blue patterns.
- Sew or adhere the pennants to a length of sturdy twine, spacing them evenly along the cord.
- Fasten the garland along a porch railing or between posts so the flags can flutter freely.
Popsicle stick stars with layered paint and grain
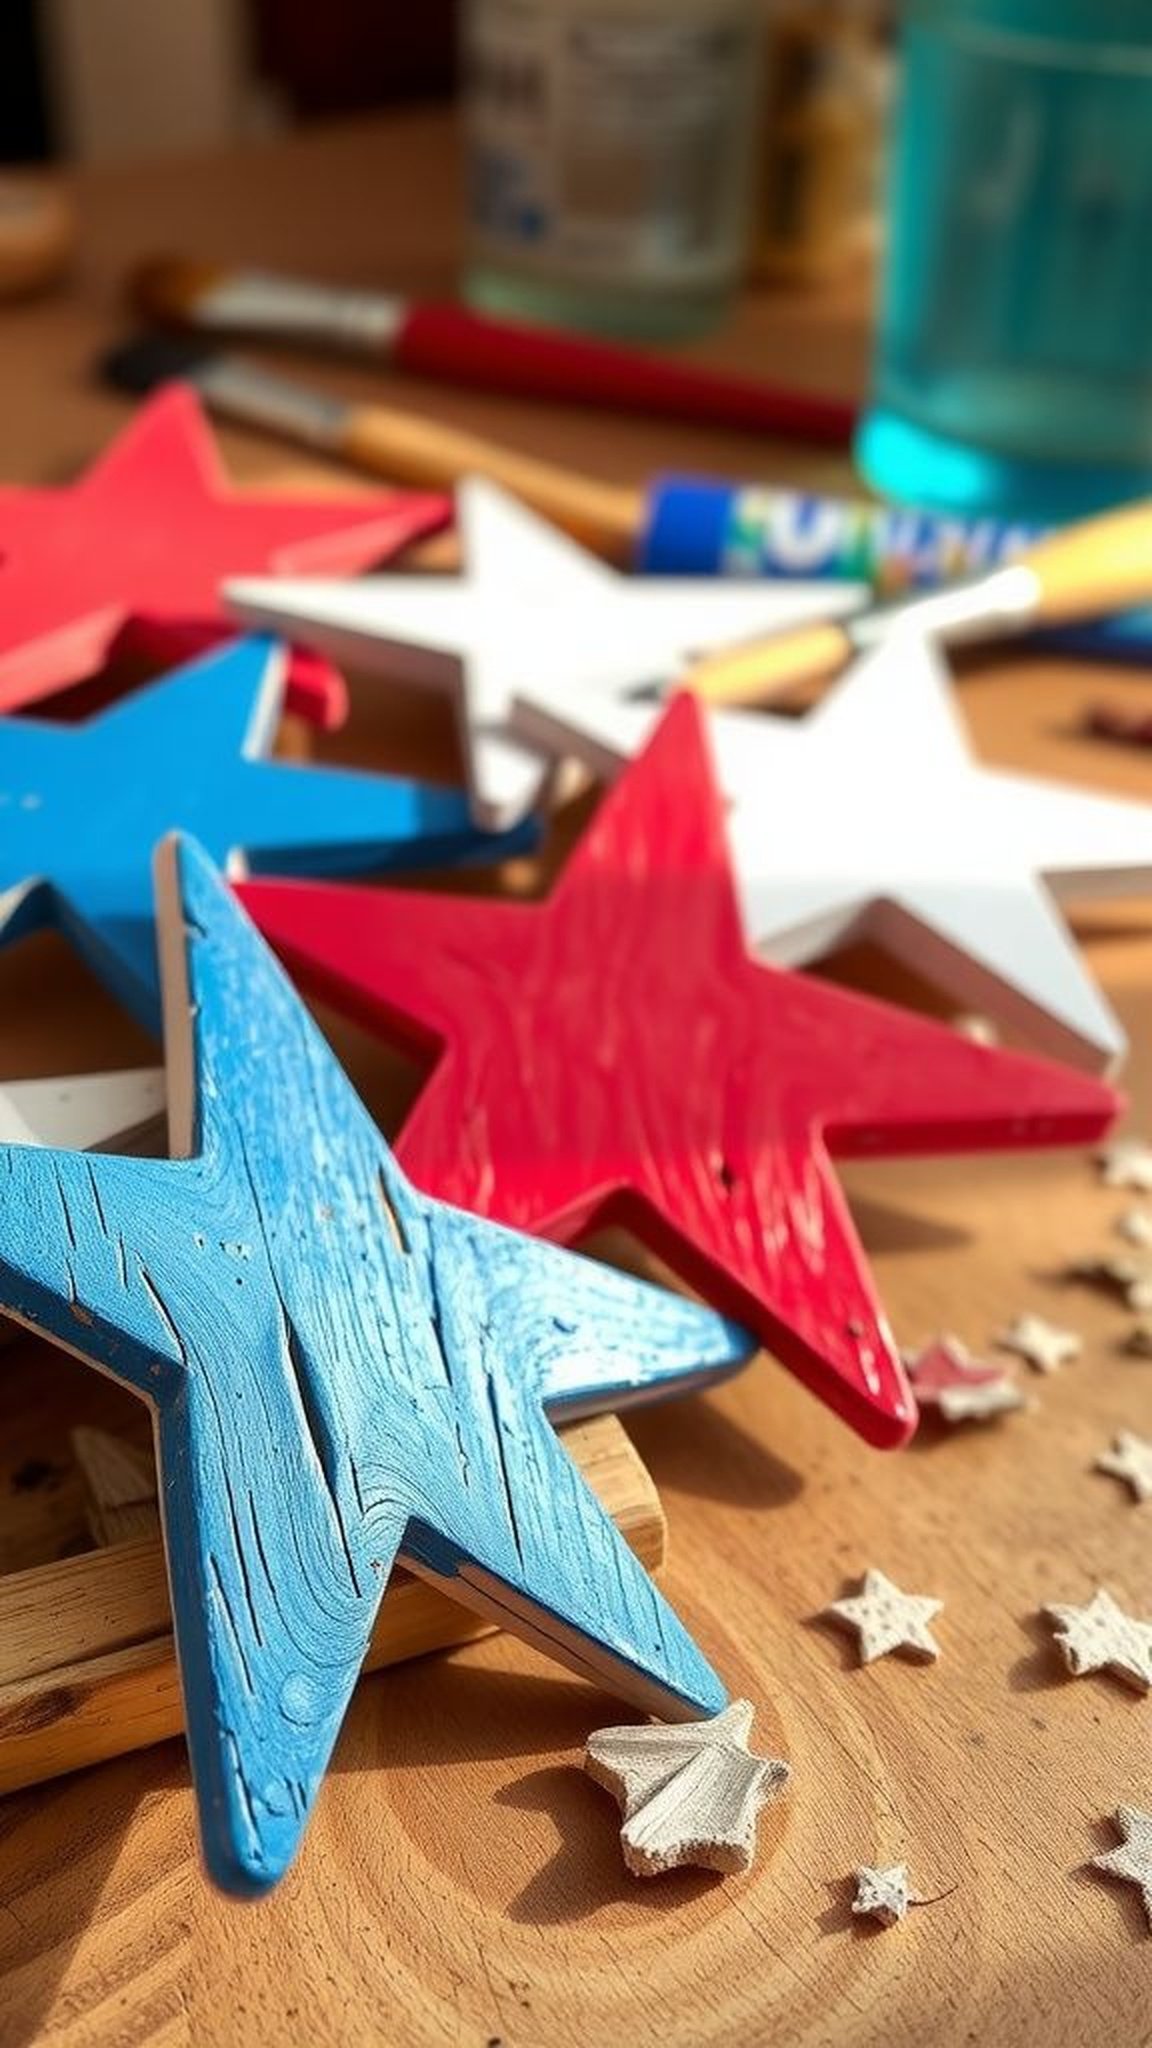
Popsicle stick stars have a childhood comfort that sits heavy in the hands. Layers of paint wear into the wood grain in a way that feels honest and a touch crumbly, and the edges sometimes show a pale layer of tooth from sanding.
When hung, they clack together with a dry, wooden tick that sounds like summer afternoons. I remember hands sticky with glue and the small thrill when a star balanced just right, and those little imperfect marks make each piece a personal keepsake.
Steps
- Arrange popsicle sticks into star shapes by overlapping edges and bonding joints securely.
- Apply layered washes of paint in red white and blue, letting each layer dry for a weathered look.
- Add a thin cord or ribbon for hanging and suspend the stars where a gentle breeze can move them.
Upcycled glass bottle vases with ribbon and blooms
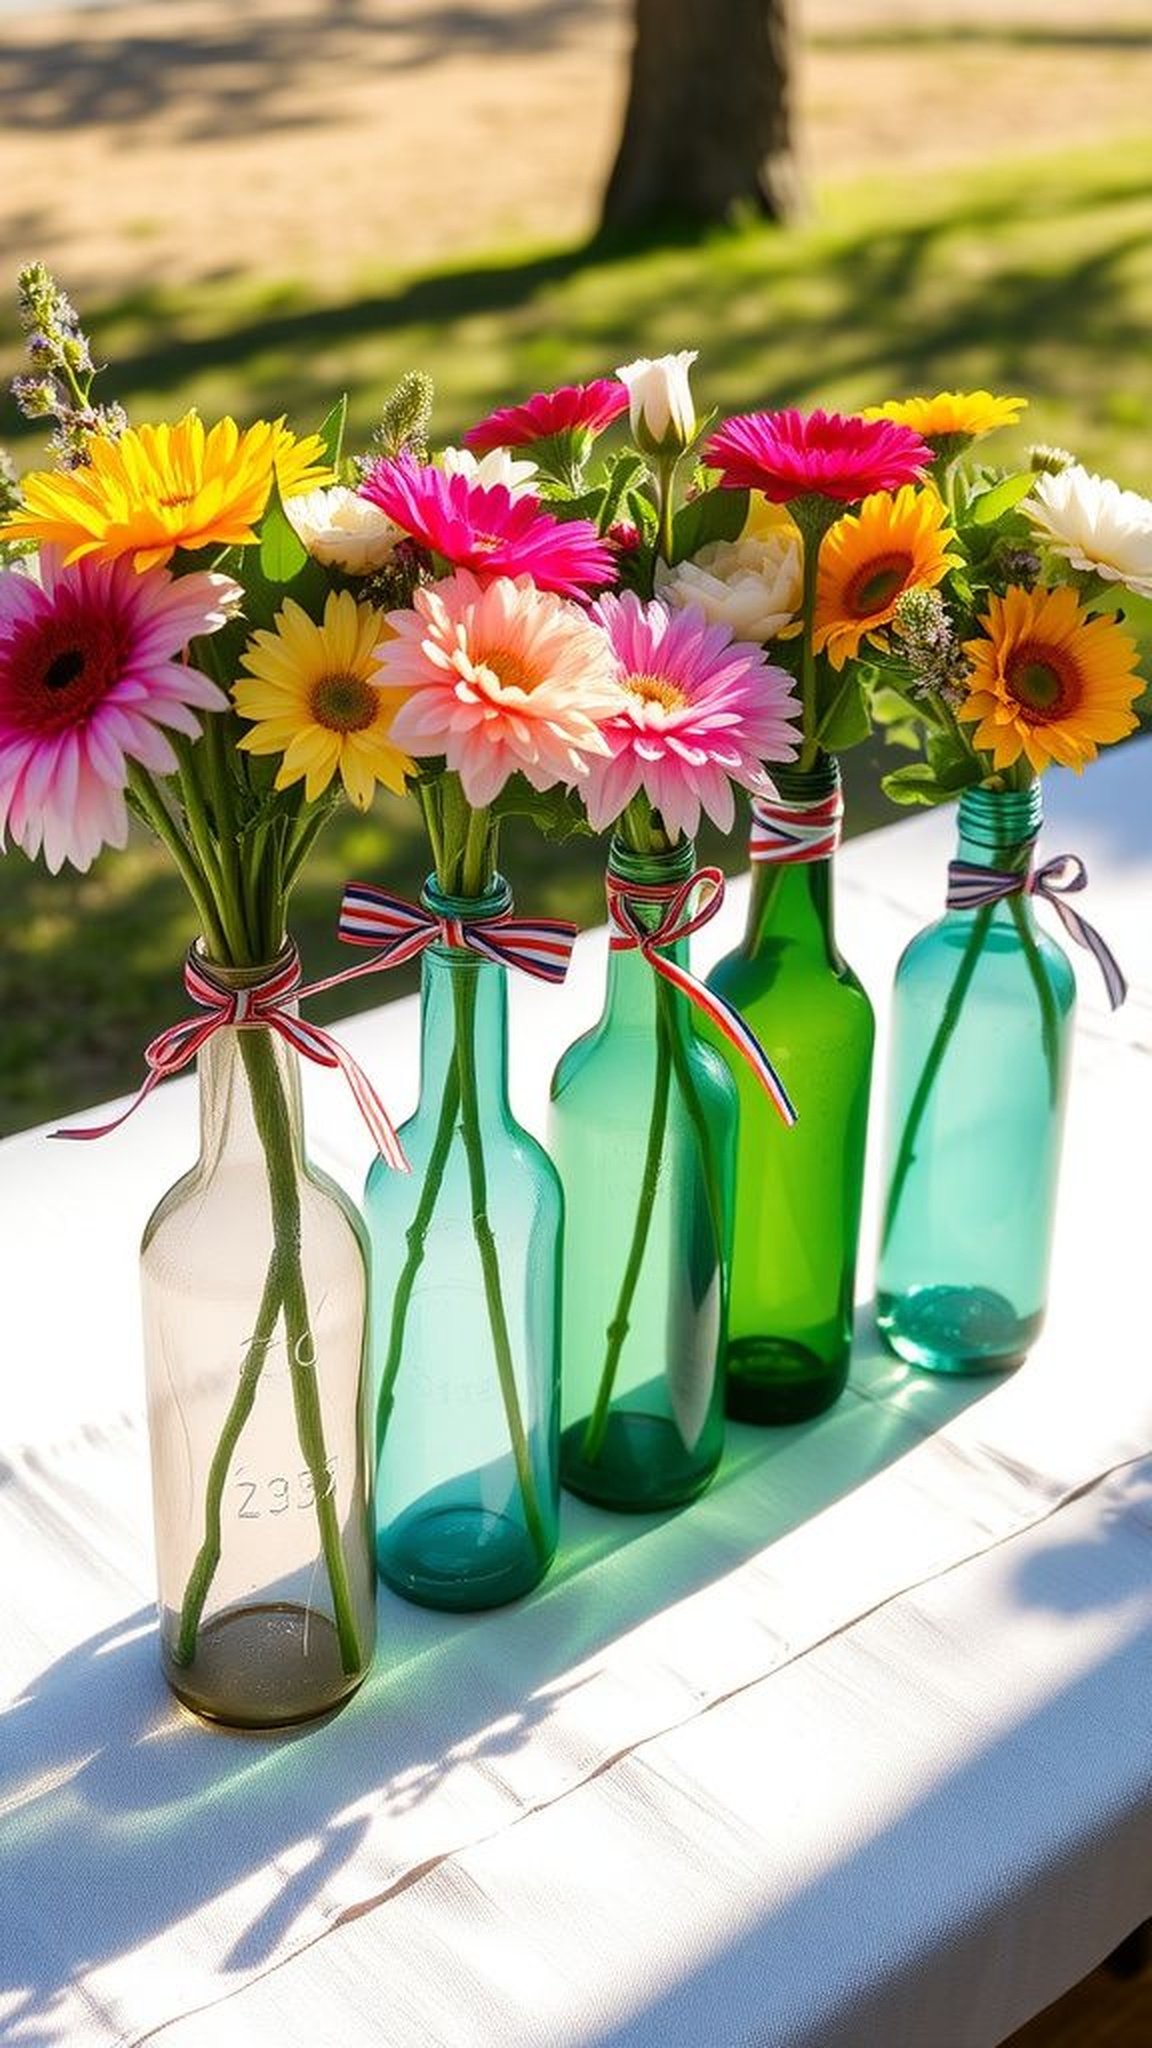
Empty glass bottles from old sodas and sparkling waters gain new life when clustered as vases. The glass holds a cool sheen and the ribbon tied around necks adds a soft contrast that shimmers when caught by sun.
Fresh cut blooms look thirsty at first, then settle into a casual arrangement that smells faintly of grass and summer rain. When guests pass, the cluster reads like effortless hospitality, with each bottle reflecting tiny splashes of light and color across the tablecloth.
Steps
- Rinse and dry an assortment of clear and tinted glass bottles so they are ready for display.
- Tie narrow ribbons around the necks in red white and blue, alternating patterns for contrast.
- Arrange seasonal blooms in the bottles and group them as a casual centerpiece on the table.
Star-spangled napkin rings that feel slightly vintage

These napkin rings carry a sense of old family picnics where table settings felt like a small celebration. The metal stars have a cool weight and the paint picks up tiny chips that tell stories of repeated use.
Wrapped napkins sit snug inside the ring and the soft fabric muffles the faint metallic clink when plates touch. I enjoy watching hands lift a napkin and reveal an unexpected little star; it makes the act of sitting down feel like a small, deliberate welcome.
Steps
- Select small metal or wooden star ornaments and smooth any rough edges for handling comfort.
- Affix the stars to plain napkin rings with a secure bond and let them dry undisturbed.
- Slip folded napkins through the rings and place at each spot before guests arrive.
Bottle cap garland with a playful metallic clink

A string of flattened bottle caps produces a tiny metallic clink when nudged, and that sound seems to summon childhood afternoons. The mix of enamel colors and the dented rims make each piece feel collected rather than manufactured.
When draped across a mantel or braided through a fence post, the garland scatters light with a faint glimmer and the occasional sun-spark on a shiny rim. I like running a fingertip along the sequence; the texture changes and the small imperfections make it feel handcrafted and personal.
Steps
- Collect bottle caps and flatten them if a lower profile is preferred, ensuring edges are safe to handle.
- Punch small holes near the edge of each cap and thread them onto twine or wire in a loose pattern.
- Hang the garland along a mantel or fence so the caps can move and make gentle sounds.
Patriotic paper fans fanned across a wall display
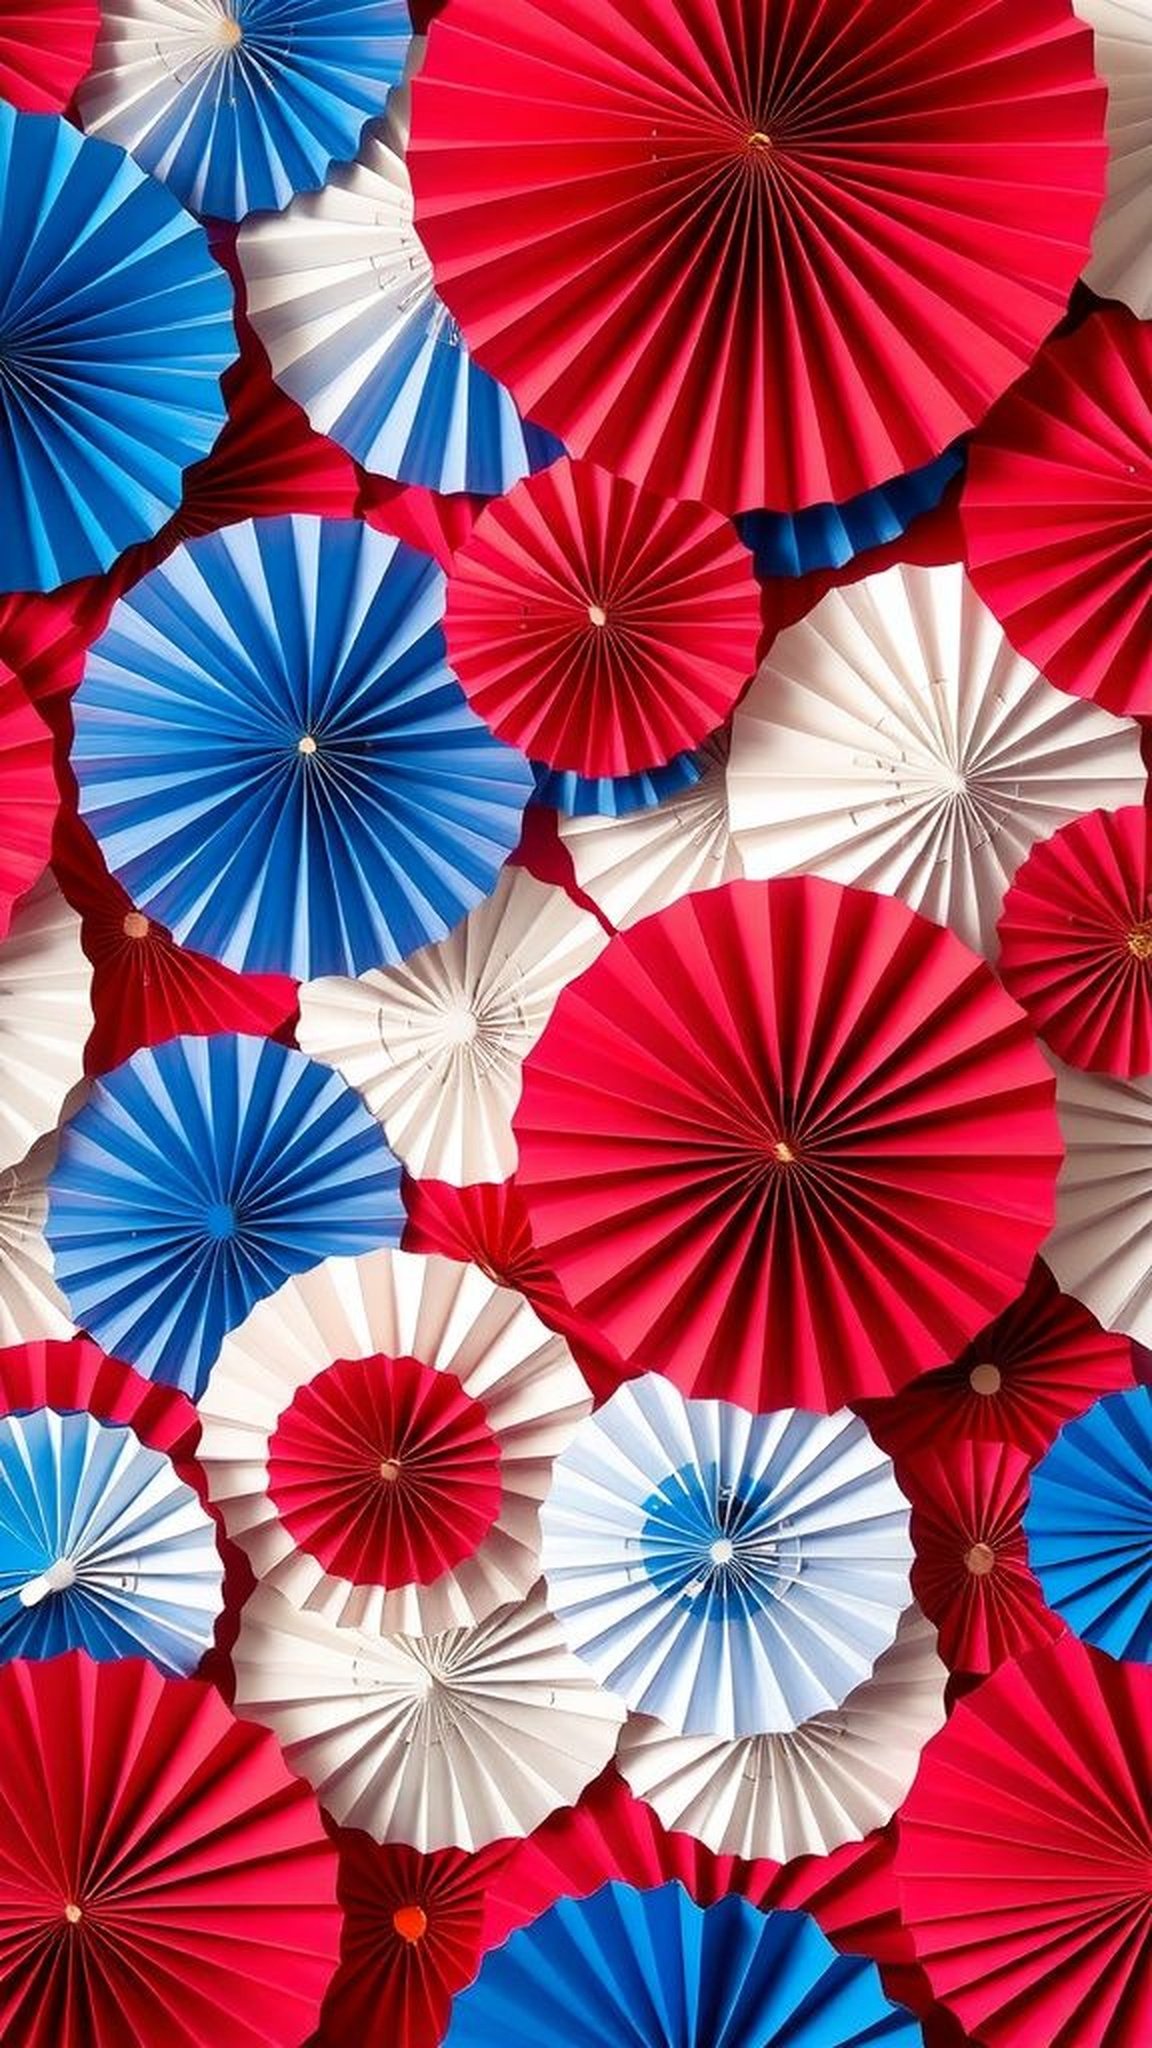
Paper fans give a room movement even when standing still, their folded ridges catching light and shadow with a delicate rhythm. The crisp paper edges have a dry papery scent when freshly folded, and layered colors create a subtle stone-like gradient.
Mounted in an overlapping pattern, they read like a handcrafted mural that invites compliments. I enjoy seeing guests pause, trace the ridges with their gaze, and comment on how paper can suddenly feel architectural and airy at the same time.
Steps
- Prepare round paper pieces and score concentric folds to create the fan pleats.
- Secure the base of each fan and layer them on a backing board with adhesive so they overlap nicely.
- Mount the finished fan display on a wall or hang it as a backdrop for photos.
Chalkboard sign with hand-lettered menu and stars

A chalkboard sign behaves like a friendly narrator at an open-air table, its matte black surface contrasting cleanly with chalky white letters. The hand-lettered menu carries smudges and little flourishes that smell faintly of dusted chalk.
When propped on an easel, it invites a slow approach and casual reading, and the tiny drawn stars along the border feel like a handwritten wink. I often notice people lingering near the board, pointing at items and smiling as if remembering their favorite dish before deciding.
Steps
- Choose a chalkboard or slate and plan a simple menu layout with a pencil guide.
- Draw hand-lettered text and small star decorations with chalk or chalk marker, allowing natural smudges for charm.
- Place the sign near the serving area so guests can read it easily as they approach.
Miniature flag pick arrangements for casual centerpieces
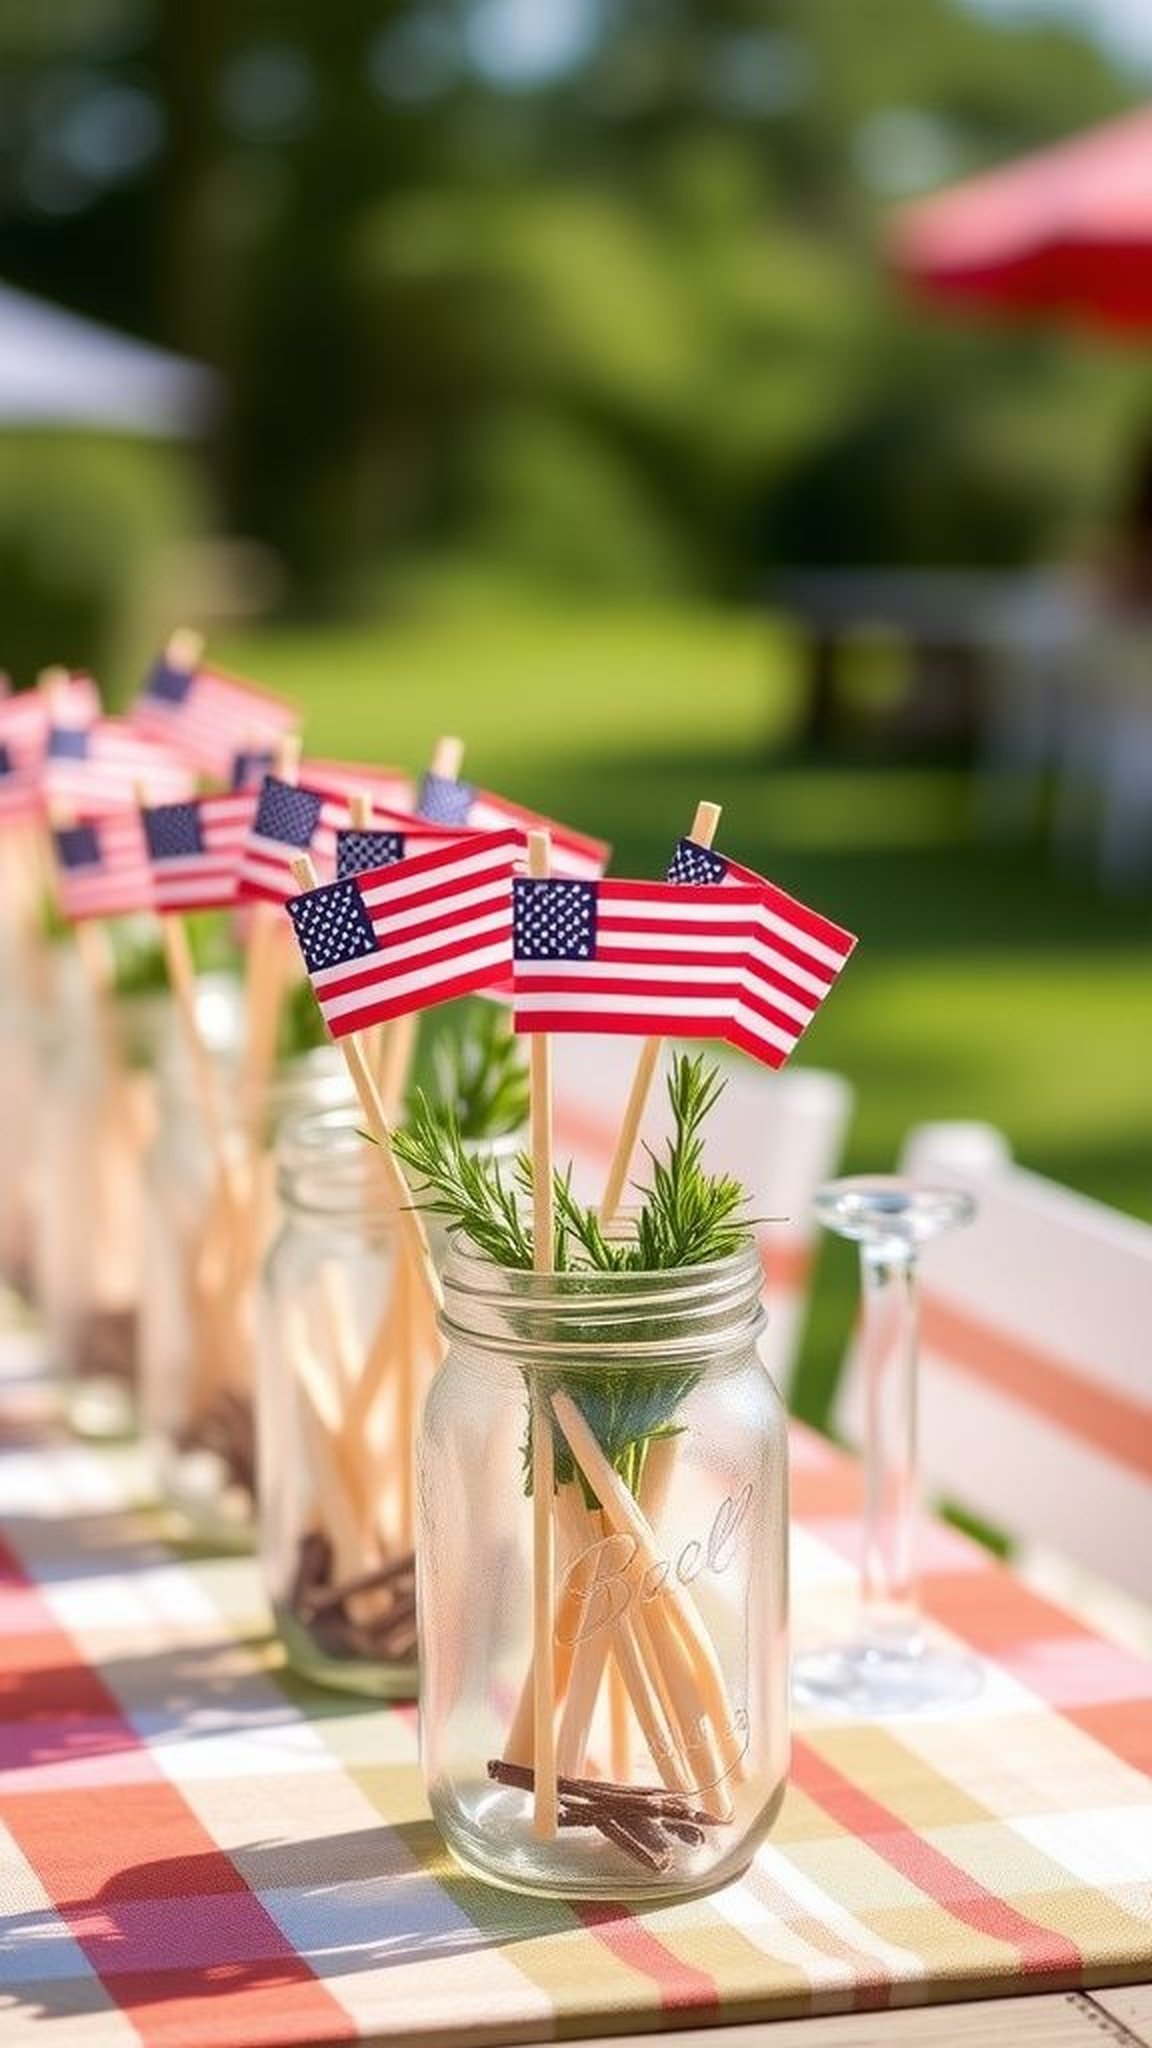
Tiny flag picks tucked into jars or planters feel like little exclamation points across the table. The paper and toothpick mix makes a tiny rustle when brushed, and the colors remain bright even as the paper softens slightly in humidity.
Clustered with sprigs of greenery or small blooms, the picks give a cheerful uprightness and a sense of coordinated detail. I tend to scatter them in low containers so they point up like miniature sparklers, and guests comment on how they lift a plate without taking up space.
Steps
- Assemble paper flags on small wooden picks and trim any uneven edges for a neat look.
- Insert the flag picks into jars filled with sand florals or foam so they stand upright.
- Group the jars along the table to create repeating miniature accents that are visible from each seat.
Lanterns with ribbon streamers dancing in the breeze

Paper lanterns carry a spherical calm that contrasts with the lively ribbon tails tied beneath. The lantern surface has a thin papery hum and the ribbons clap softly when a breeze passes through.
At dusk, the lanterns take on a warm interior glow that feels like small moons hung low among branches. I remember a night when ribbons tangled briefly and then freed themselves, an odd little pause that made everyone laugh.
The gentle motion keeps the scene feeling animated without loudness, like a quiet parade overhead.
Steps
- Inflate or assemble paper lanterns and thread a length of ribbon beneath each one.
- Secure ribbons in red white and blue so they hang freely and can move with the wind.
- Suspend the lanterns from tree branches or a pergola, spacing them for balanced visual rhythm.
Rustic wooden flag with hand-brushed stripes and grain

A wooden flag feels like a salvaged piece of summer history, with grain lines that run like topography across painted stripes. The brush strokes rest on the surface and sometimes leave a faint scent of drying paint mixed with sawdust.
Propped against a porch column or leaned on a table, it gives a solid, grounded presence and a slightly weathered look that pairs well with cool lemonade. I enjoy the small surprises where the wood knots show through paint, because those flaws read like fingerprints of place.
Steps
- Select a plank of salvaged wood and sand the surface lightly to reveal the grain.
- Brush on alternating stripes in red white and blue, allowing some grain texture to show through.
- Add a field of small stars in one corner and place the finished flag where it can be admired.
Tissue paper pom poms like clouds of festive color
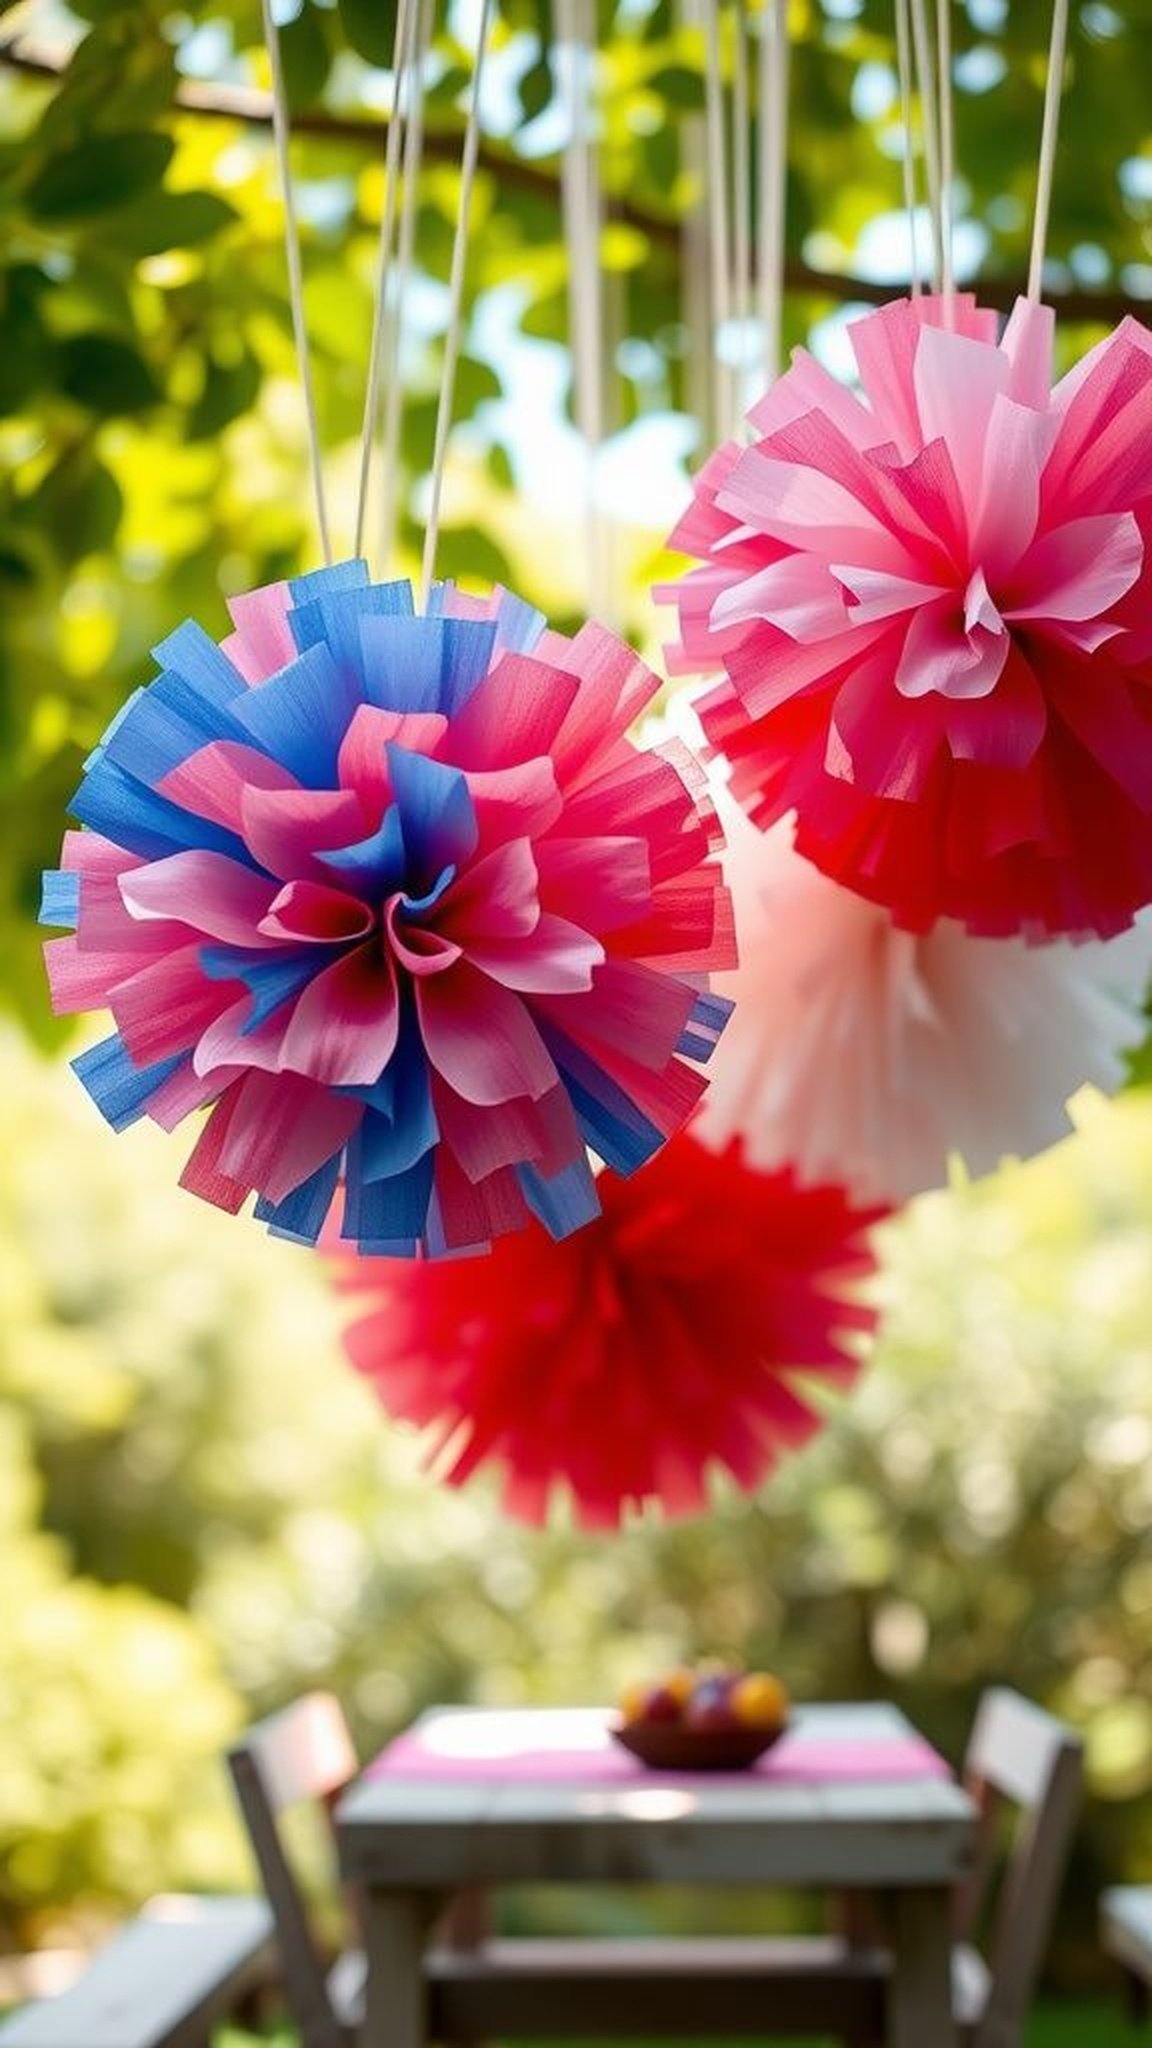
Tissue paper poms float like captured clouds and their edges rustle when brushed. Layers of thin paper produce a muffled, papery whisper when handled and collapse into soft shapes that feel unexpectedly plush.
Hung at different heights, they form a low skyline above a table, and their color intensity fades slightly in sunlight to something softer and easier on the eyes. I often hang them over a food area so the visual weight sits above guests, making the scene feel wrapped and cozy in a cheerful way.
Steps
- Stack sheets of tissue paper and accordion-fold them to build layered volume.
- Secure the center with a wire or string and carefully pull layers outward to form pom layers.
- Hang poms at staggered heights from a pergola or tree branches to create a floating canopy.
Pinwheel garden that flickers with a playful spin

Pinwheels spin with a carefree energy that feels contagious, and their plastic sheen clicks softly as blades turn. The snap of a breeze sets them whirling and the motion sends a ribbon of light across a lawn.
Stuck into planters or a grassy border, they read as a little kinetic meadow. I like standing at the edge of a pinwheel patch and watching how different speeds create patterns of color; the collage of motion feels alive and invites a childlike grin from the adults nearby.
Steps
- Craft pinwheels from patterned paper or thin plastic and secure centers so they can rotate freely.
- Mount each pinwheel on a slender dowel and insert into planters or the lawn at varied heights.
- Position the garden where breezes will catch the blades and produce lively motion.
Paper lantern centerpiece filled with fairy lights
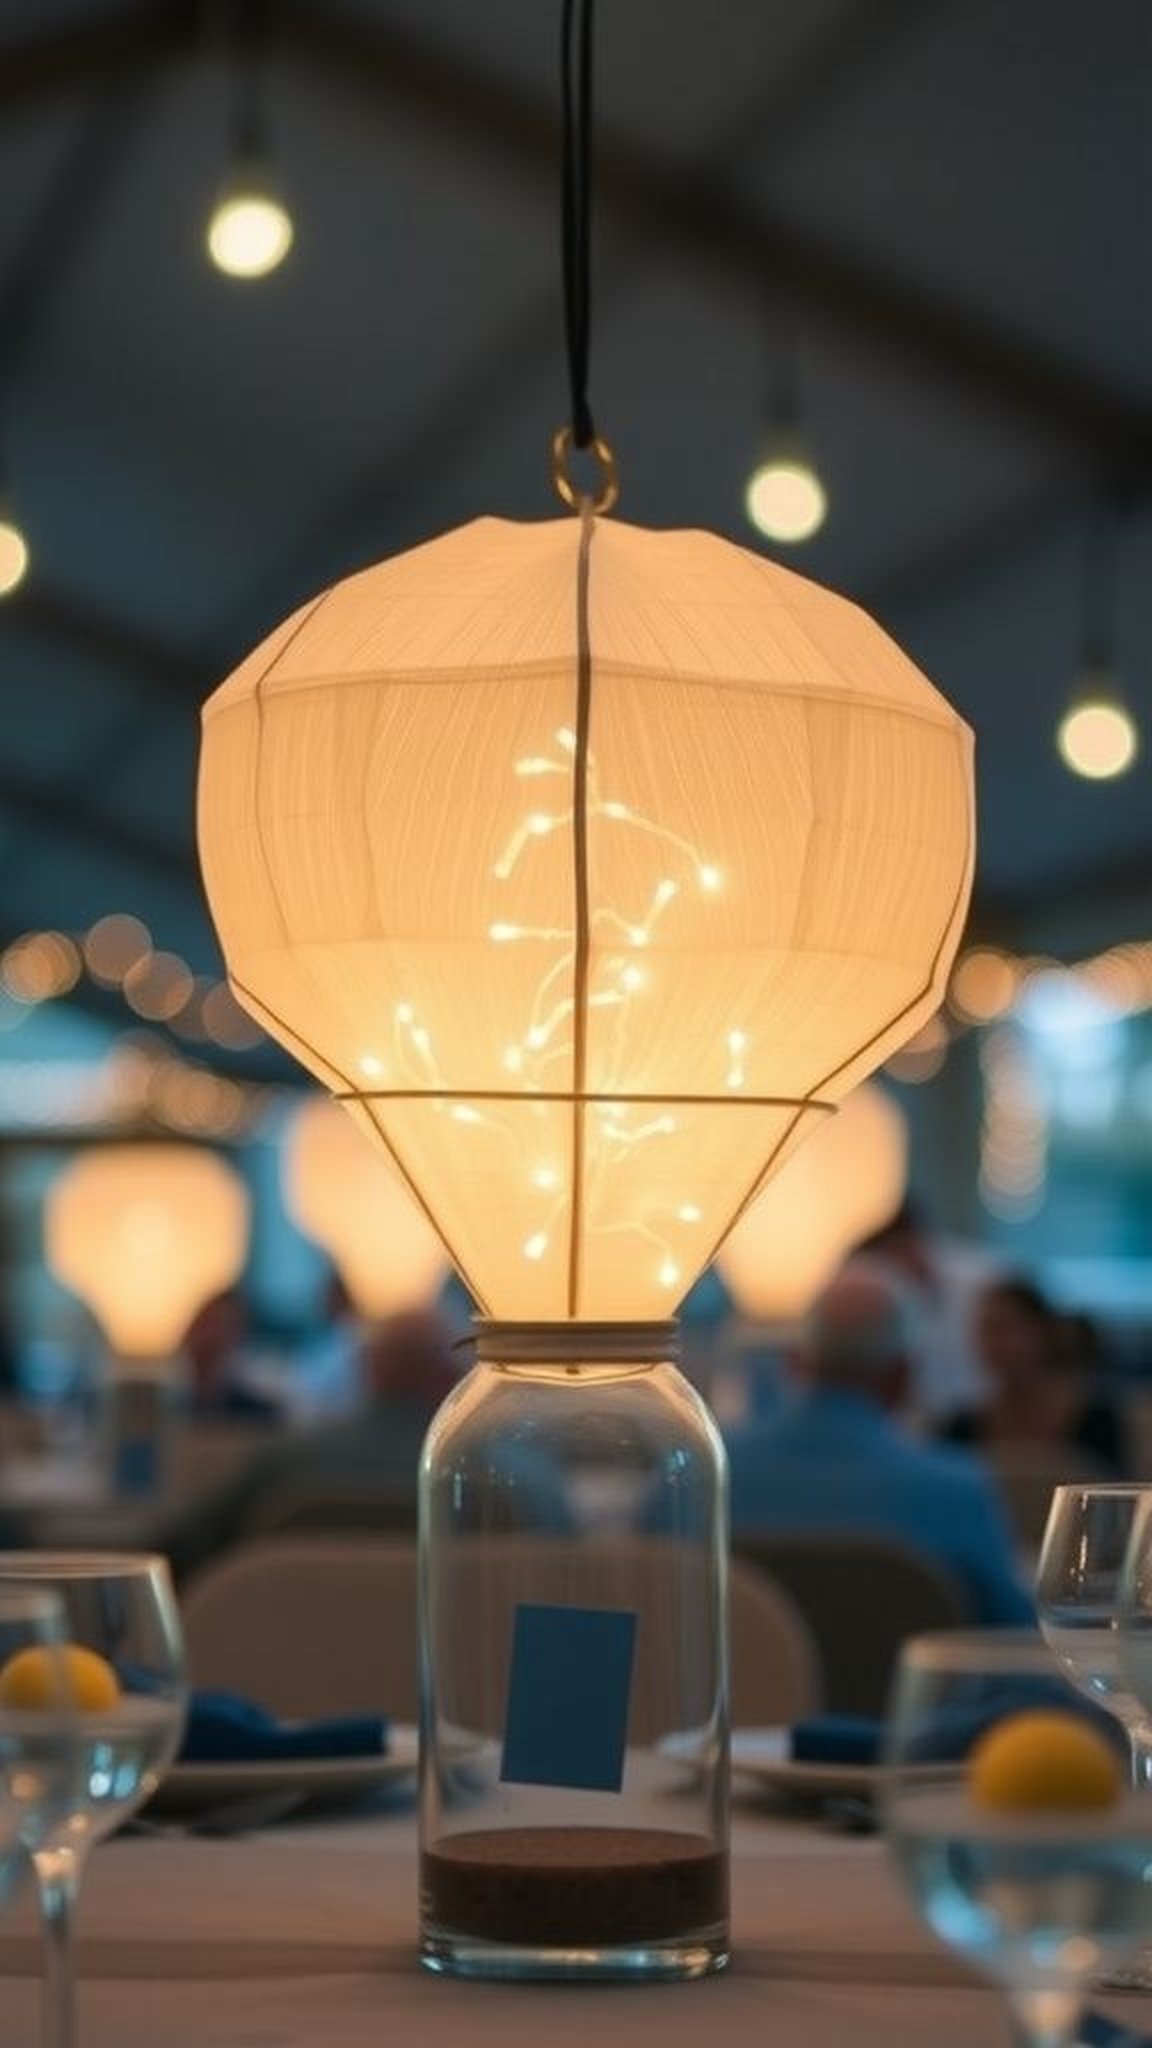
A paper lantern sitting low on a table filled with tiny lights casts a soft, intimate glow that invites quiet conversation. The lights prick through the thin paper creating a constellation effect, and the warm light temperature gives food and faces a welcoming hue.
When the lantern is close to glassware, reflections multiply the little points of light across the tablecloth. I remember one night when a breeze made the lantern shimmy slightly and the lights resembled a small, contained fireworks display; everyone paused and smiled.
Steps
- Place a battery string of warm white fairy lights inside a sturdy paper lantern with an accessible opening.
- Set the lantern in the table’s center and arrange low accents around it so the light spreads gently.
- Activate the lights before guests arrive to let the centerpiece settle into its glow.
Red white and blue candle clusters with twine trim

Clusters of candles in varying heights create a layered warmth that feels like a small domestic hearth. The wax gives off a soft, neutral scent, and the flame’s small movement offers a living detail that draws eyes.
Twine wrapped around the base adds a tactile contrast, a raw fiber against smooth wax. When assembled on a tray, the cluster reads like a miniature skyline of light, and the occasional drip tracing down a side is oddly comforting, as if the candles keep time with the evening.
Steps
- Gather pillar and votive candles in red white and blue and arrange them in a cluster on a stable tray.
- Wrap natural twine around the base of some candles for texture and secure gently.
- Light the candles just before dusk so their glow builds as the light fades.
Tin can lanterns with punched star patterns
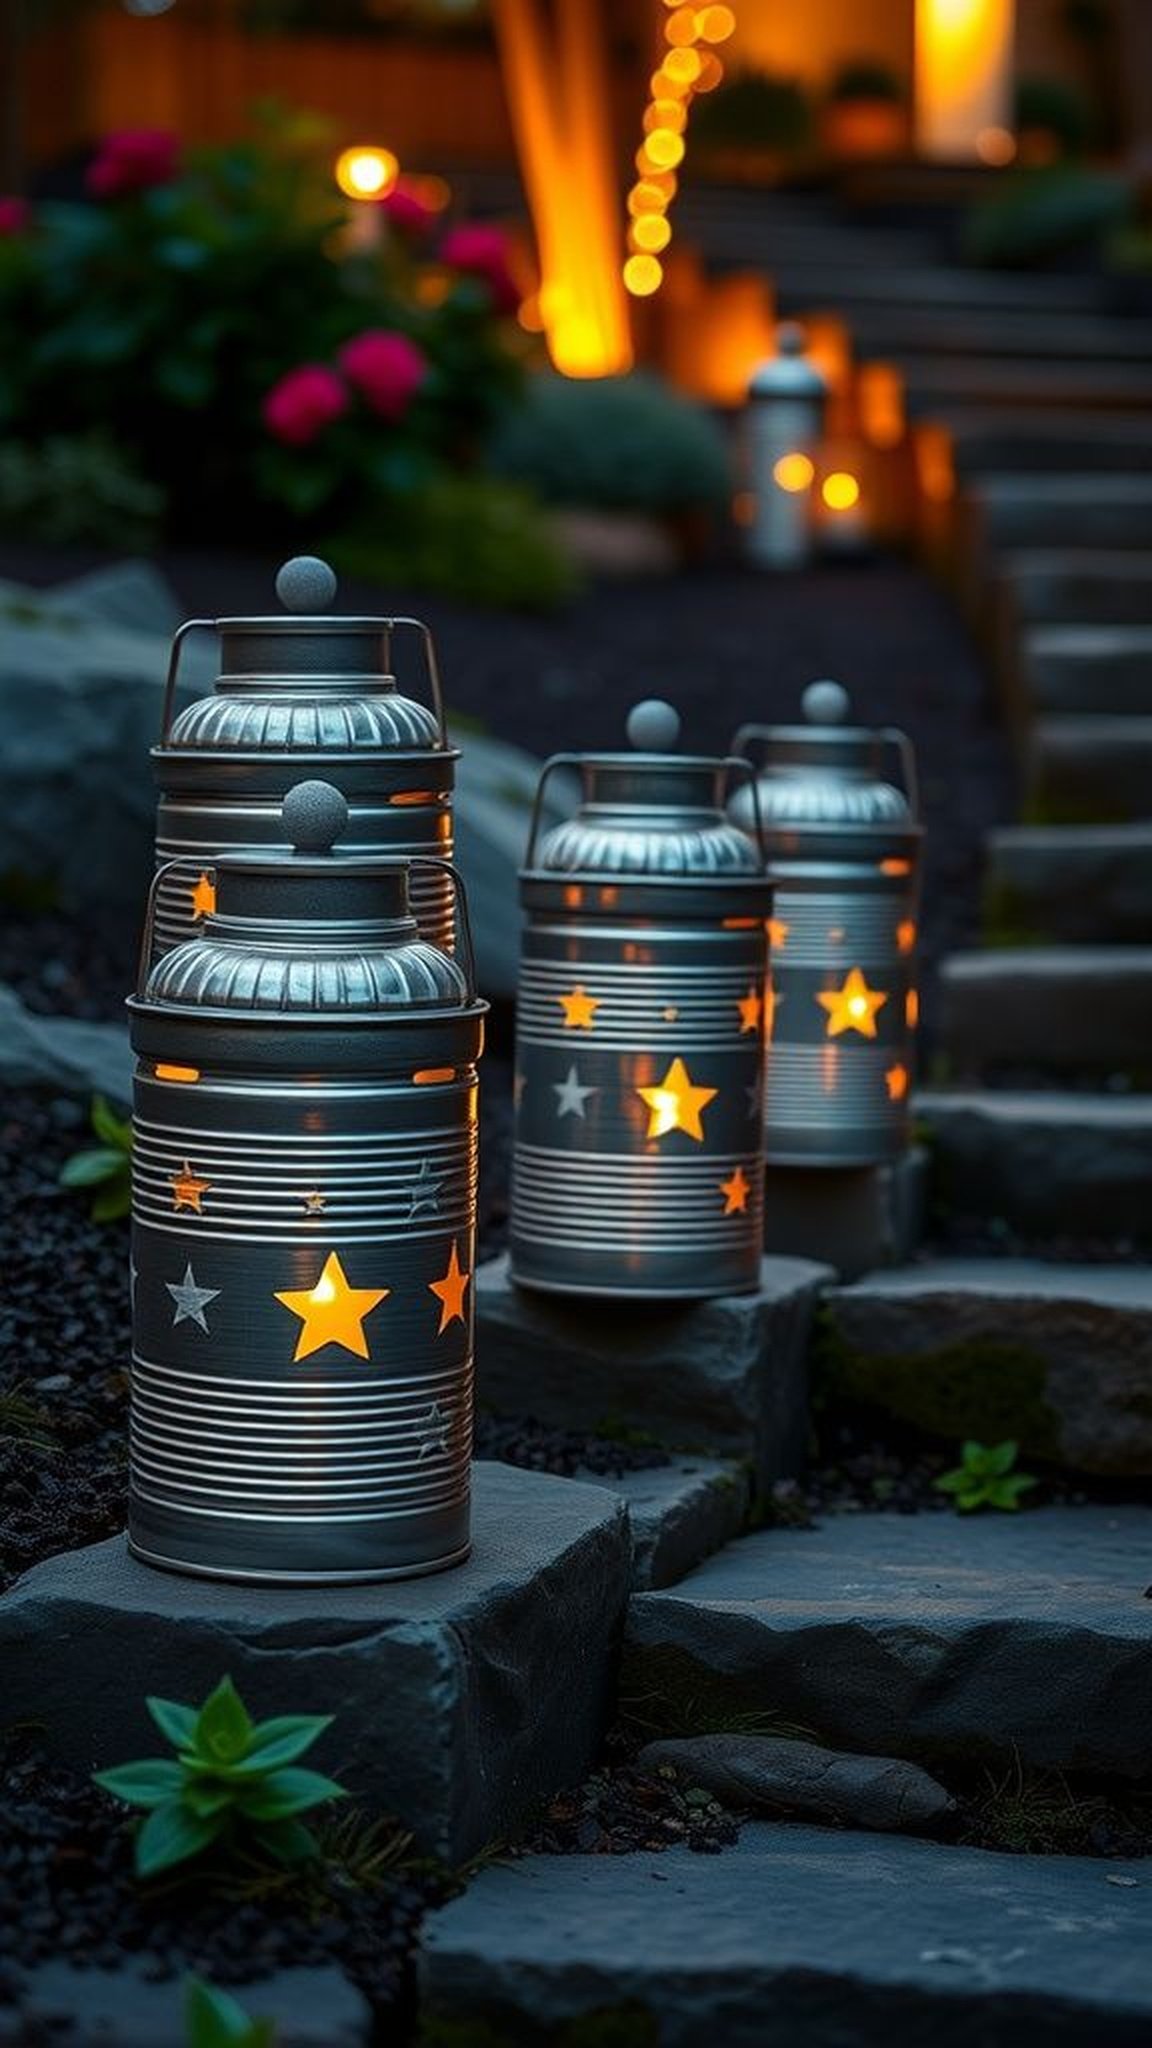
Punched tin can lanterns make a firm clinking sound when moved and the metal edges glint in sun before a candle warms them. The constellation of tiny holes scatters pinpricks of light across a surface, creating a starfield that feels both whimsical and grounded.
The slightly metallic scent of warmed tin becomes part of the evening air, and when lined along steps they give safe, pretty guidance. I often picture a quiet row of them leading guests from driveway to porch, each one throwing a little private spotlight.
Steps
- Clean and prepare tin cans, then punch star shapes into the sides with a nail and hammer, spacing holes evenly.
- Place a small candle or LED light inside each can to illuminate the punched patterns.
- Arrange the lanterns along walkways or steps so the star patterns cast decorative light.
Patriotic cupcake toppers that taste like nostalgia

Cupcake toppers feel like tiny flags in miniature parties, and they prompt a small smile before the first bite. The paper and toothpick combination makes a faint papery snap as they are moved, and the sight of red white and blue on frosting reads festive without fuss.
When nestled into a swirl of buttercream, the topper becomes a herald for a small indulgence. I find people reach for them and then pause to photograph the plate, as if the toppers gently mark the moment as worth remembering.
Steps
- Craft small paper flag toppers with decorative edges and affix them to short toothpicks.
- Press each topper gently into the center of frosted cupcakes so they stand upright.
- Arrange the cupcakes on a tiered stand for an inviting display.
Clothespin photo display with string and tiny flags
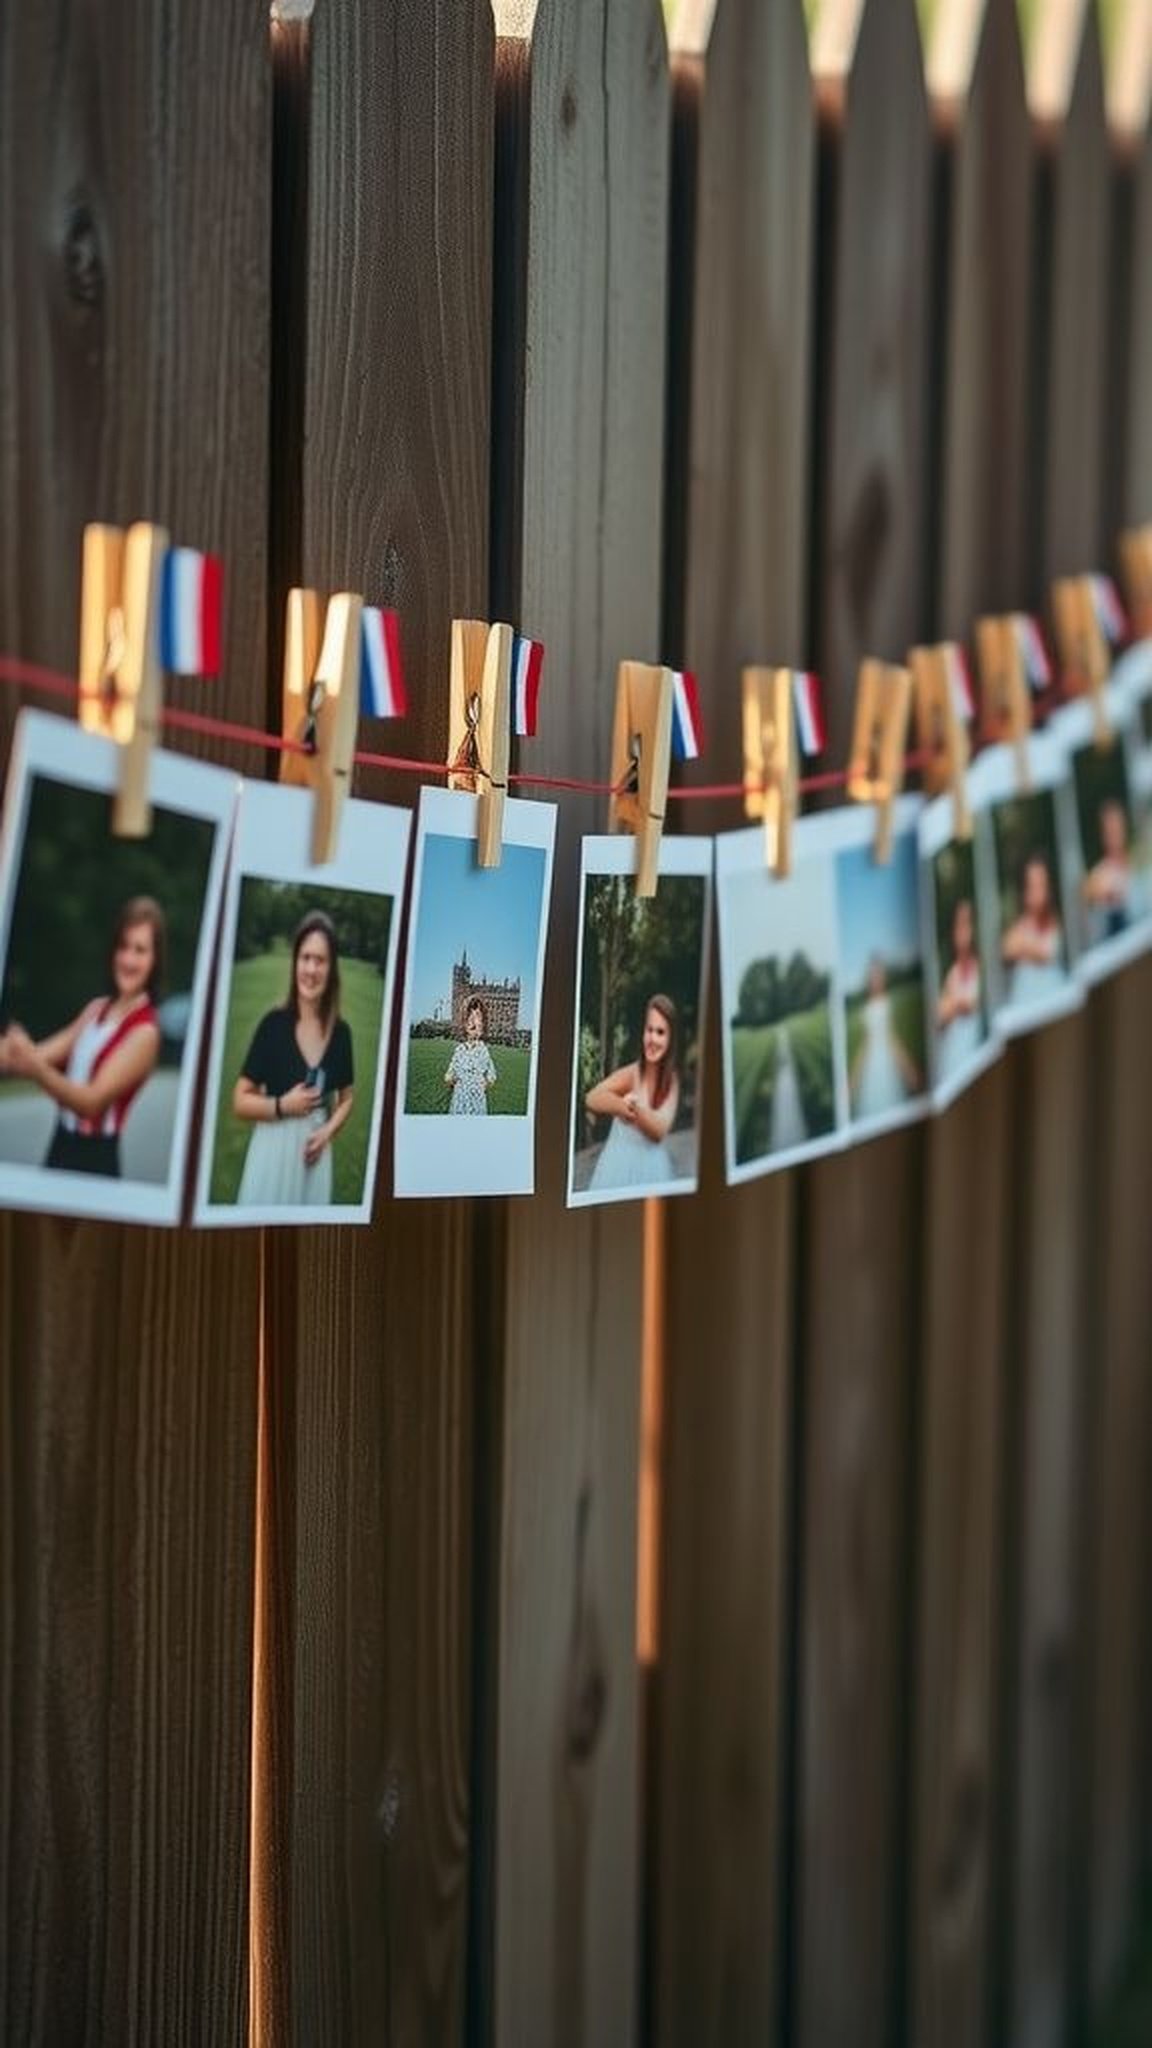
Clothespins clipped along a string carry photos like pages on a timeline, and the small flags tucked between them add punctuation. The clipped edges leave a whisper of wood scent and the little spring gives a tactile satisfying snap when pinched.
Hung at a comfortable eye level, the display invites quiet browsing and bumps conversations into memory lanes. I often find guests swapping stories by the string, fingers tracing shared faces and laughing at candid shots as if the display has tucked them into a gentle group hug.
Steps
- Stretch a length of twine across a wall or between posts and secure it tautly.
- Attach printed photos with clothespins and intersperse small paper flags for color and rhythm.
- Encourage guests to add instant photos during the event for a live-evolving display.
Floating centerpiece bowls with berries and petals

Glass bowls of water filled with floating berries and petals look cool to the eye and give off a faint fruity scent. The smooth water surface mirrors the sky and the floating elements bob gently when the table trembles.
Light refracts through the bowl and splinters into quiet reflections that dance across nearby surfaces. I like the understated movement; it feels elegant without fuss.
Guests often lean in to watch a drifting petal or to fish a berry for a small, refreshing taste that feels almost like a shared secret.
Steps
- Fill shallow glass bowls with clean water and float seasonal berries and flower petals on the surface.
- Position bowls at intervals along the table so each setting sees a calm reflective element.
- Replenish the water and floating pieces as needed to maintain freshness during the event.
Washi tape wrapped votives for quick color pops

Washi tape wrapped around glass votives brings immediate color and pattern with a glossy whisper when rubbed. The tape sits smoothly on glass and the lanternlike votive glow warms the taped pattern from within.
Placed in clusters, they harmonize with varied centerpieces and add tidy spots of contrast across a table. I appreciate their tidy look because they feel like small design choices that carry a quiet confidence.
The taped edges sometimes lift after long hours, which reads like a little end-of-night proof of use.
Steps
- Wrap strips of washi tape around small glass votive holders, overlapping patterns as desired.
- Place tea lights or battery candles inside to illuminate the taped patterns.
- Group several votives together to create a coordinated burst of color across the table.