I always end up drawn to heart shaped wreaths whenever seasons change. There’s something comforting about a rounded heart hanging on a door that blends nostalgia with small bursts of color.
I remember making my first heart shaped wreath on a rainy afternoon, fingers sticky with sap and ribbon, while a slow jazz record hummed in the background.
Over the years I’ve mixed dried citrus, soft moss, burlap, and tiny LED lights into heart shaped wreath designs that felt personal and warm. These ideas grew from casual experiments and a few happy accidents that turned into favorites.
Rustic grapevine heart with dried lavender sprigs
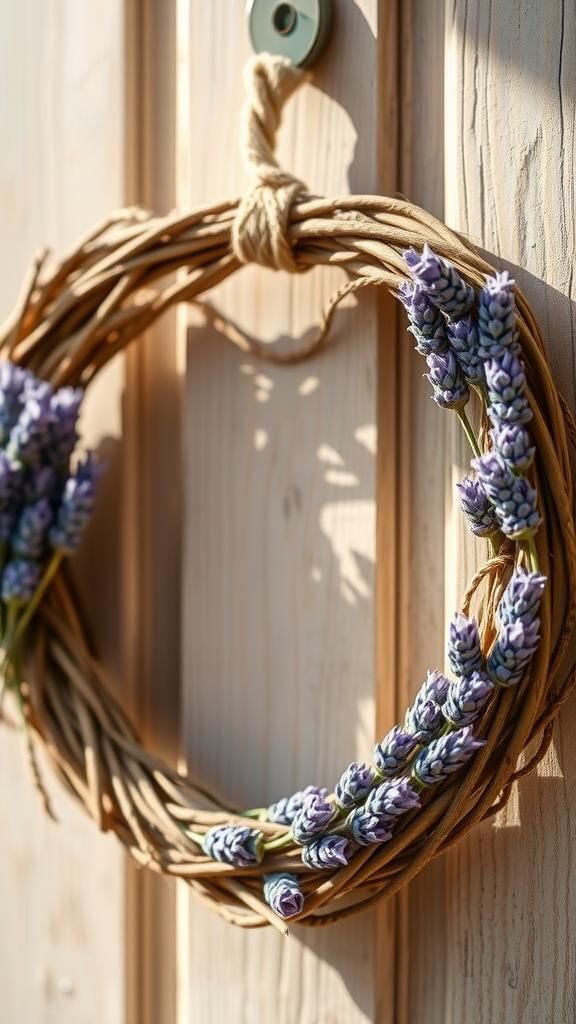
I love the earthy fragrance that drifts from a grapevine heart decked in dried lavender. The twisted vines offer a tactile base that feels almost like pottery to the touch, warm and slightly rough.
Lavender stems sit like tiny purple flags, giving a muted color that softens sunlight. The whole piece carries a faint woody scent and a simple country charm.
When hung against a weathered door, the silhouette reads as gentle and unpretentious, a piece that invites a slow, appreciative glance.
Steps
- Gather a grapevine heart base, bundles of dried lavender, floral wire, and scissors.
- Position small lavender bundles across one side of the heart and wrap thin wire around stems and vine to hold them snugly.
- Add additional bundles to create a layered look and fasten ends of wire securely behind the base.
- Tuck stray stems into gaps for a fuller appearance and trim any overly long pieces.
- Create a hanging loop with extra wire and straighten any visible ticks of wire.
Soft moss heart with tiny white blossoms

A moss heart feels like holding a tiny patch of forest. The green is velvety and cool under fingertips, with little irregularities that catch light in surprising ways.
Scattered through the moss, tiny white blossoms sit like freckles, lending a delicate contrast and a whisper of spring. The scent is faintly earthy; rain-on-soil memory.
Hung indoors, the piece brightens a room without shouting, offering a quiet, contemplative presence. It’s one of those decorations that invites people to come closer and inspect the texture.
Steps
- Collect a foam heart form, preserved sheet moss, small faux white blossoms, floral pins, and scissors.
- Press moss onto the foam surface and secure edges with floral pins at intervals.
- Insert small blossoms into the moss at scattered points, anchoring stems into the foam so blooms sit flush with the surface.
- Add a few layers of moss to cover any exposed foam and adjust pins until surface looks seamless.
- Attach a loop of ribbon or wire to the back for hanging and fluff moss for final texture.
Burlap and lace heart for vintage doorways

Combining burlap with lace feels like pairing two old friends: burlap brings a coarse, homespun look while lace offers gentle intricacy. The contrast between rough weave and delicate patterns gives the heart a layered personality that looks at home on a vintage door or over a mantle.
The burlap edges fray slightly, adding character, while the lace seems to float above, catching late afternoon light. Handmade stitches and small pin details peek out, reminding me of afternoons spent with sewing projects and soft conversations.
Steps
- Gather a heart-shaped base, strips of burlap, lengths of lace trim, needle and thread, and fabric glue alternative.
- Layer burlap strips across the base with slight overlaps and secure by stitching along the centerline.
- Lay lace trim over burlap in chosen patterns and hand-stitch through both layers to create gentle gathers and texture.
- Tuck raw edges under and add small decorative pins for visual interest.
- Affix a simple twine loop to the back for hanging and smooth any creases.
Citrus slice heart with dried orange accents
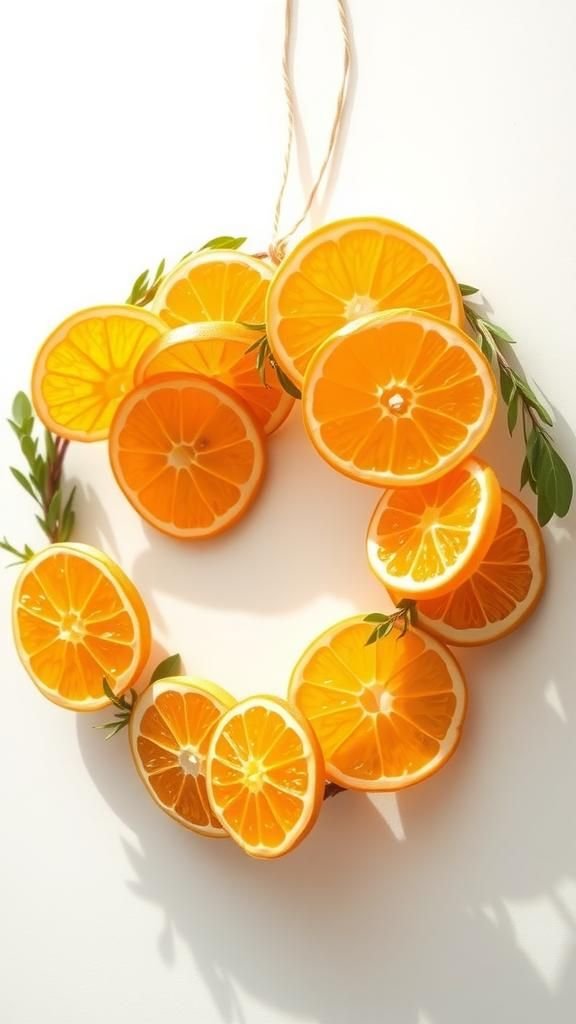
There’s a burst of color in a heart ornamented with dried citrus slices. The translucent orange disks catch sunlight like tiny stained-glass windows, and their citrusy scent lingers faintly in the air.
When grouped along the curve of a heart, the slices create a sunlit mosaic that feels joyful and fresh. The rind’s textured edge adds a tactile contrast to smoother elements, and small sprigs of greenery threaded between slices make the palette feel grounded and lively, perfect for kitchens or summer entryways.
Steps
- Prepare dried orange slices and a heart-shaped base made from wire or rattan and gather thin floral wire and sprigs of greenery.
- Lay orange slices along the heart contour and fasten stems or edges with delicate wire loops secured behind the base.
- Insert small greenery sprigs between slices, tucking stems under loops to keep everything snug.
- Fill any sparse spots with additional slices or tiny seed pods for texture.
- Bend the wire loops flat against the back and add a hanging loop at the top.
Felt hearts in ombré shades strung together
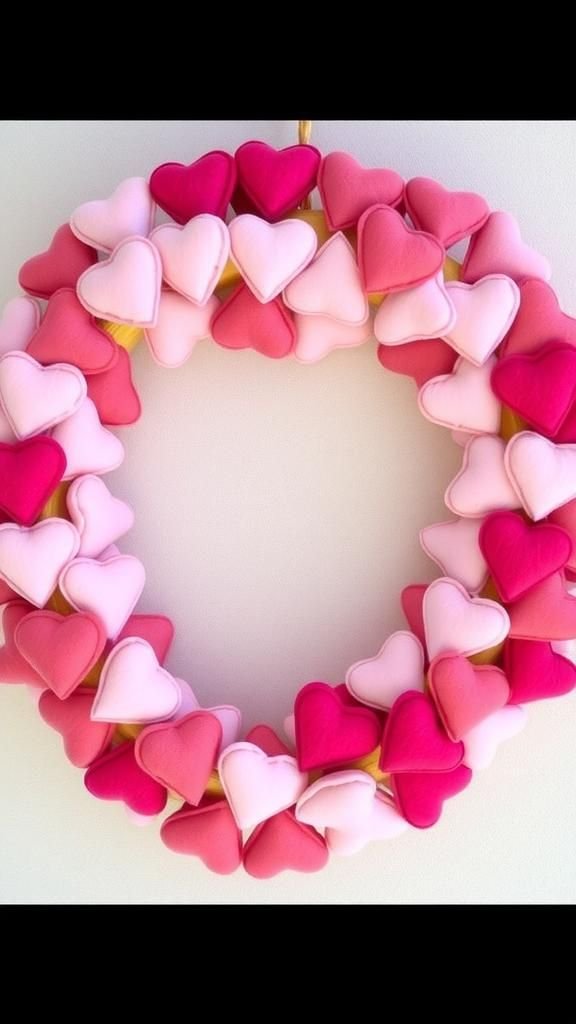
A garland of felt hearts arranged in ombré tones feels cozy and playful. The soft fibers give a gentle matte finish, and the gradient from light to dark draws the eye along the curve of the heart.
Each little heart has a squishy, fabric weight that creates a pleasant rhythm when the wreath moves. Close up, the seams and tiny stitches read as handcrafted charm.
Hung in a nursery or near a reading nook, the piece radiates warmth and a touch of whimsy without being overly saccharine.
Steps
- Cut felt hearts in graduated colors and prepare a heart base to support the garland.
- Thread hearts onto a length of thin twine or thin ribbon, spacing them evenly along the string.
- Arrange the strung hearts across the heart-shaped frame, draping the garland so it follows the contour.
- Secure ends of the twine to the frame with small knots tucked to the back.
- Fluff felt surfaces and adjust spacing until the gradient reads smoothly.
Minimalist twig heart with single bloom accent

When the design is pared back to twigs and a single bloom, the heart reads as quiet and elegant. The twigs create a rustic lattice with small gaps that let the background show through, while a singular bloom anchors one side like a punctuation mark.
The wood has a dry, crisp crackle to the touch, and the bloom brings a soft petal contrast. The overall impression is contemplative, like a haiku translated into decor, and it pairs well with simple interiors where every object gets noticed.
Steps
- Gather flexible twigs, a heart-shaped wire frame, a single artificial or dried bloom, and thin floral wire.
- Weave twigs across the frame to form an open lattice and secure intersections with thin wire wrapped behind the frame.
- Position the bloom where it complements negative space and anchor its stem within the twig lattice with wire.
- Trim any extraneous twig ends to refine the silhouette.
- Attach a discreet hanging loop and adjust twig placement for balance.
Seashell heart for coastal cottage vibes
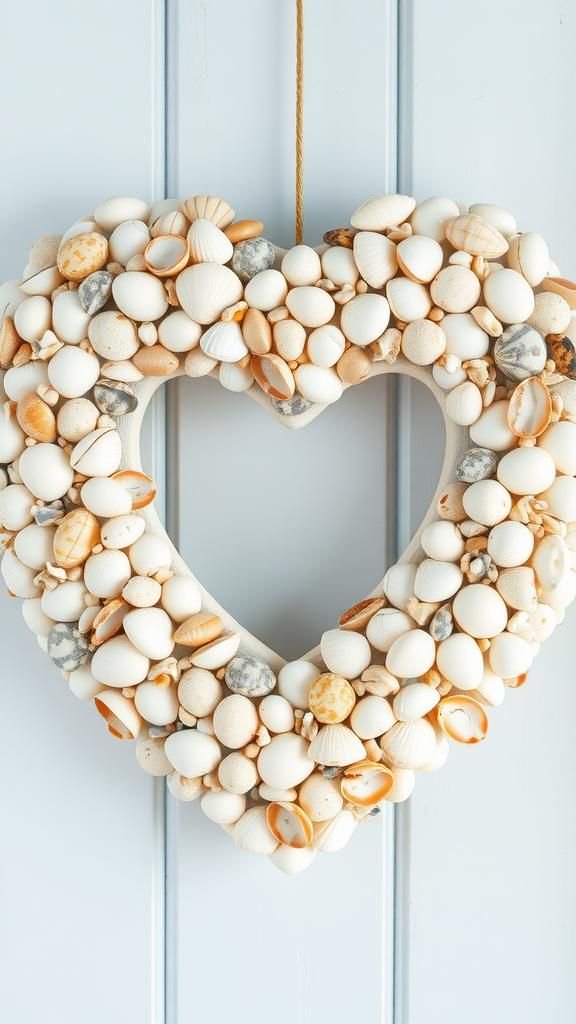
A heart sprinkled with seashells conjures shoreline afternoons: the faint grit underfoot, the mix of sun-warmed beige and pearly white. Tiny shells sit with edges smoothed by tides, each one different in tone and curve.
The piece has a faintly salty memory and a cool heft when lifted. Lined against a pale blue wall, the shells take on a sculptural role, evoking sea breeze and slow waves.
It brings a relaxed, collected feel, like a small cabinet of curiosities hung up where guests can admire it.
Steps
- Select a heart base, an assortment of cleaned seashells, and a clear adhesive substitute safe for crafts.
- Plan shell placement across the heart surface with larger shells as anchors and smaller ones filling gaps.
- Secure shells starting from the center outward, pressing each shell until it holds firmly.
- Fill in remaining spaces with tiny shells and bits of sand or small pebbles for texture.
- Allow adhesive to set fully before adding a hanging loop or ribbon.
Paper rosette heart with scalloped edges
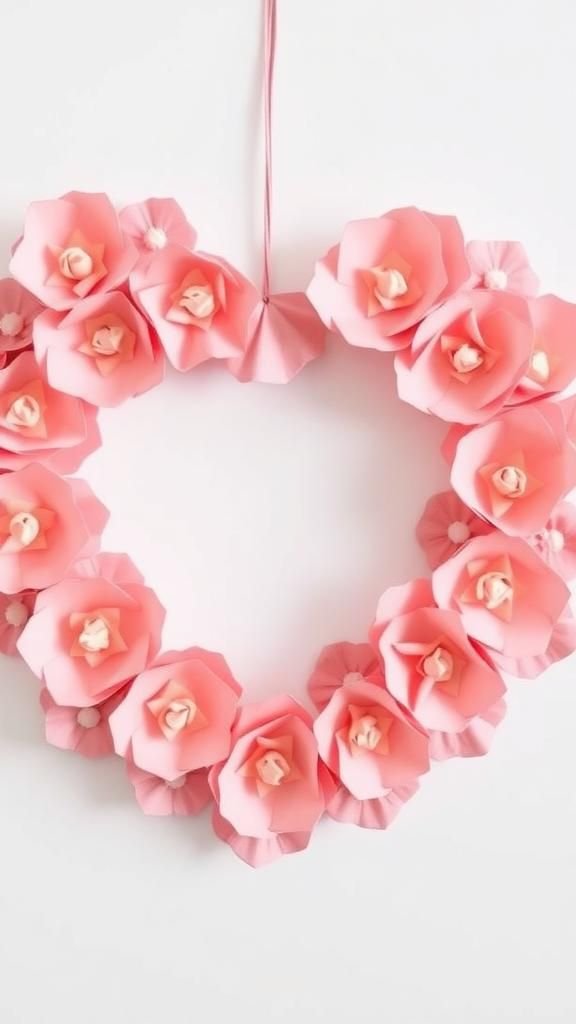
Paper rosettes create a playful, textured heart that feels both delicate and crafted. Each rosette folds into tiny ridges that catch light at the peaks and shadow in the troughs, producing a rhythmic pattern across the heart.
When layered, the rosettes give a lush, fabric-like density while remaining lightweight. The paper rustles faintly if moved, and edges sometimes show a hand-torn softness.
Colors can be muted or bold, but even a single tone reads as cheerful and decorative, perfect for celebratory moments or window displays.
Steps
- Prepare paper strips in chosen colors and a heart-shaped backing board.
- Fold and pleat strips into rosettes by spiraling and securing each center with a dab of adhesive alternative.
- Arrange rosettes tightly on the backing, starting from one side and layering until the surface is covered.
- Fill any visible gaps with smaller rosettes or curled paper confetti.
- Attach a hanging ribbon to the back and smooth rosette peaks for uniformity.
Vintage brooch heart with metallic sparkle
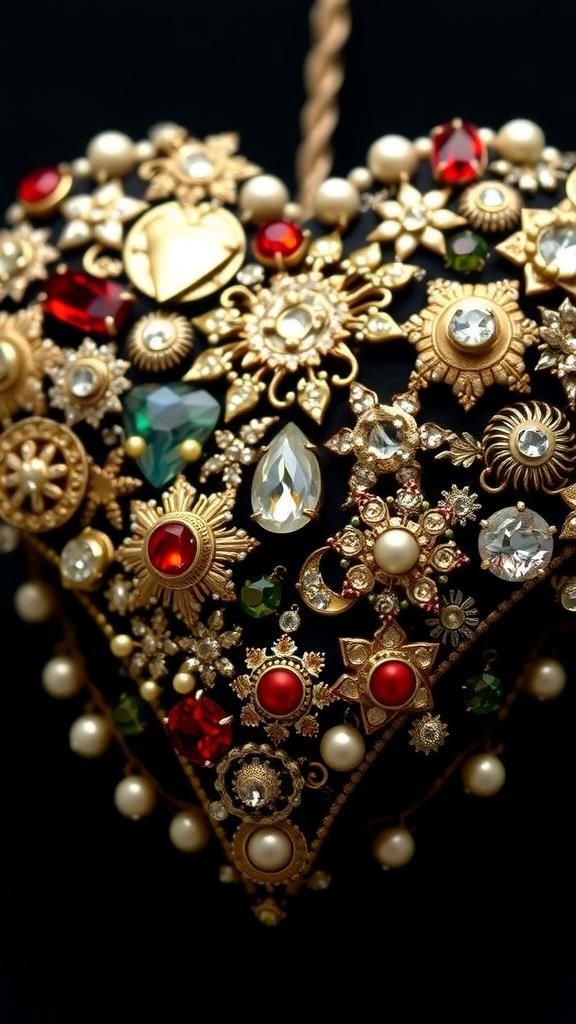
A heart studded with vintage brooches feels like a jewelry box opened and spread into a shape. Metal tones, rhinestones, and enamel bring flashes of light as the piece catches sun.
Weighty and tactile, each brooch carries a small history—tiny clasps and filigree that invite closer inspection. The arrangement feels like a collage of personalities, some bold and ornate, others with simple charm.
Hung where light can play on its surfaces, the brooch heart becomes a shimmer that shifts with viewpoint and time of day.
Steps
- Collect an assortment of vintage brooches and a sturdy heart backing, plus heavy-duty pins or small loops.
- Arrange brooches across the heart surface to balance metallic tones and shapes, leaving minimal gaps.
- Fasten each brooch by passing its pin through the backing and securing on the reverse with small washers.
- Add smaller brooches or costume jewelry to fill tight spaces and enhance sparkle.
- Attach a secure hanging bracket to the back and test the balance before display.
Yarn-wrapped heart with pom pom garland
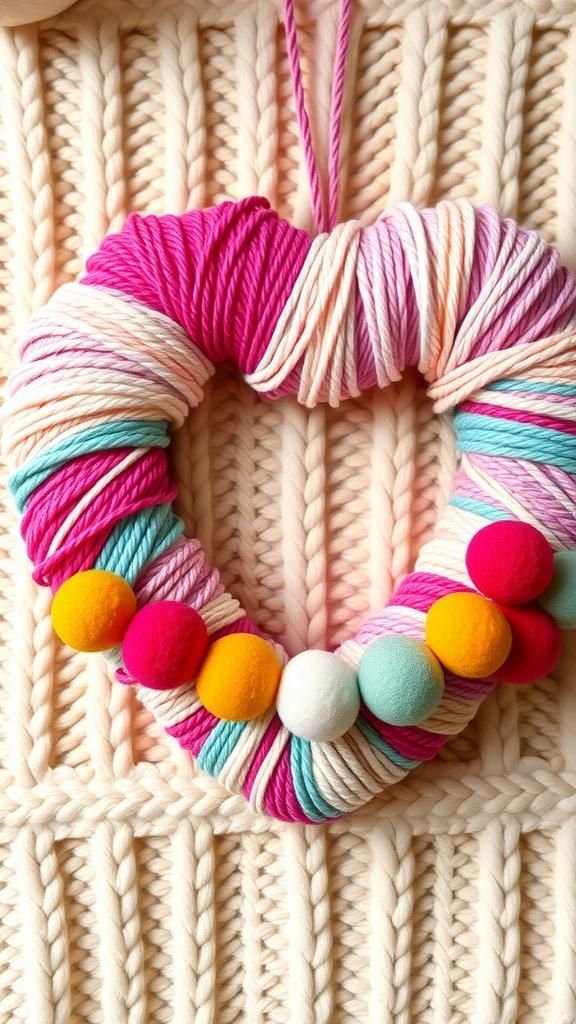
A yarn-wrapped heart has a snug, handcrafted feel, like a sweater turned into décor. The fibers create soft ridges along the heart curve, and a garland of pom poms bounces lightly, adding playful movement.
The colors feel cozy and approachable, often warm pastels or jewel tones that invite touch. The overall texture is soft and slightly fuzzy, catching stray threads in the air.
It exudes a homemade warmth that pairs well with book-lined rooms or breakfast nooks where comfort matters most.
Steps
- Choose a foam or wire heart base and several skeins of yarn in coordinating colors.
- Wind yarn tightly around the base until the surface is fully covered, changing colors where desired and tucking ends behind the wrapped layers.
- String pom poms on thin cord and drape the garland across the heart, anchoring ends behind the base.
- Trim any loose fuzz for a neat finish and secure the cord so pom poms rest evenly.
- Add a hanging loop made from yarn and adjust pom pom spacing for visual balance.
Pressed flower mosaic heart with glass sheen

Pressed flowers set into a heart form create a fragile, museum-like beauty. Petals flatten into translucent planes that shimmer slightly under glass or resin, and veins show tiny maps of life.
The colors are muted and elegantly aged, like preserved moments from a garden. The surface has a cool smoothness that contrasts with the plant material’s delicate structure.
When light moves across it, the flowers glow faintly, giving the piece a contemplative presence that feels both botanical and tender.
Steps
- Arrange pressed flowers on a heart-shaped backing and prepare a clear resin or glass panel for encapsulation.
- Place flowers carefully to create a balanced mosaic, leaving small gaps for resin flow.
- Pour a thin layer of resin over the surface, allow it to level, and remove any trapped bubbles with a gentle torch or heat source.
- Add a second resin layer if needed for a smooth finish and let cure completely.
- Attach hanging hardware to the cured back and polish edges for a refined look.
Holiday pinecone heart with cinnamon stick accents
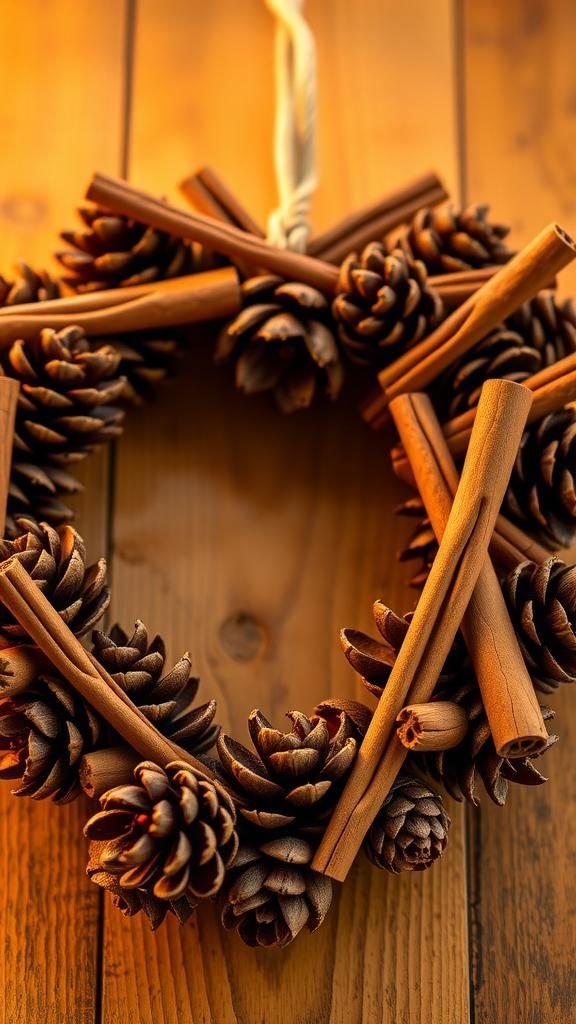
A heart filled with pinecones and cinnamon sticks brings a warm, spiced atmosphere that feels like holiday evenings. The pinecones’ scales offer a rugged texture and an earthy brown palette, while cinnamon sticks add linear contrast and a spicy aroma when close.
The arrangement reads as rustic yet festive, with a satisfying crunch under the fingertips. Hung near a kitchen, the wreath seems to borrow warmth from oven heat and candlelight, creating a nostalgic tableau that hints at shared gatherings and slow, contented conversations.
Steps
- Gather a heart-shaped foam or wire base, assorted pinecones, cinnamon sticks, and floral wire.
- Position larger pinecones as anchors across the heart and secure them by wrapping wire around bases and frame.
- Nest cinnamon sticks into gaps between cones, fastening them discreetly with wire or small nails.
- Fill remaining spaces with smaller cones and sprigs of evergreen to add depth.
- Finish with a hidden loop for hanging and check that elements sit firmly.
Button collage heart with colorful mismatched charm
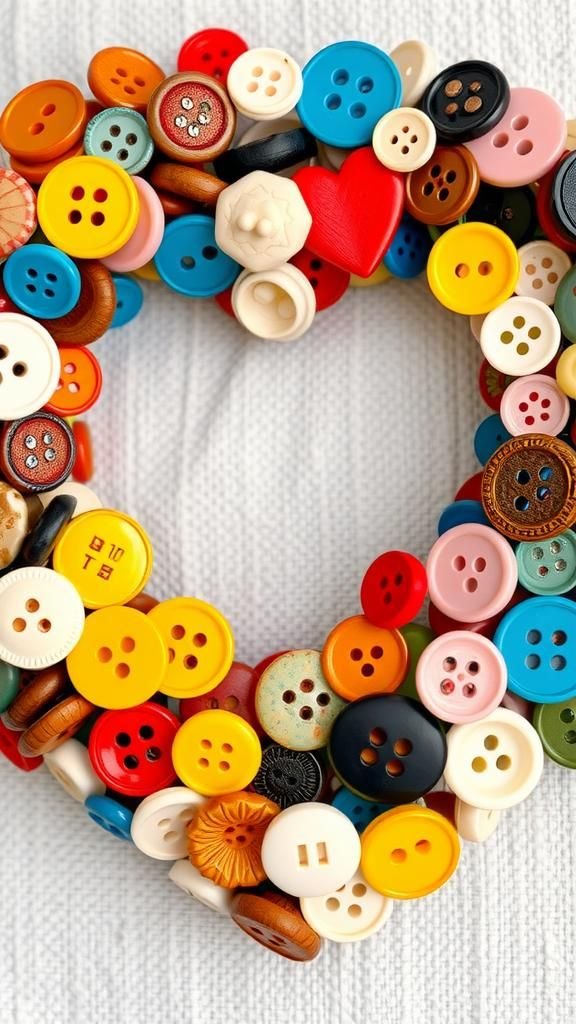
A button-covered heart feels playful and nostalgic, as if rummaging through a grandma’s sewing box produced an instant artwork. Buttons bring a surprising range of tiny surfaces—matte pastels, glossy mother-of-pearl, and a few metallic glints.
The texture is tactile and slightly bumpy, encouraging fingers to trace the layout. When arranged in casual clusters, the buttons form little constellations of color and shape that cheer up a plain wall.
This piece reads as warm and personal, full of small histories bound into a single silhouette.
Steps
- Collect an eclectic mix of buttons and a sturdy heart backing board.
- Sort buttons by size and color to visualize clusters and pattern flow.
- Affix buttons starting from one area and working outward to create balanced coverage, filling gaps with smaller buttons.
- Press each button firmly into place and allow adhesive to set.
- Attach a hanging device to the back and inspect for any loose buttons.
Succulent-packed heart for long-lasting greenery

A heart planted with succulents carries a quiet resilience. The rosettes and stacked leaves form a sculptural surface that feels alive yet unpretentious.
Succulent skins range from waxy jade to dusty blue, creating a cool palette that changes subtly with light. The piece has a gentle weight and a compact presence, and the tactile firmness of succulents contrasts with the soft soil hidden beneath.
It reads as a living ornament, patient and low-maintenance, lending a modern botanical note to any room it inhabits.
Steps
- Select shallow heart planter or a foam heart lined with coconut fiber and gather a variety of small succulent cuttings.
- Arrange succulents across the heart surface, pressing roots or cut ends into the fiber so each plant sits securely.
- Fill gaps with smaller succulent offsets or pebbles to stabilize placements.
- Mist lightly after planting and allow the arrangement to settle.
- Place in bright, indirect light and water sparingly as succulents establish.
Patchwork fabric heart with frayed edges for softness
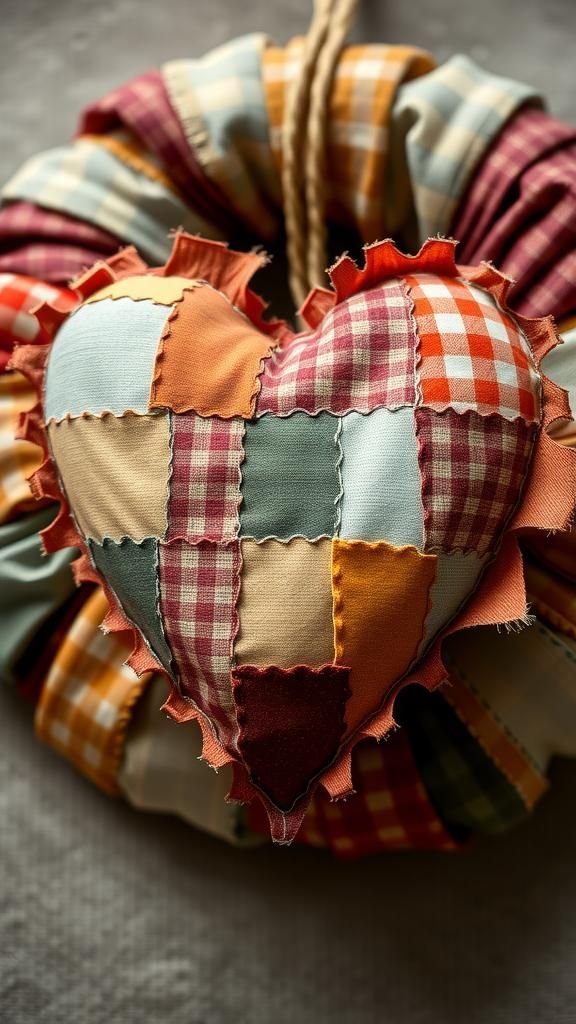
A patchwork heart brings together scraps and memories into a single cozy shape. Fabrics with tiny florals, stripes, and checks nestle next to each other, stitches visible like neat little records of the maker’s hand.
The surface is soft and slightly worn at the edges, a texture that invites a gentle squeeze. The overall effect is homey and comforting, as if the heart had been stitched during a rainy afternoon while tea steamed nearby.
It carries a sense of thrift and thoughtful reuse.
Steps
- Cut fabric scraps into heart patches and prepare a heart-shaped cotton or foam base.
- Layer patches across the base with intentional overlaps and sew edges together by hand or machine to secure them.
- Add a backing fabric to cover raw seams and stitch around the perimeter for a finished look.
- Lightly stuff if desired to create a plush dimension and close the final seam neatly.
- Add a fabric loop at the top for hanging and fluff patches to create a lived-in look.
Ribbon-bow heart in pastel celebration palette
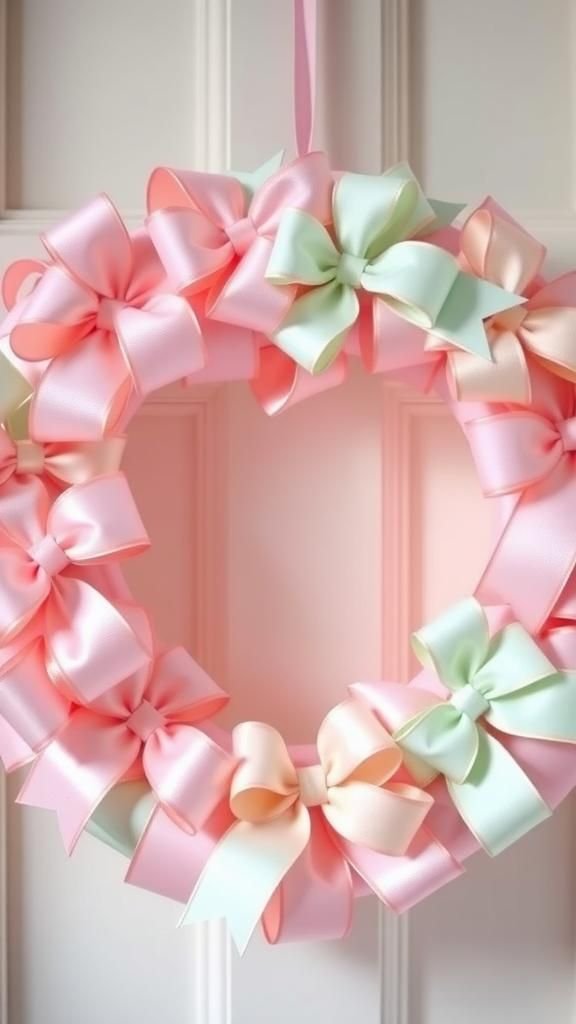
A heart built from ribbons and bows reads as joyful and fluttery. Satin, grosgrain, and organza ribbons create a mix of sheen and matte that plays with light.
Bows of different sizes create a layered landscape of loops and tails, and the whole piece has a soft, airy silhouette. The tactile combination of slippery satin and crisp grosgrain invites fingers to linger.
Hung where daylight filters through, ribbons pick up subtle highlights and cast delicate shadows, making the heart feel almost animated with light.
Steps
- Choose an array of ribbons in coordinating pastel shades and a heart-shaped base.
- Form bows of varying sizes and secure centers with thin wire or thread.
- Arrange bows tightly across the base, fastening centers onto the surface to create a plush covering.
- Tuck ribbon tails to hide any backing and layer smaller bows into gaps.
- Attach a ribbon loop for hanging and adjust bow faces for the best silhouette.
Seed packet heart for gardeners and green thumbs

A heart assembled from seed packets feels like a promise tucked into paper. The colorful illustrations and typefaces on each packet form a graphic collage full of vintage charm.
The paper has a slight papery rustle and a matte finish that soaks up light differently across the surface. The overall piece reads as hopeful and practical, perfect for a sunroom or garden shed.
It carries a forward-looking optimism, a reminder of seasons to come and small rituals like planting and waiting.
Steps
- Collect assorted seed packets and a rigid heart backing board.
- Arrange packets across the heart to create an appealing collage, alternating colors and illustrations for balance.
- Adhere packets flat to the backing, smoothing creases and overlapping edges where needed.
- Add a thin clear coat over the surface if protection is desired and allow to dry.
- Attach a hanging bracket to the back and display where light enhances packet colors.
Plaid ribbon heart with cozy flannel undertones
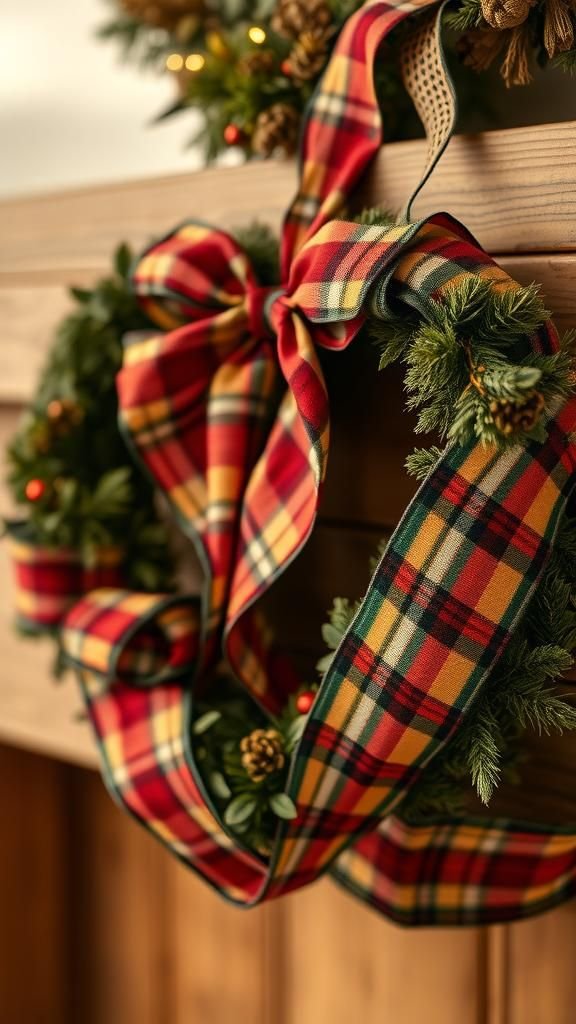
Plaid ribbons layered across a heart evoke chilly evenings and layered sweaters. The pattern brings a visual warmth, with intersecting lines and a color story that reads as familiar and snug.
The ribbons’ woven fibers offer a subtle textural richness, and the overall heart has a textile depth that feels like a small embrace. It pairs well with woodsy decor and soft incandescent lamp light, creating corners of comfort where conversation or reading can linger without hurry.
Steps
- Select plaid ribbons in coordinating colors and a sturdy heart frame.
- Weave ribbons across the frame in overlapping bands, securing ends discreetly behind the base.
- Layer additional ribbon loops and knots to add volume and pattern variation.
- Tuck raw edges under and smooth ribbon faces to prevent twisting.
- Add a hanging ribbon and situate the heart where its pattern complements nearby textiles.
Sequin heart that catches light like tiny mirrors

A sequin-covered heart becomes a small, glittering presence that responds to motion. Each sequin reflects light differently, creating a lively surface that shimmers subtly as angles change.
The texture is smooth yet slightly rippled where sequins overlap, and the piece has a playful glamour without feeling overdone. It adds a festive note near party spaces or rooms that enjoy a bit of sparkle.
Even without strong direct light, the sequins pick up ambient reflections and lend a lively, shimmering energy to the space.
Steps
- Prepare a heart-shaped backing and gather sequins in desired colors with matching thread.
- Sew sequins in rows across the base, overlapping slightly to create a continuous shimmering surface.
- Continue sewing until the entire heart area is covered and check for even coverage.
- Fill any sparse spots with additional sequins for consistency.
- Attach a hanging loop to the back and smooth sequin alignment for final gleam.
Paper cut silhouette heart with layered shadows
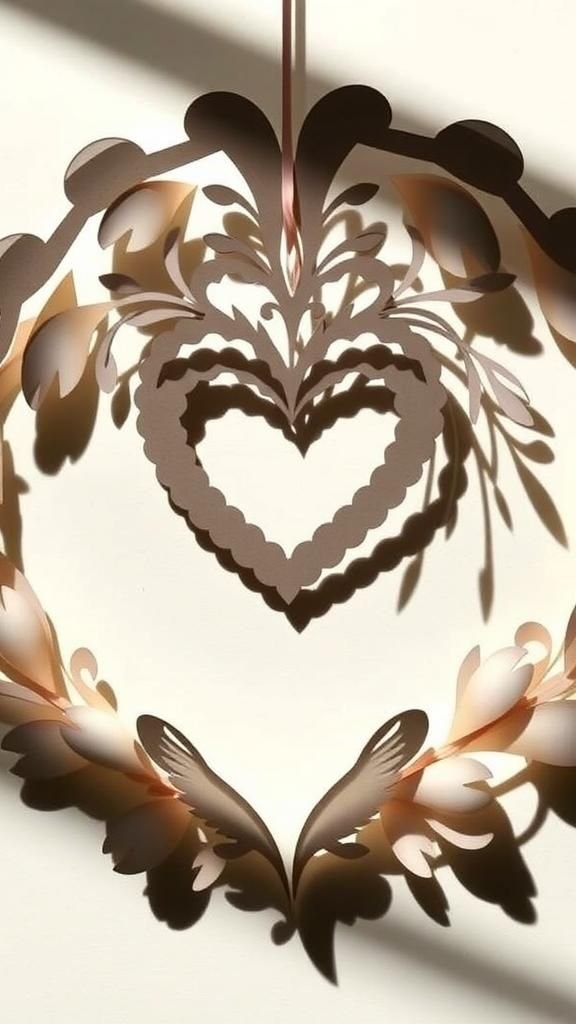
Delicate paper cut silhouettes layered into a heart create an interplay of shadow and line. Thin paper edges cast tiny shadows that shift with light, giving the piece a living quality.
The cuts can be botanical, geometric, or whimsical, and the repeated motifs build depth as layers peek through. The surface holds a refined fragility; it invites quiet attention and often inspires closer inspection.
Placed in a narrow ledge with directional light, the heart becomes almost kinetic, the layered shadows performing a subtle choreography throughout the day.
Steps
- Design and cut paper silhouettes in complementary patterns and prepare a shallow heart frame to hold layers.
- Stack cut pieces with small gaps between layers to create depth and glue at minimal points for stability.
- Allow small shadow gaps to remain so light can pass and emphasize the layered effect.
- Trim any uneven edges for a crisp outline and add a neutral backing if desired.
- Mount the heart where directional light enhances shadows and delicate cuts.
Leather strip heart with rugged, warm tones
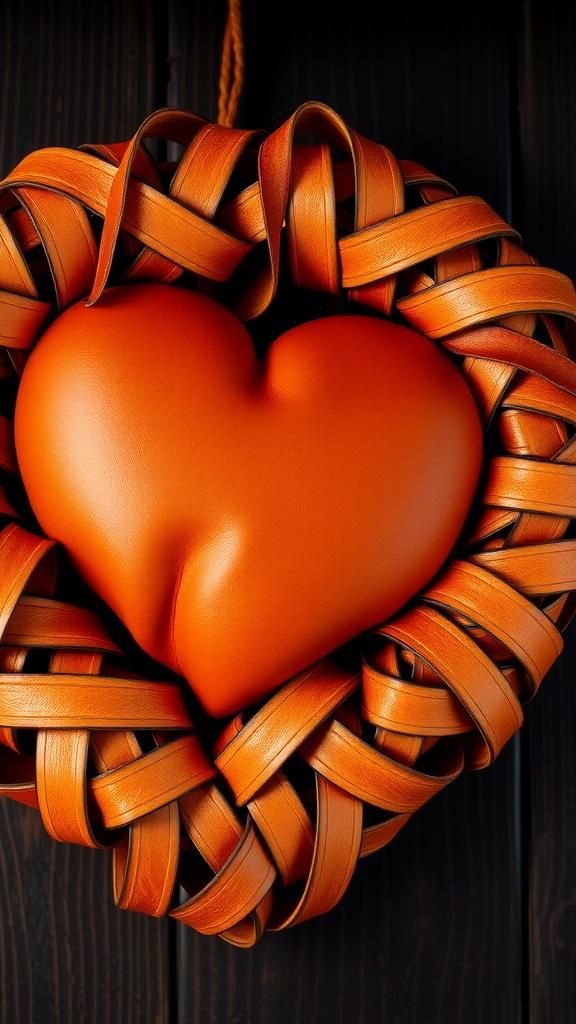
Strips of leather woven across a heart form bring a sturdy, rustic elegance. The grain and patina of leather offer a tactile richness, and seams show handwork that reads as crafted rather than manufactured.
The colors range from caramel to deep chestnut, each shade adding weight and warmth. The surface has a quiet durability; it seems like something that will age attractively over time.
When hung in a study or entryway, the leather heart adds a masculine, grounded accent that pairs easily with wood and metal elements.
Steps
- Cut leather strips to consistent widths and prepare a rigid heart frame to support weaving.
- Weave strips over and under the frame to create a tight basket-like surface and secure ends on the reverse with strong thread or small rivets.
- Trim any excess and tuck raw edges to the back for a clean front view.
- Add a leather loop or metal hanger to the back for mounting.
- Condition the leather lightly to enhance patina and display in a warm-toned space.