I grew up looking forward to the lantern-making afternoons that surfaced around Lunar New Year. The table would be strewn with red paper, scissors, and a slow warm light as everyone talked and lingered; those Lunar New Year Paper Lantern Crafts mixed quiet focus with a feeling of celebration that stuck with me.
Even now, working through Lunar New Year Paper Lantern Crafts feels like visiting an old friend.
The scent of rice paper, the soft transparency when a bulb glows inside, and the rustle of tassels all bring back small moments that are both cozy and bright.
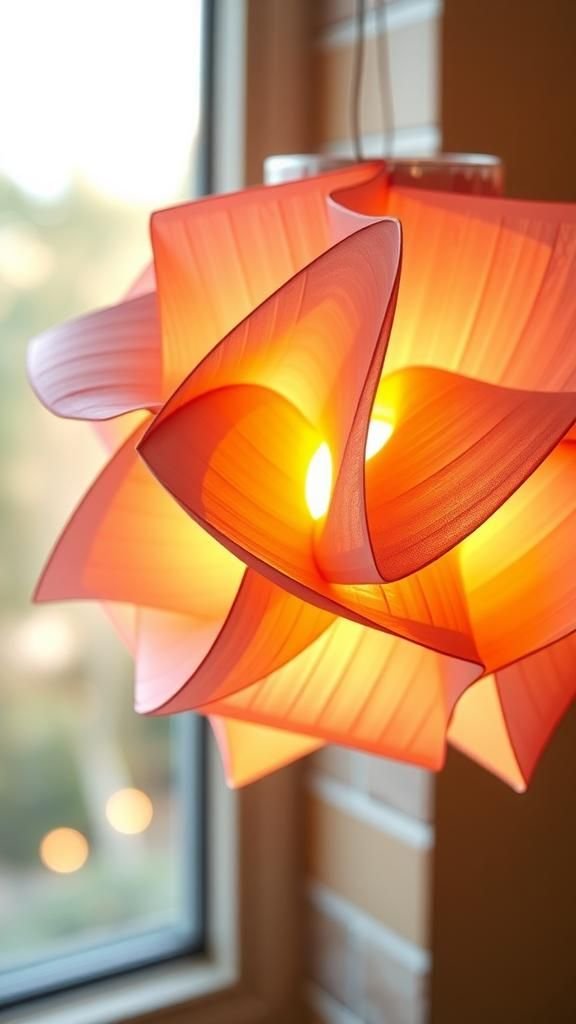
Hand-painted silk globe lantern with warm glow

I remember the slow pleasure of painting soft shapes across silk paper, each brushstroke blurring into the next as the silk drank color. The lantern surfaced as a warm orb that hummed softly when lit, the painted koi and cloud motifs leaning toward one another in the light.
The surface felt silky under fingertips and the painted edges glowed richer where pigment pooled. Sitting nearby, that lantern made the whole room hush in the nicest way, casting a warm amber that felt both festive and quietly domestic.
Steps
- Gather a round paper lantern frame, silk paper panels, brush, and translucent adhesive.
- Sketch simple koi and cloud motifs lightly on the silk, then paint with diluted pigments for soft edges.
- Allow panels to dry flat, then apply adhesive to the frame edges and secure each painted panel around the frame.
- Fit a low-heat light source inside and check that panels sit smoothly before hanging.
- Add a short tassel or cord at the base for a finishing touch.
Traditional red cylinder lantern with gold accents

There was an instant sense of ceremony the first time I saw a tall red cylinder lantern swinging softly in an evening breeze. The paper felt slightly coarse, its surface catching small flecks of gold leaf that shimmered when the lantern tilted.
The cylinder shape made the light stretch into an even column, and the gold accents threw tiny flecks across nearby walls. The tactile rim had a faint stiffness that suggested resilience, and when a breeze passed, the lantern whispered against its frame in a voice that felt celebratory.
Steps
- Prepare a cylindrical paper shell, thin bamboo hoops, red paper, and gold foil accents.
- Wrap the red paper around the bamboo hoops to form a cylinder and secure with adhesive along the seam.
- Apply gold foil strips or patterns to the outer surface and press gently to adhere.
- Insert a small LED lantern inside and thread a hanging loop through the top hoop.
- Trim any excess paper for a neat edge and hang the lantern.
Origami-inspired folded lantern with crisp edges

I liked the snap of precise folds and the clean geometry of an origami-style lantern. The paper folded into repeated facets that caught light differently along each ridge, producing a lively interplay of bright and dim planes.
Running fingers along those crisp edges felt reassuringly exact, and the lantern’s silhouette leaned modern even when it coexisted with more ornate pieces. At night the facets created a faceted glow, each plane offering a slightly different tone.
The whole piece suggested a quiet kind of cleverness and a love for tidy patterns.
Steps
- Choose a heavy-weight paper or cardstock and mark fold lines for an accordion or faceted pattern.
- Make precise folds along marked lines, ensuring each crease aligns cleanly with the last.
- Form a closed shape by bringing folded edges together and securing the seam with adhesive.
- Add a top ring for hanging and place a battery-operated light inside the hollow form.
- Adjust folds slightly to control how light escapes through the facets.
Tea light paper jar lantern with lace-patterned glow
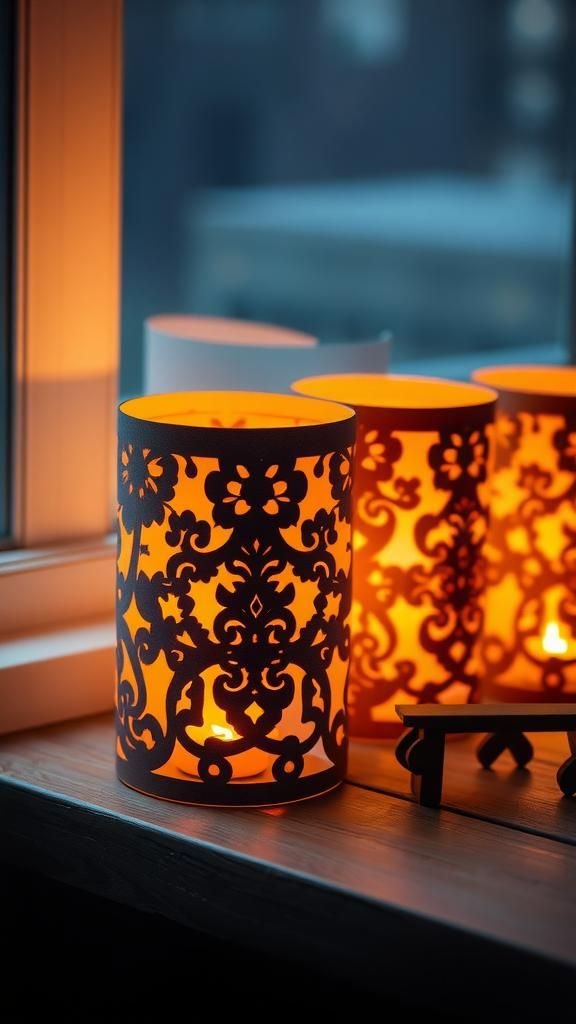
The paper jar lantern that uses lace-like cut patterns always felt like a tiny festival. When lit, those cutouts threw delicate patterns across tabletops, and the warm circle of light inside made the surrounding paper look softer and more delicate than it seemed by daylight.
The edges of the cut shapes had a slight roughness that read as handmade, and the glow turned ordinary lines into a lacy halo. I often imagined these clustered along windowsills, each casting a small, patterned universe into the dark evening.
Steps
- Select a translucent paper jar or wrap translucent paper around a glass jar base.
- Transfer a lace or floral stencil pattern onto the paper surface and trim cutouts carefully.
- Fit the patterned paper around the jar, securing the seam to form a cylinder.
- Place a battery-operated tea light inside and observe the patterned glow.
- Arrange multiple jars together for a clustered effect.
Paper cut silhouette lantern with storytelling scenes

I remember tracing tiny silhouettes and watching a whole scene come alive once a light sat behind them. The cut figures cast bold shadows while the narrow slivers of background color peeped through like a stage curtain.
The paper’s edges held a faint crispness from precise cuts, and the overall scene felt like a memory pressed flat into light. Sitting close, those silhouettes suggested motion even without it; a child imagined a dragon, a pair of dancers, or a willow tree, all reanimated as charcoal shadows dancing on a wall.
Steps
- Draft a continuous storytelling scene across panels of sturdy paper, considering how shadows will appear when backlit.
- Use a sharp blade to carefully cut out silhouettes and save the negative shapes as needed.
- Mount the cut panels around a lantern frame so the scene forms a continuous wrap.
- Place a low-heat light inside to backlight the silhouettes and reveal the story.
- Adjust spacing between panels to fine-tune shadow sharpness.
Bamboo frame lantern with woven paper panels

The bamboo frame gave a lantern a natural weight and a faint whisper of resilience under touch. Paper panels woven through the slats added an organic rhythm, each strip catching light slightly differently.
The smell of cut bamboo and the faint fiber grain on the paper felt grounding, like a bridge between outdoors and the lantern’s small interior world. When lit, the woven pattern created slight moiré effects that moved as the lantern shifted, and the overall impression was rustic but refined, offering a calm, handcrafted presence.
Steps
- Build a simple bamboo hoop frame for top and bottom and connect with vertical bamboo supports.
- Cut paper strips and weave them between the vertical supports to form continuous panels.
- Trim ends and secure the woven panels to the inner frame edges with adhesive.
- Insert a safe battery light into the center and test the evenness of glow.
- Add a hanging cord threaded through the top hoop.
Watercolor ombré lantern for soft blended hues

The watercolor ombré lantern always felt a little like holding a sunset in a paper shell. Pigment pooled and bled along fibers, creating gradients that shifted from deep vermilion to soft apricot.
Touching the surface revealed a subtle tooth where paint had dried, and the light inside made those gradients look liquid and alive. The edges where colors met were often feathered and tender, which made each lantern feel unique.
At night, the soft bleed of color spread warmth around the room, like a low, colorful tide.
Steps
- Stretch watercolor paper panels flat and plan a gradient from one color to the next.
- Apply watercolor washes wet-on-wet to allow pigments to blend and feather naturally.
- Dry panels fully, then form them around a lantern frame and secure seams.
- Install a diffused LED light to enhance subtle color transitions.
- Trim edges and add a simple hanging loop.
Tassel-adorned lantern with rhythmic movement

I liked how a cluster of tassels turned a lantern’s still form into something that hinted at motion. The tassels swung and caught the light, their threads throwing tiny highlights and shadows that changed whenever a door opened.
The threads had a silk-sheen that contrasted with matte paper, and the weight at the bottom gave the whole piece a gentle gravity. The sound of tassels brushing against one another was a small, domestic percussion that made the lantern feel like it was breathing along with the room.
Steps
- Prepare a paper lantern main body and select matching silk or rayon tassels.
- Attach tassels to the lantern base by tying or securing to a small bottom ring.
- Balance placement so tassels hang evenly around the perimeter.
- Place a warm LED inside to interact with moving threads.
- Hang the lantern where a gentle draft can animate the tassels.
Lotus-shaped lantern that feels delicate and serene
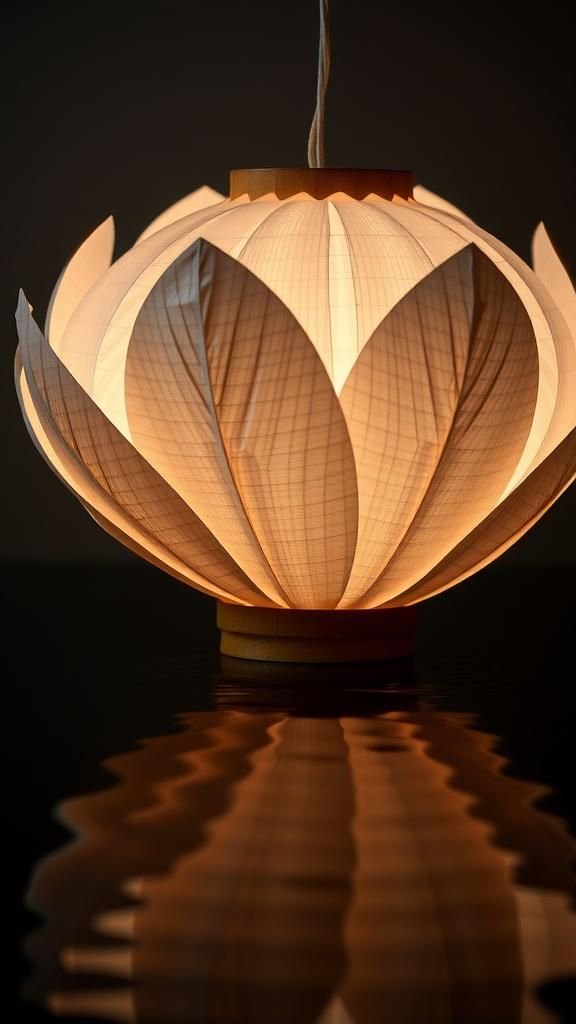
The lotus-shaped lantern had a softness that suggested floating on water. Petal-like paper layers overlapped in gentle curves, each rim catching a faint rim of shadow that made the shape read as both delicate and dimensional.
The paper had a faint translucence, so the center light bloomed outward like a heart. Handling the lantern felt meditative; the layered petals produced small rustling sounds when nudged, and the overall impression was one of quiet balance.
In a dim room, it read almost like a small lantern bloom opening on a still pond.
Steps
- Cut petal shapes from translucent paper in graduated sizes to form layered tiers.
- Arrange and secure petals around a circular frame so they overlap like a flower.
- Create a central cavity for a low-heat light and ensure petals allow gentle ventilation.
- Place a soft LED inside so the petals glow from within.
- Suspend the lantern at eye level to appreciate its layered silhouette.
Accordion-fold lantern that opens into bright planes

The accordion-fold lantern had a satisfying rhythm, like a paper chorus of pleats. Each fold created tiny valleys of shadow, and when the lantern caught light at different angles the planes flicked between brightness and shade.
The creased edges had a tactile firmness, and the overall structure felt lively without fuss. I enjoyed how the folds suggested tempo: compact by day, then slightly inflated by a lamp to show off the pleated silhouette.
It felt modern and playful, an object that loved to change its mood with one flick of light.
Steps
- Prepare strips of durable paper and score fold lines for consistent accordion pleats.
- Fold the paper into an accordion and join the ends to form a ring.
- Add top and bottom rings to maintain shape and provide hanging points.
- Place a soft, diffused light in the center and adjust pleats for even glow.
- Trim any uneven edges for a neat finish before display.
Calligraphy-inscribed lantern with flowing brush strokes

Seeing calligraphy bold across a lantern felt like letters caught mid-song. The strokes pooled at the edges and thinned into delicate tails, and the ink’s slight sheen contrasted with matte paper.
When lit, the calligraphy darkened into strong silhouettes while the surrounding paper glowed like a soft parchment. The tactile trace of brush bristles was visible in places, and the finished lantern always felt like a poem you could hold.
In small gatherings, that lantern prompted quiet compliments and guesses about the phrases inked across its sides.
Steps
- Select smooth rice paper panels and draft calligraphy characters lightly with pencil.
- Ink the final characters using a brush and sumi or Chinese ink, allowing strokes to vary naturally.
- Let the ink dry fully, then mount panels around a lantern frame.
- Place a diffused light inside so the calligraphy reads clearly against the glow.
- Balance placements to keep characters centered and visually harmonious.
Lantern garland for a string of tiny warm lights

A row of small lanterns on a cord changed an ordinary mantel into something celebratory. Each mini lantern held its own personality—bright reds, pale creams, small hand-cut patterns—and together they made a lively chorus.
The string produced a layered rhythm of light, with gaps and overlaps that felt pleasantly irregular. When the lights came on, the garland drew the eye along its path and turned a whole corner into a luminous ribbon.
The tactile weight of the cord balanced the fragile paper, and the whole ensemble felt both casual and thoughtfully arranged.
Steps
- Make multiple small paper lanterns sized to fit along a decorative cord.
- Secure each lantern to a string of battery-operated micro LED lights using small loops or rings.
- Space lanterns evenly along the cord and check that each light sits centrally inside its lantern.
- Hang the garland across a mantel, window, or hallway.
- Tidy any loose wires and adjust lantern orientation for even appearance.
Stenciled shadow lantern for dramatic patterns
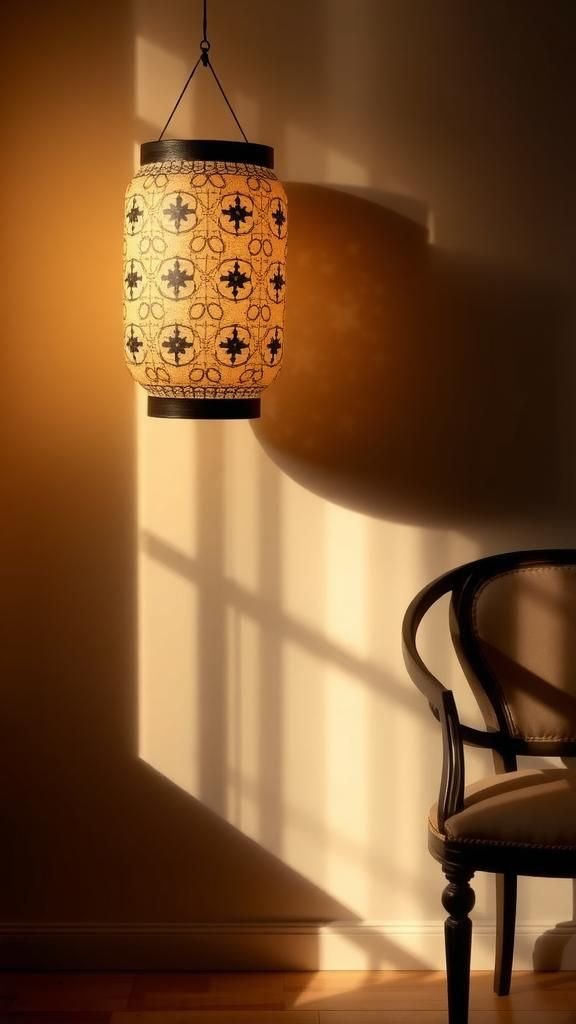
The stenciled lantern felt architectural, with bold pattern fragments stepping out of the paper when lit. The cut stencils caused sharp shadow edges that stretched across nearby surfaces like decorative silhouettes.
The contrast between the crisp shadowed shapes and the lantern’s glowing interior created an effect that read both modern and ceremonial. Touching the stencil edges revealed slight unevenness from hand-cut work, which added warmth.
At night those shadows rearranged furniture planes into something theatrical, turning an ordinary wall into an ornate backdrop that invited slow, appreciative looks.
Steps
- Choose a bold stencil design and transfer it onto sturdy translucent paper panels.
- Cut the stencil shapes carefully, keeping interior elements attached where structural strength is needed.
- Mount the stenciled panels around a lantern frame, aligning patterns for continuity.
- Install a bright yet diffused light source to emphasize sharp shadow edges.
- Position the lantern so shadows fall onto a clear wall for maximum effect.
Embroidered fabric lantern with stitched motifs

I loved how embroidery turned flat fabric into something tactile and heirloom-like when wrapped as a lantern. Stitched motifs—flowers, clouds, tiny characters—rose slightly from the surface and held subtle shadows when the lamp inside glowed.
The thread caught the light in gleams while the fabric offered a soft, warm diffusion. Running a finger over the embroidery felt comforting, and the slight irregularity of hand-stitched lines made each motif read as intimate.
The lantern gave off a textile-based warmth that suggested care and time had been spent making it.
Steps
- Embroider fabric panels with chosen motifs using threads that will contrast with base fabric.
- Stabilize the embroidered fabric and trim panels to fit the lantern frame.
- Wrap the embroidered panels around the frame and secure seams with adhesive or stitching.
- Place a low-heat light source inside to reveal stitched textures.
- Hang or place the lantern where textile details can be admired up close.
Paper bead-adorned lantern with tactile embellishments
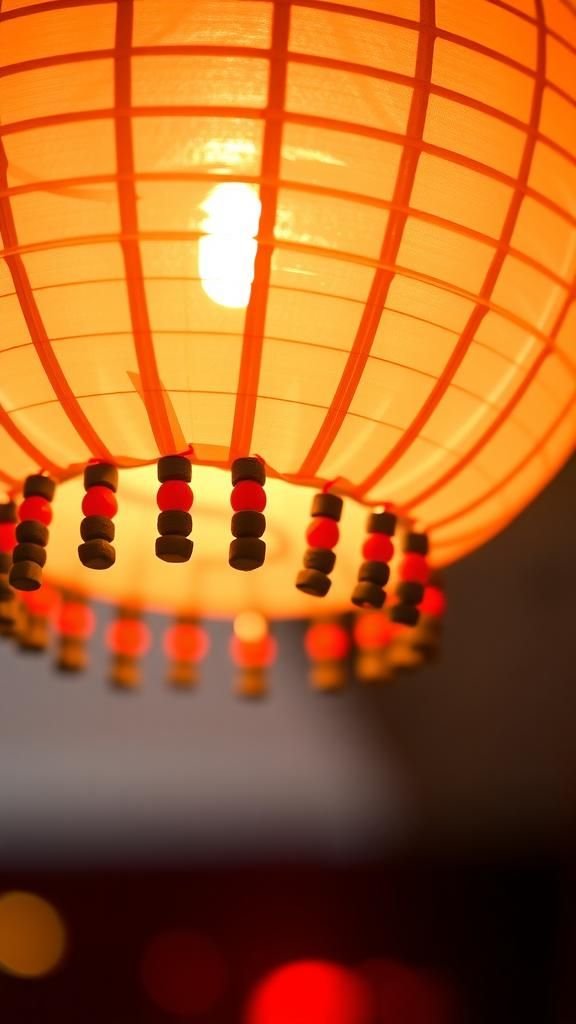
Beads threaded around a lantern rim added a playful clack and sparkle. The beads caught tiny pinpricks of light, sending small glints across surfaces as the lantern moved.
The contrast between smooth glassy beads and matte paper gave a pleasing tactile mix, and the bead colors layered over the lantern’s glow like confetti. Holding the lantern close allowed the beads’ cool weight to rest against the palm while beads chimed softly.
The whole effect felt celebratory and hand-finished, like a found object made new through a few thoughtful adornments.
Steps
- Choose glass or wooden beads and strong thread to match the lantern’s palette.
- Attach a beaded fringe along the bottom rim by looping thread through small holes or rings.
- Space beads evenly and knot securely at each anchor point.
- Place a gentle LED inside so light sparkles through bead gaps.
- Test the bead weight to ensure the lantern hangs evenly.
Miniature tea-lanterns for clustered tabletop warmth

Mini tea-lanterns felt like a little constellation when grouped on a table. Each tiny lantern had a personality—some patterned, some plain—and together they created a low field of light that invited conversation.
The small scale made the lanterns approachable; moving one shifted the whole cluster’s rhythm. Their heat was barely perceptible, and the light quality was soft enough that faces looked gentle in the glow.
Placing them near a platter of food made the table feel intentionally arranged, without fuss, like a cozy evening unfolding one small light at a time.
Steps
- Construct multiple small paper lanterns sized to fit battery-operated tea lights.
- Decorate each lantern with small cutouts, stamps, or paint for variety.
- Place a safe tea light in each lantern and test for even glow.
- Arrange the lanterns in a loose cluster at the center of a table.
- Adjust spacing to create pleasing overlaps of light and shadow.
Floating lanterns that mimic soft water reflections

Floating lanterns carried a quiet magic when set on water. The paper cup sat fragile atop ripples, and the reflected glow painted wavering light onto the surface below.
Wind and water conspired to make each lantern’s reflection a living thing, smoothing and then stuttering with small waves. The paper felt damp at the bottom after a while, and the lantern’s glow became elongated in the water’s mirror.
Watching a drift of these lanterns was calming, like following a line of tiny beacons that slowly lost themselves in motion.
Steps
- Create waterproofed paper cups or use treated paper mounted on a lightweight base.
- Add a stable, low-heat floating light source that resists tipping.
- Place the lantern gently on calm water and observe its balance.
- Monitor floating lanterns while lit and retrieve them after use.
- Arrange multiple lanterns to create a drifting chain of reflections.
Star-shaped lantern that projects constellations indoors

The star-shaped lantern felt a little theatrical, projecting narrow beams through each point. The paper tips created sharp lines of light that met in a bright center, and where edges overlapped the glow deepened.
The structure had a pleasing tension, like folded origami stretched into three dimensions, and the lantern cast star-like shadows across ceilings and walls. Touching the edges felt delicate but satisfying, and the whole piece had a celebratory tilt, as though the room had been invited to look up and appreciate a miniature sky.
Steps
- Cut geometric panels that form the points of a star and score folding lines.
- Fold panels into three-dimensional points and join edges to create a cohesive star form.
- Reinforce internal seams so the star holds its shape when suspended.
- Place a centralized LED light that illuminates evenly through the points.
- Hang the star at ceiling height to project shadowed rays across the room.
Pinwheel paper lantern with playful rotating petals
The pinwheel lantern had a kinetic look even when still, its layered petals arranged as if to spin. Delicate slits allowed small puffs of air to rotate the outer petals if a breeze came by, and the lantern’s layered color palette gave the effect of movement even when still.
The paper felt light and airy, and watching the petals catch light was unexpectedly pleasant—each one emphasized texture and edge. Placed near an open window, it hummed quietly and suggested a certain youthful joy, like summer afternoons folded into festival light.
Steps
- Cut matched petal shapes and layer them concentrically to form a pinwheel silhouette.
- Secure layers at the center while allowing outer petals slight freedom to move.
- Mount the assembled pinwheel onto a lightweight lantern frame.
- Insert a soft light source and hang near a gentle draft to encourage motion.
- Balance the structure so it rotates evenly without toppling.
Folded fan lantern with elegant ribbed silhouette

The folded fan lantern read like a breath captured in paper. The ribs created long shadows that radiated outward when the lantern glowed, and the overall silhouette suggested both fan and shell.
The folds produced a pleasing tactile rhythm that made each angle interesting, and the paper edges had a fine crispness from the folds. Nearby, the light felt directional, throwing a gentle arc across surfaces rather than an all-over wash.
It made the room feel curated and quiet, like a single thoughtful object placed with care.
Steps
- Score and fold paper into a radial fan pattern that will wrap into a lantern shape.
- Join the ends to form a curved shell and add top and bottom supports.
- Reinforce ribbed folds to keep their shape when suspended.
- Place a directional LED inside to highlight the ribbed silhouette.
- Suspend the lantern so its radiating folds catch ambient light.
Paper mosaic lantern with colorful tessellated panels
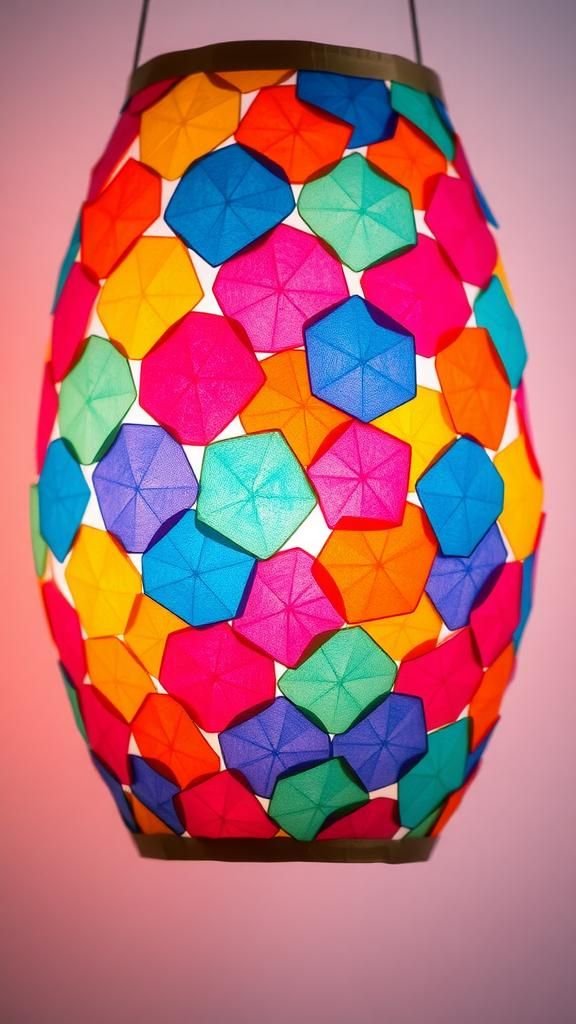
The mosaic lantern felt joyful in an almost tactile way; tiny paper tiles made up its skin, and each tile caught light a little differently. The tessellated surfaces offered a textured sparkle when the lantern was lit, and running fingertips over it revealed seams and ridges that read as handmade.
The colors could be bold or restrained, but even a limited palette looked lively because of the patterning. When clustered with plainer lanterns, the mosaic piece acted like a cheerful anchor, pulling the eye with its little squares of color and light.
Steps
- Cut many small paper tiles in chosen colors and sorts to form a mosaic palette.
- Arrange tiles onto lantern panels in overlapping or tessellated patterns and adhere them securely.
- Allow the mosaic surface to dry flat to prevent warping.
- Mount panels around a lantern frame and insert a diffused light source.
- Inspect seams and touch up any gaps for a cohesive look.