I still remember the kitchen table strewn with paper scraps and dried flower petals when I made my first homemade present for my mother. There was a quiet pleasure in choosing colors, feeling textures, and imagining her smile when she opened a simple package.
That gentle kind of making is exactly what Mother’s Day handmade gift crafts can bring back.
These Mother’s Day handmade gift crafts live in that small, personal space where time and thought matter more than polish. They often carry tiny stories, soft scents, or a little laugh, and they make an ordinary morning feel like a small celebration.
Pressed flower photo frame for sunlit mantels
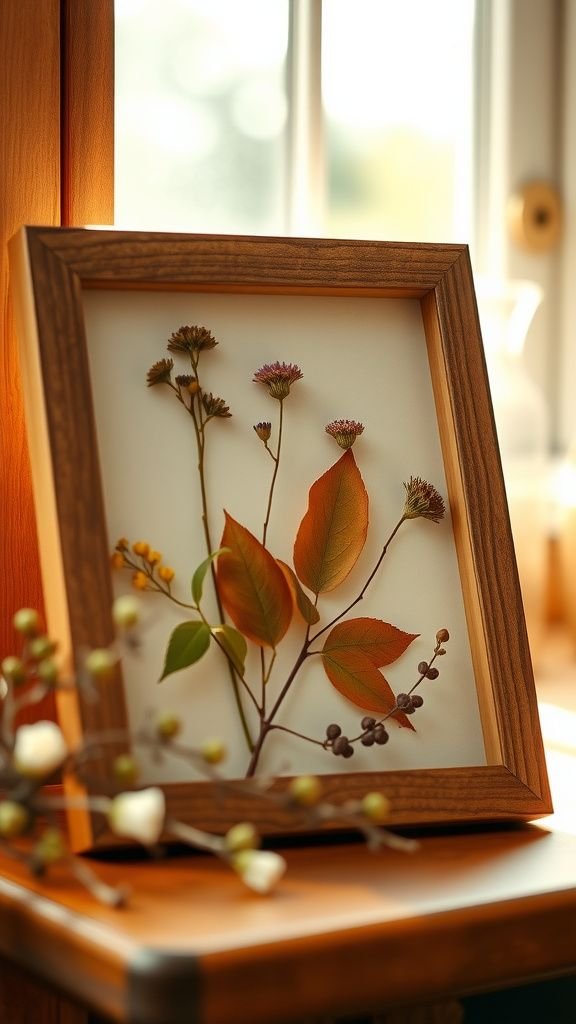
I kept a stack of roadside blooms after a spring walk and the way they held light surprised me. The frame became a quiet collage of translucent petals and memories, where little veins caught sunlight like tiny stained glass.
Each pressed fragment carried the faint honey scent of the meadow and the papery rustle when I nudged the glass. Setting it on the mantel felt like giving the room a soft exhale.
Friends asked about the flowers and I liked telling the short stories tied to each one.
Steps
- Gather a few fresh flowers and leaves and press them between heavy books for several days until dry.
- Clean a simple glass frame and arrange the pressed pieces on the inside surface to create a pleasing composition.
- Secure the backing of the frame and trim any excess stems that peek out beyond the edges.
- Wipe the glass gently and place the frame where warm light highlights the colors and textures.
Hand-painted ceramic mug that feels like a hug
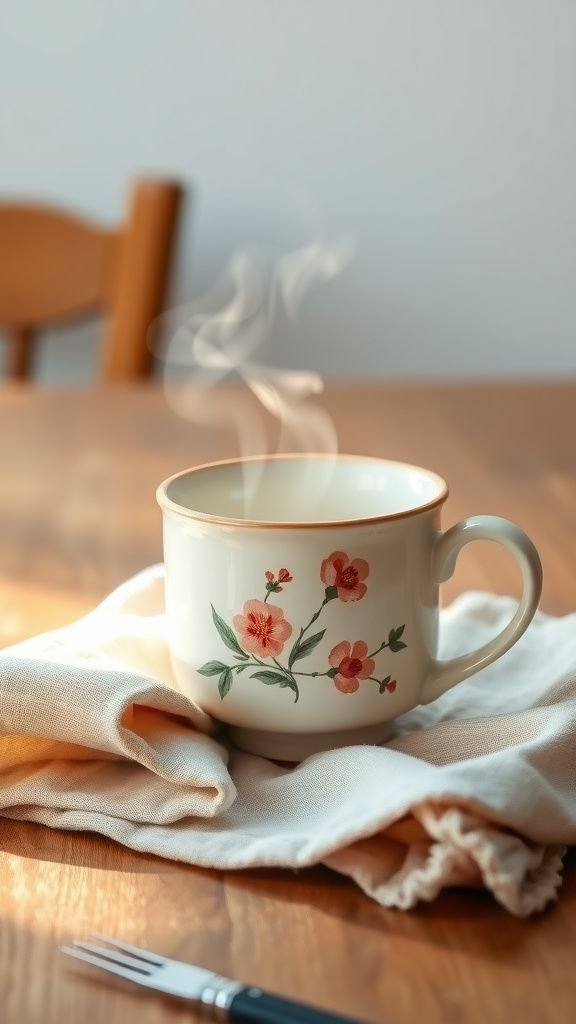
There was a morning when a chipped thrift-store cup became a tiny canvas and paint felt like conversation. The glaze took crayons of color and left faint fingerprints that made the mug feel familiar.
Drinking tea from it added a touch of warmth that seemed to stay after the cup was put down. The design was imperfect in a comforting way, strokes visible and edges slightly blurred where the brush lingered.
Each sip carried a small reminder of time spent painting and the soft clink of ceramic against saucer.
Steps
- Choose a plain ceramic mug and clean it thoroughly to remove oils and dust.
- Sketch a simple design with a pencil, then apply ceramic paints or markers in layers for vibrant color.
- Allow the painted mug to dry and follow paint manufacturer instructions for baking or sealing the surface.
- Rinse gently after curing and wrap the mug in tissue for gifting.
DIY lavender sachets for drawers and pillows
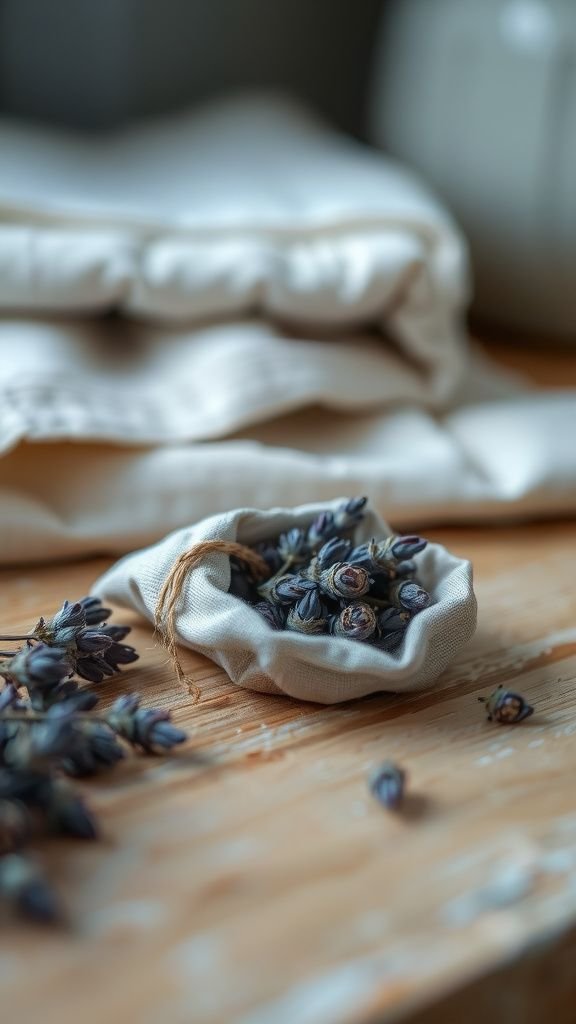
The first sachet I tied smelled like a late afternoon garden, with floral coolness and a hint of sun-warmed grass. Tiny stitches held fragrant filling that released a calm note every time a drawer opened.
The fabric was slightly rough to the touch, linen that softened with handling and wore a faint crease where fingers pressed it closed. Passing by a dresser, the scent would lift my mood the way a memory does, quiet and reassuring.
It felt like a small ritual to tuck one into a pillowcase before bedtime.
Steps
- Cut two small squares of breathable fabric and place dried lavender or a fragrant mix in the center of one square.
- Pin the squares together with right sides facing and stitch around the edges, leaving a small opening.
- Turn the sachet right side out through the opening and gently fill with the lavender until pleasantly plump.
- Close the opening with a hidden stitch and tie with ribbon if desired for a finished look.
Mini memory jar to hold tiny notes of love
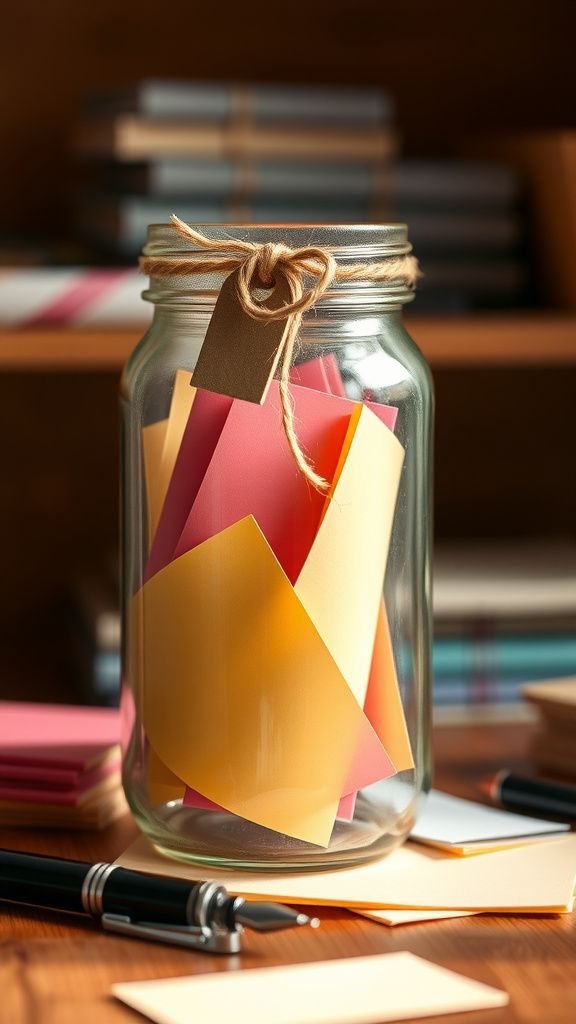
I remember folding a scrap of paper and writing the first small memory before the jar was even half full. The glass gathered faint fingerprints that felt like secret signatures.
Each slip contained a short scene–a shared joke, a recipe mishap, a rainy afternoon under an umbrella. Pulling one out later made a pulse of surprise and warmth, like a folded letter rediscovered in a coat pocket.
The lid had a bit of rust from age which only deepened its charm, and the overall object sat on a shelf like a quiet treasure.
Steps
- Select a clean jar with a tight-fitting lid and prepare a stack of small paper squares.
- Invite friends and family to write short notes, memories, or loving messages and fold them into the jar.
- Seal the jar and decorate the lid with twine, a tag, or a small charm for personalization.
- Encourage opening the jar on special mornings or whenever a cheer is needed.
Hand-stitched heart pillow with faded charm
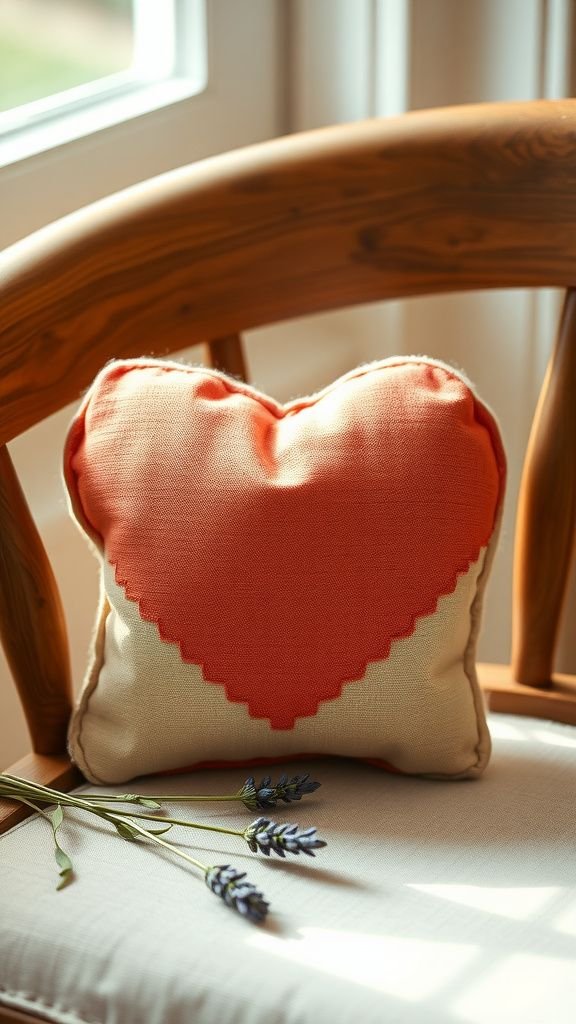
Sewing the pillow by hand felt like writing a letter with thread. The fabric was a cotton print with tiny worn spots where it had been loved before, which added character rather than anything else.
Each running stitch created a small ridge under the fingertips and the stuffing made the pillow yield just enough to feel embraced. The heart shape was a little lopsided in the way that made it feel handmade, and the scent of lavender tucked inside was a soft, calming note.
It settled on a chair like a quiet companion.
Steps
- Trace a heart shape on two fabric pieces and cut them out with a small seam allowance.
- Place the fabric pieces with right sides together and hand stitch around the edge, leaving a small opening.
- Turn the heart right side out and add soft stuffing until plump and comforting.
- Close the opening with a ladder stitch and optionally add embroidered details for character.
Personalized recipe spoon set with handwritten charm
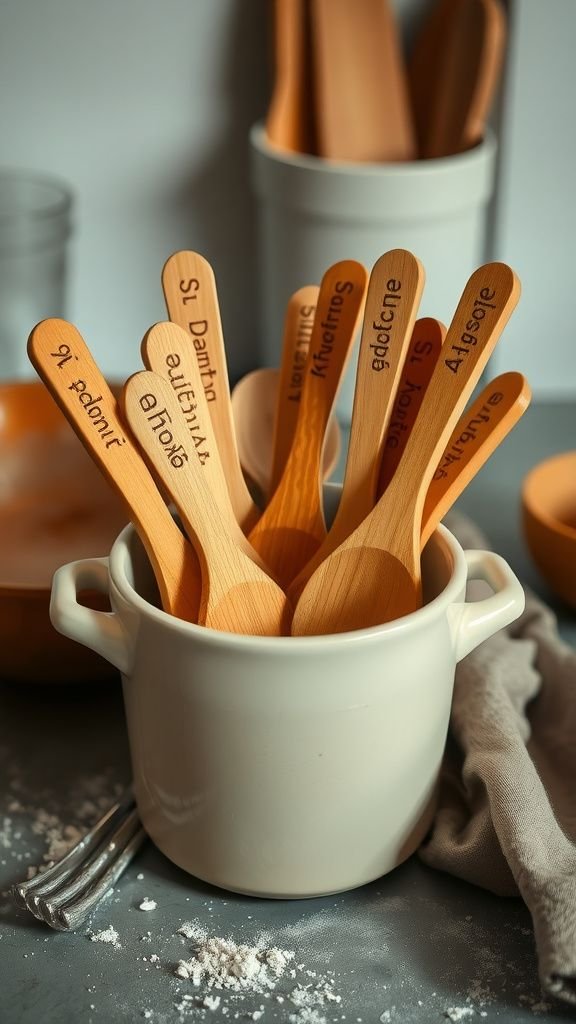
The wooden spoons carried the warmth of late afternoons spent baking together, the grain absorbing years of batter and sauce. Names and little notes burned into the handles created a private language that always made me smile when reaches for them.
The wood smelled faintly of vanilla and oil, a comforting, earthy scent under the fingertips. They sat in a crock by the stove like quiet friends, each one telling a tiny story through a carved word or an initial.
The set felt like a tactile version of a family recipe card box.
Steps
- Choose a set of smooth wooden spoons and sand any rough spots for an even surface.
- Use a wood burning tool to gently add names, dates, or short messages to the handles in a steady hand.
- Wipe off any residue and apply food-safe mineral oil to bring out the grain and protect the wood.
- Let the oil absorb fully before arranging the spoons in a decorative crock or wrapping them.
Homemade soy candle in recycled teacup
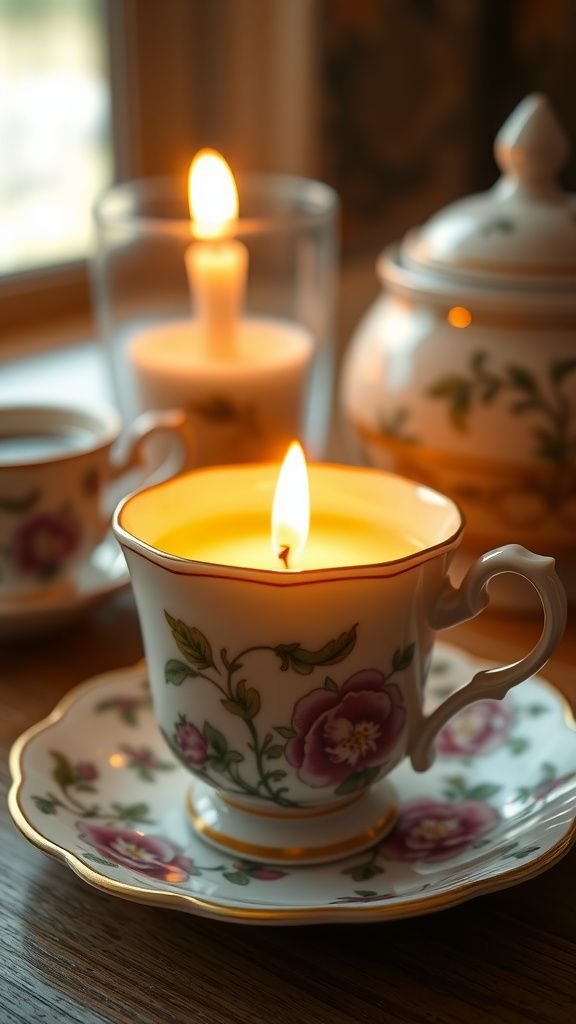
Melting wax in an old teacup felt pleasantly domestic, the rim carrying a faint tea stain that the wick did nothing to hide. The scent chosen was soft and green, a whisper of citrus and basil that filled the room without shouting.
Watching the first flame steady itself inside that curved porcelain was oddly soothing, like a tiny hearth. The cup added personality, its floral decal catching the light while the wick sent up a steady, small glow.
After cooling, the surface of the wax had tiny trimples that looked like ripples.
Steps
- Prepare a clean teacup and secure a wick centered in the bottom with a dot of melted wax.
- Melt soy wax in a double boiler until fully liquid and stir in a few drops of chosen fragrance oil.
- Carefully pour the wax into the teacup around the centered wick and allow it to cool undisturbed.
- Trim the wick to a quarter inch once the candle is fully set and optionally add a small label.
Beaded bracelet that jingles with every movement
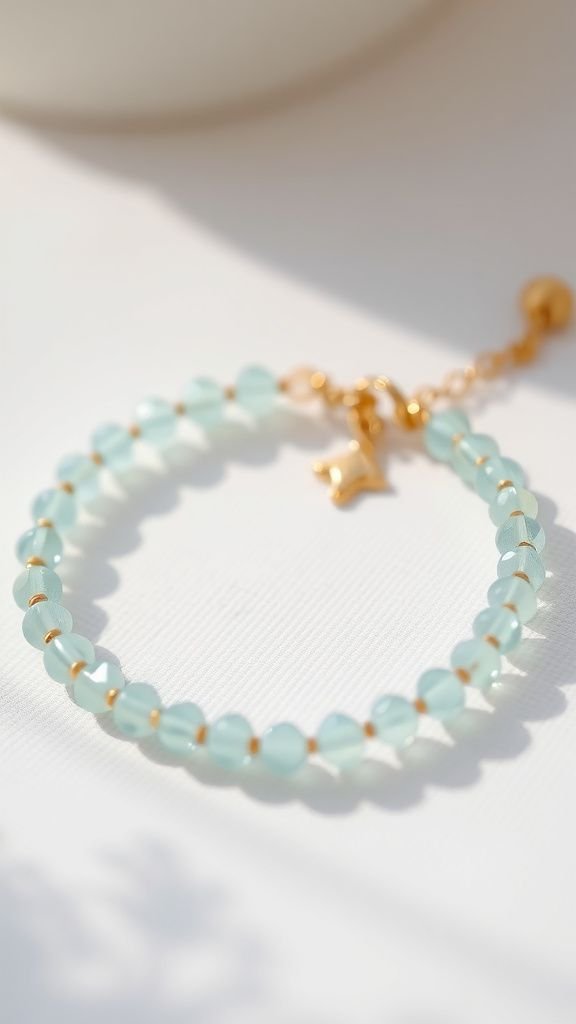
I threaded seed beads while listening to old records and the rhythm matched my hands. The bracelet felt lightweight against the wrist, each bead a tiny polished planet catching bits of room light.
A single charm added a gentle metallic shiver when someone raised a hand, an audible punctuation to conversation. The color palette was soft blues and gold, and the clasp had a small, warm weight that made fastening it feel inevitable.
Wearing it made the ordinary habit of checking time or stirring tea feel a touch more deliberate.
Steps
- Select a palette of beads and a complementary charm, and cut a length of beading wire to fit comfortably.
- String the beads in a pleasing pattern and add the charm in a chosen spot for visual interest.
- Attach crimp beads and the clasp at each end, compressing the crimps securely with pliers.
- Trim excess wire and tuck the ends into adjacent beads for a neat finish.
Watercolor card set with soft washed florals
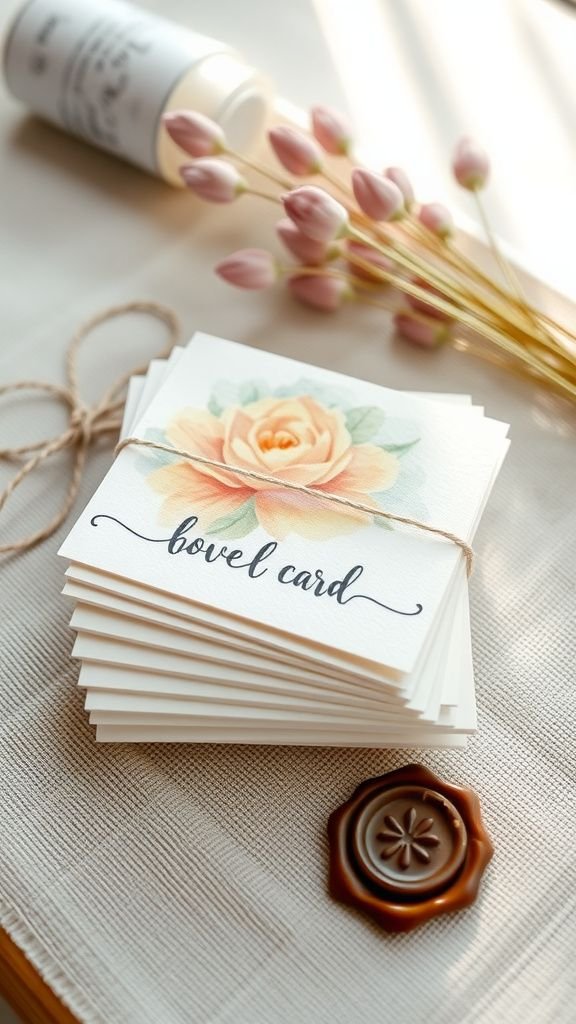
Sitting at the table with a small palette, each card unfolded like a tiny scene. The watercolor blooms bled edges into one another, creating pale halos of color that felt accidental and honest.
The paper was thick and toothy, and the brush left faint ridges that reacted to light. Handwriting the inside note felt more like sharing a mood than composing a declaration.
Tying the set with thin twine turned the collection into a slow surprise that invited someone to take one out and smile at a wash of color.
Steps
- Cut heavyweight watercolor paper into folded card sizes and gather a small palette of paints and brushes.
- Paint loose floral or abstract washes, allowing pigments to blend and edges to soften naturally.
- Let the cards dry fully and write a heartfelt message inside with a fine pen.
- Stack the cards and tie them together with twine or place them in a handmade envelope.
Clay trinket dish with thumbprint character
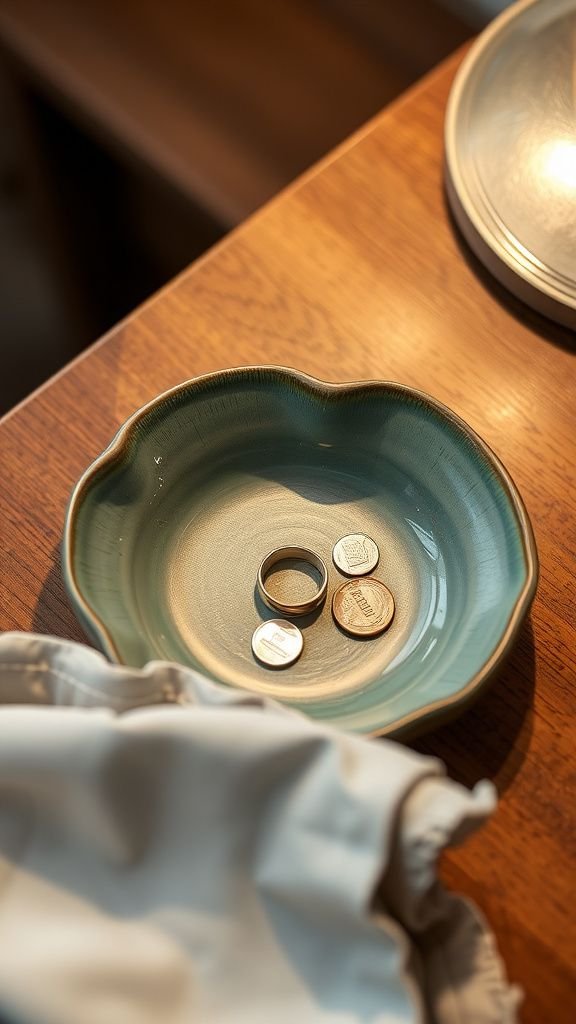
Working with clay left fingerprints like little signatures that never entirely disappeared, and that felt like the point. The dish caught coins and a single ring and the shallow curve made each object look precious.
The fired surface had a slightly matte sheen, evoking stone warmed by the sun. I liked how the rim held a small unevenness that read as personality rather than flaw.
When held, the dish had a satisfying weight and the glaze palette of soft teal and cream created a calm, touchable little island on the dresser.
Steps
- Roll out a small portion of air-dry or oven-bake clay and gently press it into a shallow dish shape with hands.
- Smooth the edges and add a thumbprint or small texture for a personal touch.
- Allow the clay to dry or bake according to the product instructions, then apply a thin glaze or acrylic paint if desired.
- Seal the finished dish with a clear varnish for protection and let it cure before gifting.
Embroidered linen napkins with botanical motifs
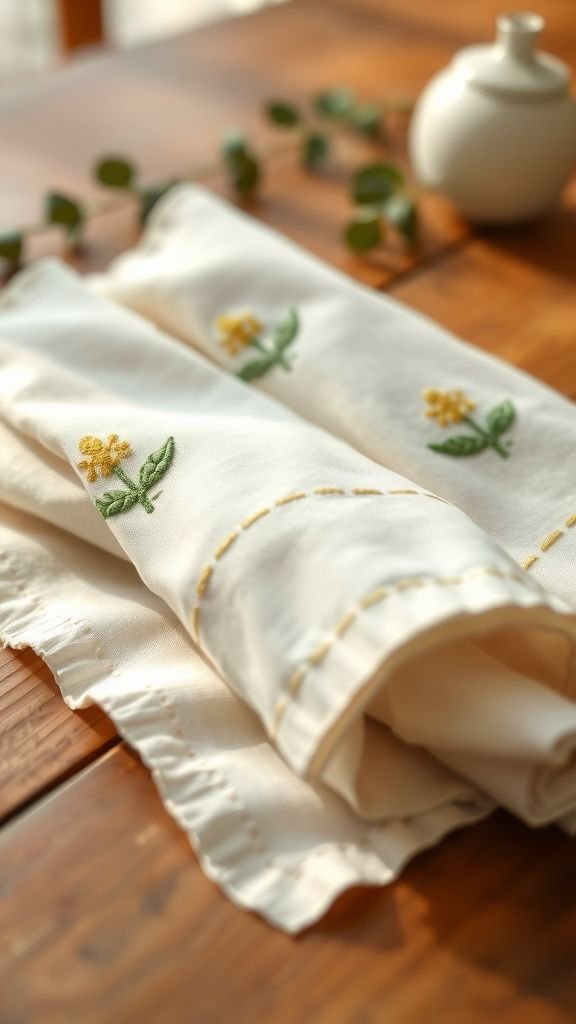
The embroidery was slow but strangely meditative, tiny stitches collecting into leaves and stems that looked alive from across the table. Linen held the thread with a satisfying tuck and the finished napkins smelled faintly of starch and cotton, a domestic perfume.
Set beside plates, the embroidered motifs caught conversation and a fork’s glint. The edges had a soft fray that felt elegant rather than rough.
Folding one up and slipping it into someone’s hand felt like offering a detail that would outlast a single meal and return to the table again.
Steps
- Choose a set of plain linen napkins and sketch botanical motifs lightly with a water-soluble pen.
- Thread an embroidery needle and work small satin and backstitches to build the designs.
- Rinse any marking lines, press the napkins gently with a warm iron, and trim loose threads.
- Bundle the napkins with a ribbon or linen tie for presentation.
Upcycled tea tin turned into a tiny planter
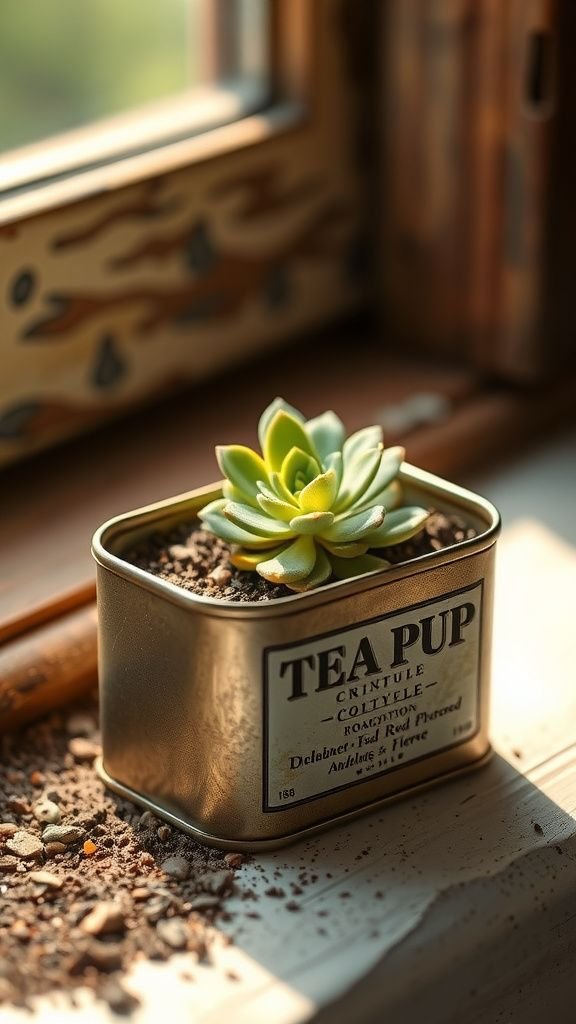
The tin had once held fragrant blends and now cradled a small succulent, its metal warmed by the sun behind the windowsill. The label carried a memory of kettle steam and late-night conversations, and repurposing it felt gentle.
The plant’s plump leaves contrasted the tin’s cool metallic surface, and the soil gave off that nutrient scent that makes a room feel alive. Tiny water stains and scratched paint read like history marks.
The tin fit into a corner of the kitchen where it collected drips of morning light and a few friendly bees on warm days.
Steps
- Clean an old tea tin thoroughly and add a layer of small pebbles for drainage if desired.
- Fill the tin partly with potting mix suited to succulents and nestle a small plant into the soil.
- Lightly firm the soil around the roots and water sparingly to settle the plant.
- Place the tin in a bright spot and enjoy the new green accent.
Recipe card book with handwritten family favorites
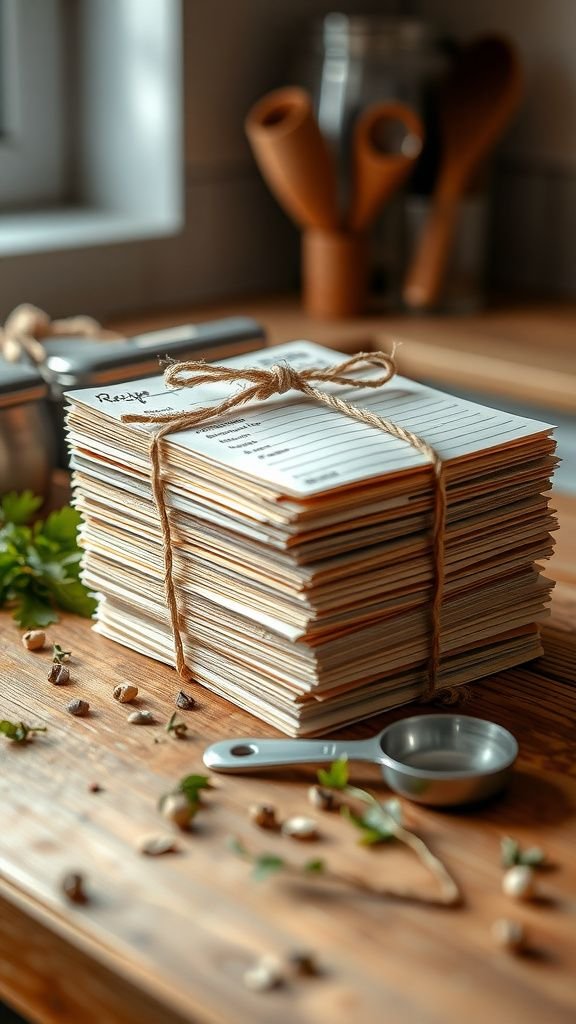
The first page smelled faintly of onion and butter from the last time the recipe was used, an odd but comforting sensory ghost. Each card held handwriting that curled in ways I recognized from family notes.
Ink smudges and splatters served as proof of use, making the collection feel alive rather than archival. Tying the stack with twine added a nostalgia that made picking up a card feel like pulling a small story from a drawer.
The book made the kitchen feel like a map of afternoons and shared meals.
Steps
- Gather favorite recipes on sturdy index cards or cardstock and write or print each recipe clearly.
- Decorate card borders with small illustrations or stamps for a personal touch.
- Punch a hole in a corner of each card and bind them together with a ring or ribbon for easy flipping.
- Consider adding categories with labeled dividers for organization.
Handmade coupon book for simple shared favors
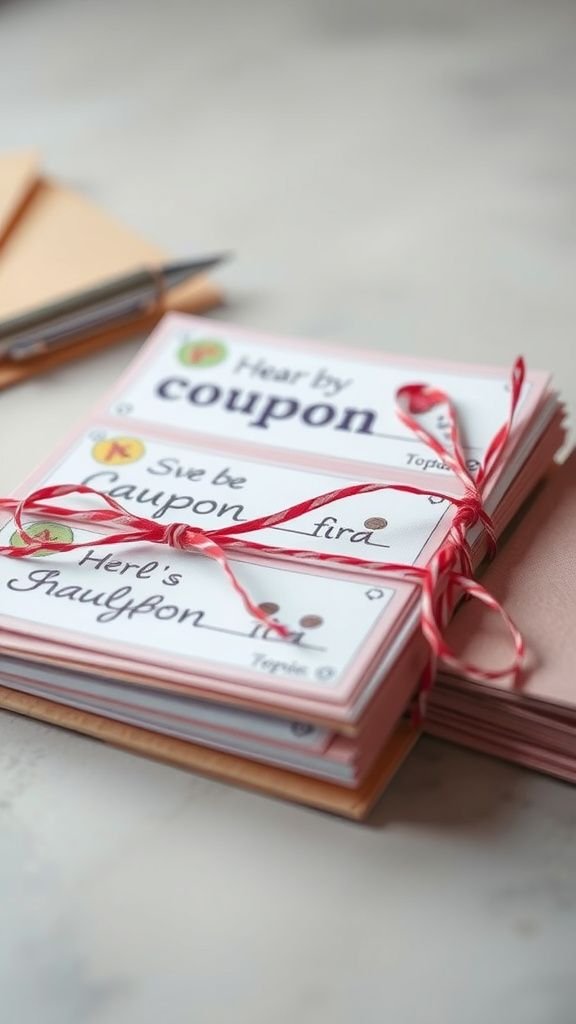
Folding the little coupons felt a bit like folding small promises, each one light and low-pressure but meaningful. The paper had a soft egg-shell finish and the ink sat on the surface with a slight sheen.
Coupons promised tiny comforts like a quiet morning coffee or a late-night dish wash, and writing them felt like keeping a gentle calendar of kindness. When redeemed, the coupons created small, bright exchanges that felt more intimate than a single grand gesture.
Stacking them in a decorated envelope turned ordinary offerings into a touchable keepsake.
Steps
- Cut cardstock into small uniform rectangles for coupons and design each with a simple heading and brief description.
- Add decorative borders or small illustrations to match the recipient’s taste.
- Stack the coupons and bind them with a ribbon or staple in the corner to form a booklet.
- Present the booklet in a handmade envelope or tied with twine.
Mini succulent garden in a shallow wooden box
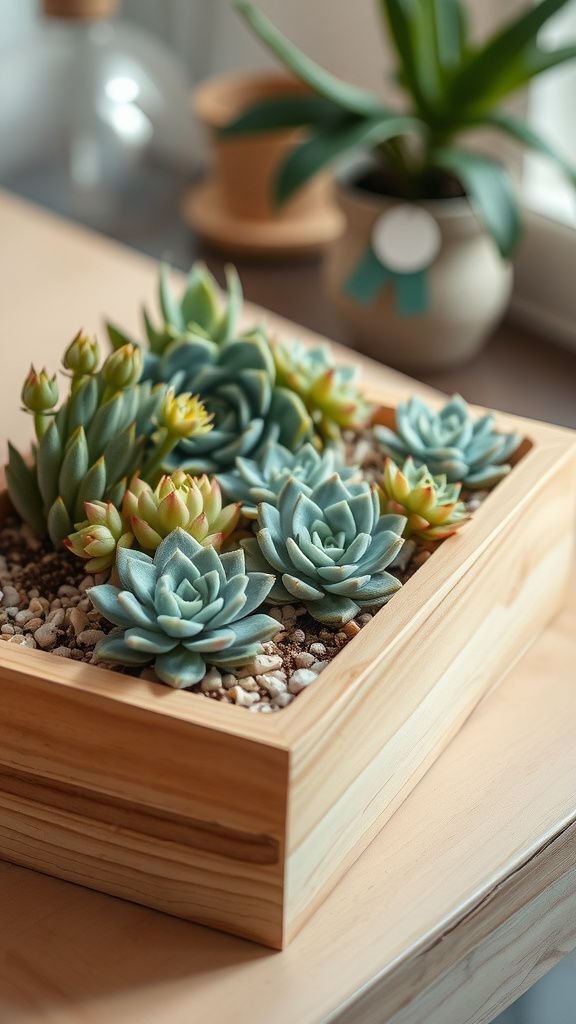
The wooden box smelled faintly of cedar and soil, and the little succulents fit together like a tiny landscape. Each plant offered a different texture: one had glassy rounded leaves while another had a fuzzy softness that begged close inspection.
Light bounced differently off each surface, making the garden look subtly alive as the day progressed. The soil gave off that faint hum of life and the whole arrangement sat like a quiet piece of living decor on a sunny windowsill.
Tending to it felt forgiving and satisfying.
Steps
- Line a shallow wooden box with landscape fabric and add a base layer of pebbles for drainage.
- Fill with a well-draining potting mix suited for succulents and arrange a handful of small succulents with varying shapes.
- Firm the soil gently around each plant and top with decorative gravel or sand.
- Place the box in a bright spot and water sparingly to establish roots.
Stamped metal pendant for everyday wear
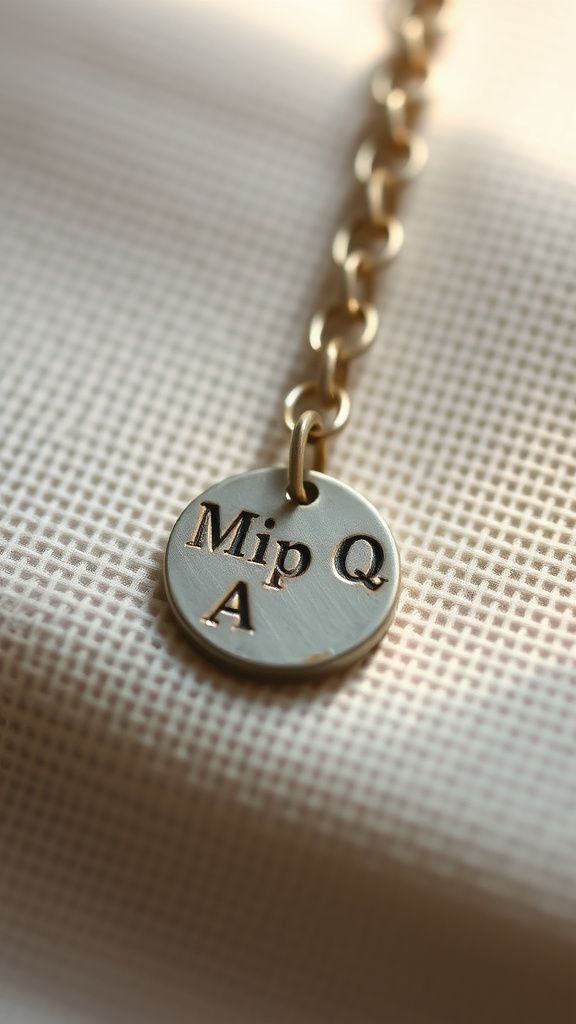
The pendant had a small, cool weight that felt reassuring against the skin, and the stamped letters caught the light in a friendly way. The metal showed tiny tool marks that I came to like; they read as evidence of handcraft.
The chain moved with a soft whisper and the pendant landed just below the collarbone where it was easy to glance at. Choosing the short phrase to stamp felt like choosing a tiny motto to carry, and the resulting object became a quiet companion during everyday routines, a soft reminder tucked into clothing.
Steps
- Select a small metal blank and a set of metal stamping letters for the chosen phrase or initials.
- Place the blank on a steel block and carefully stamp each character using a hammer and steady strikes.
- Darken the stamped impressions with a jeweler’s blackening solution or permanent marker, then wipe the surface clean.
- Attach the pendant to a chain and polish the metal lightly before presenting.
Crochet coaster set in soft cotton yarn
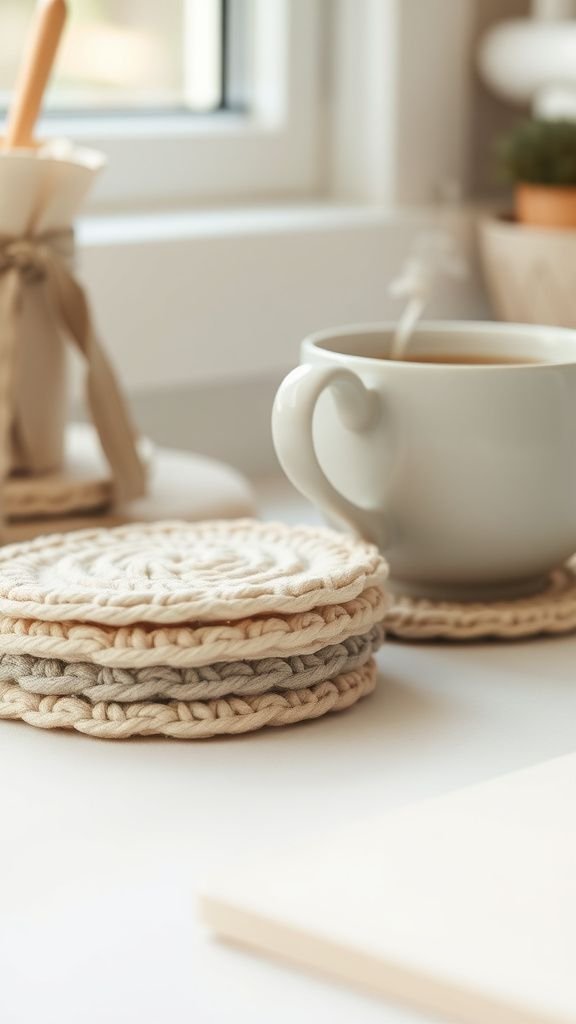
Cup rings and a faint coffee scent were inevitable companions to the coasters, which felt pleasantly warm and slightly springy under a teacup. The crochet stitches created tiny ridges that caught detail and made each coaster feel like a small textile landscape.
A palette of soft creams and muted greens made the set blend into different rooms, and the cotton was absorbent enough to catch a stray drop. Stacking them next to the kettle felt like offering a small, handcrafted courtesy to guests and family alike, a practical object with a friendly texture.
Steps
- Choose cotton yarn and a crochet hook appropriate to the yarn weight, then chain a small circle for the coaster center.
- Work rounds of single or double crochet, increasing evenly to keep the piece flat.
- Finish with a neat border and weave in loose ends for a tidy appearance.
- Block lightly if needed to smooth the shape and allow the coasters to dry fully.
Hand-quilted mug rug with cozy patterns
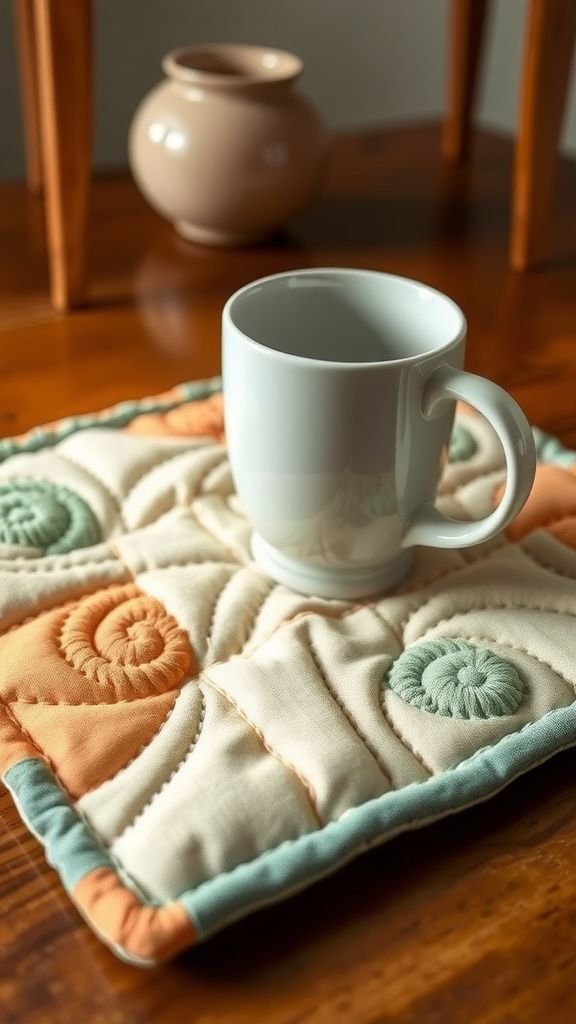
The tiny quilt carried a warmth beyond its size; the batting created a tiny pillow for a mug and caught the heat like a small hearth. Tiny stitches held together different fabric scraps, and the seams made an honest grid that softened in time.
The pattern felt like a pocket of afternoon, a mix of gentle florals and geometric prints that read as someone’s careful thought rather than a mass piece. Placing a mug on it made the simple act of pouring tea feel ceremonious, an invitation to slow down for a minute.
Steps
- Cut a front piece, batting, and backing to size and layer them together for the mug rug.
- Quilt through the layers with straight lines or a gentle pattern, stitching from the center outward.
- Trim edges and bind with bias tape or a folded fabric strip for a finished border.
- Press the finished mug rug and pair it with a matching note for gifting.
Hand-scented potpourri in a fabric bag
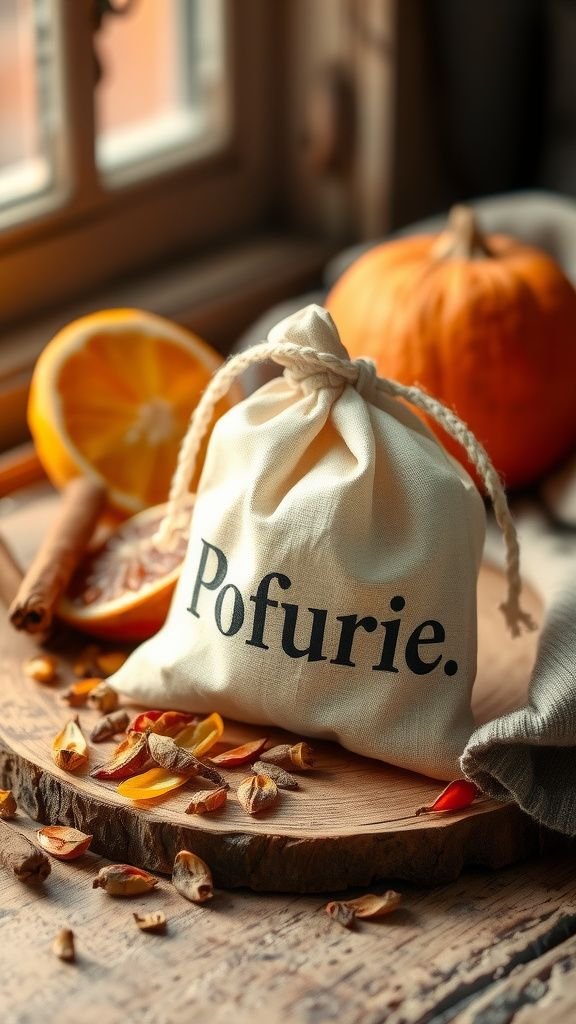
Dried peels and tiny pine cones released an aromatic pulse every time the bag brushed against a hand. The mix blended citrus brightness with the grounding warmth of spice and a faint woodsy note that felt like a slow exhale.
The fabric held the mixture’s scent and released it in gentle wafts that floated through a closet or car. The textures ranged from papery peel to crinkled petals and the overall effect was more like a quiet memory than an air freshener.
Tucking one into a drawer made opening it feel like a small ceremony.
Steps
- Combine dried citrus peels, leftover spice pods, and dried flower petals in a bowl and mix to distribute fragrance.
- Place the mixture into breathable fabric squares and cinch the tops with ribbon or twine.
- Optionally add a few drops of essential oil to boost the scent and let the bags rest for a day.
- Place the sachets in drawers, closets, or gift them in a small box.
Upcycled book turned into a secret keepsake box
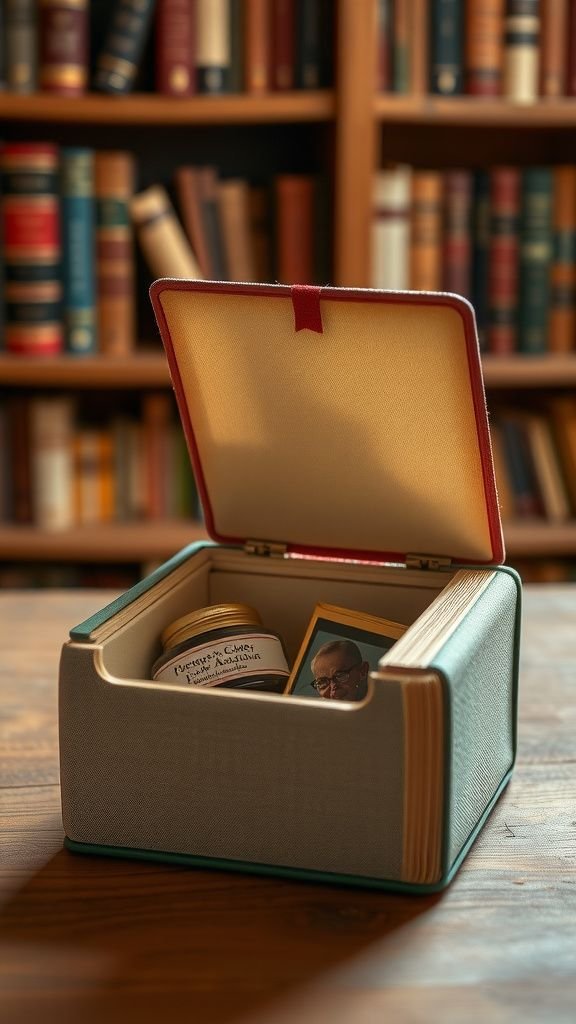
Hollowing out a thick book left a hollowed heart in the shelf where it once stood. The edges of cut pages formed a layered paper cliff that smelled faintly of dust and ink, a nostalgic scent.
Inside, the little cavity held tiny treasures like a pressed ticket, a worn coin, and a folded note. The book’s cover, with a slightly fading cloth, read like an old friend and blending it into a stack on the shelf kept secrets visible only to those who looked closer.
It felt like hiding memories in plain sight.
Steps
- Choose a hardcover book with a thick block of pages and mark an inner rectangle on the front page.
- Carefully cut out the marked section page by page to create a cavity, leaving a border of pages around the edges.
- Glue the surrounding page edges together for stability and line the inside with decorative paper if desired.
- Place keepsakes inside and close the book to conceal them on a shelf.
Hand-rolled paper roses in a tiny bouquet
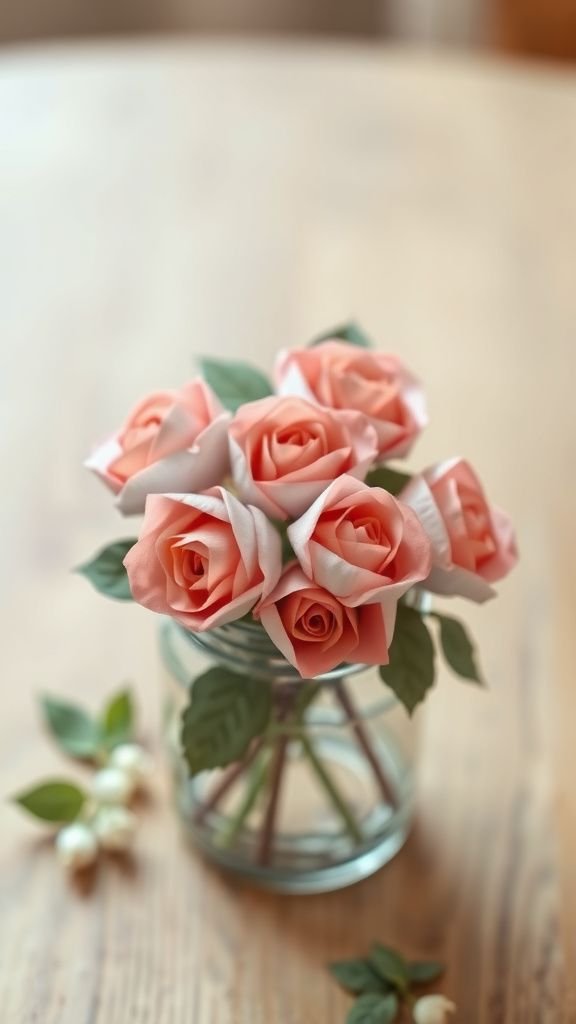
The paper smelled faintly of ink and glue, and each petal curled with a gentle edge that suggested motion. The bouquet sat in a jam jar like a pocket-sized garden, and running a thumb along a petal revealed the layered construction.
Colors ranged from pale blush to deeper coral, creating a small gradient that looked almost alive from a distance. The stems were slim and a little bendy, which made arranging them feel like coaxing a snoozing pet awake.
The paper blooms seemed to last a long time and were easy to revisit on quiet days.
Steps
- Cut spirals from cardstock and start rolling from the outer edge inward to form rose shapes.
- Secure the rolled paper base with glue and gently flare the petals outward for a natural look.
- Attach a thin floral wire stem using floral tape and repeat to build a small bouquet.
- Arrange the paper roses in a small jar or vase for display.