
I always end up making more cards than I expect each February, scribbling tiny notes while a mug cools and soft music plays. There is something quietly joyful about Romantic Valentine Card Making Ideas that turns simple paper into keepsakes I tuck into pockets or under pillows.
Over the years those ideas have drifted from delicate pressed petals to playful pop-up hearts.
I tend to favor sensory textures and small surprises, and sharing a few favorite Romantic Valentine Card Making Ideas feels like passing along a warm, slightly messy tradition.
A tea-stained love note with pressed petals

I once soaked a stack of paper in weak tea and watched the fibers take on warm amber tones that felt like old letters. A tiny pressed petal lay like a quiet punctuation, brittle and faintly fragrant.
The edges showed a soft mottling, and the ink seemed to settle into the grain with a gentle sigh. Holding that card brought a small thrill, as if a memory had been folded into the paper.
The overall look was gentle, tender, and slightly nostalgic, the kind that invites slow reading.
Steps
- Gather lightweight paper, dried flower petals, a shallow tray of cooled brewed tea, and a protective surface.
- Submerge paper briefly in the tea until the desired shade appears, then lift and lay flat to dry on a towel.
- Position a pressed petal on the dried paper and secure with a tiny bit of archival adhesive at one point.
- Handwrite a short note with a fountain pen or felt-tip for soft, soaked-in lettering.
- Place inside a kraft envelope for a warmly aged presentation.
Hand-lettered script with a wax-seal finish

There was a day I tried curling my script into loops and found myself smiling at each imperfect flourish. The ink had a tiny sheen where the nib paused, and letterforms leaned slightly to the right like a private handwriting.
A warm wax seal gave the whole card a small theatrical moment, a little weight that made opening feel ceremonial. The scent of beeswax and a whisper of smoke hung for a short while.
That combination felt quietly formal but deeply personal, like sending a small heirloom through the mail.
Steps
- Choose thick cardstock and select a dark, flowing ink suitable for dip pens or brush pens.
- Practice the layout on scrap paper, then write the message on the card with steady, relaxed strokes.
- Melt sealing wax onto the flap of the envelope and press a metal seal to create an impression.
- Let the wax cool fully before handling and tuck the card into a fitted envelope.
- Add a faint smudge of wax on the corner of the card for a cohesive touch.
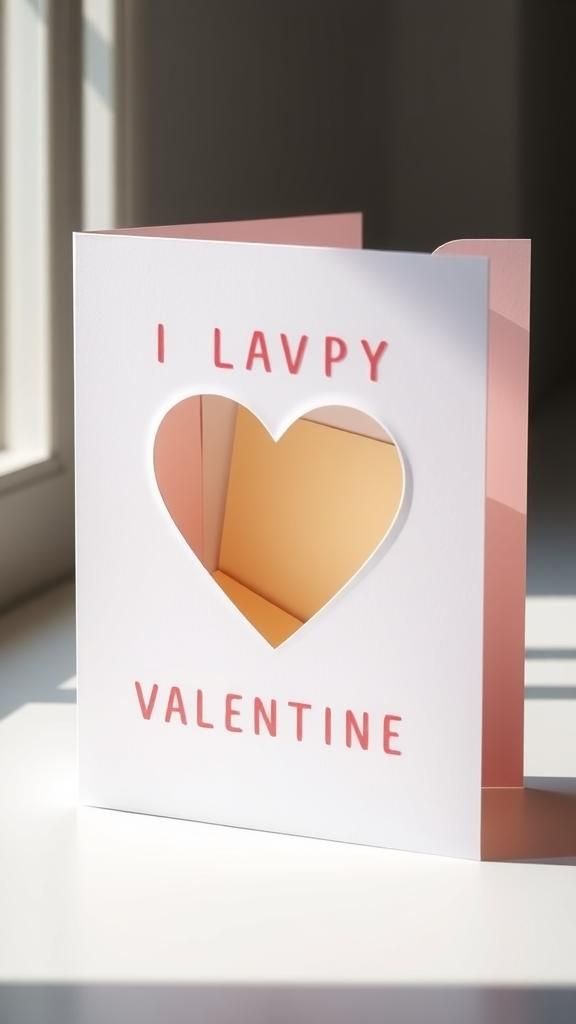
A tiny accordion pop-up heart inside

I remember opening a card where a miniature heart unfurled like a shy bloom. The little paper ribs made a faint whisper as they moved, and the heart’s edge caught the light with a crisp shadow.
The inside felt playful and slightly mischievous, the sort of small surprise that made a laugh bubble up. The outer card stayed understated, keeping the surprise private until the moment it was revealed.
That tactile reveal lingered in memory long after the paper lay flat again on the table.
Steps
- Select contrasting cardstock for the exterior and the pop-up heart, keeping sizes proportional to the card.
- Fold the heart strip into an accordion so it compresses neatly and expands when opened.
- Adhere the ends of the accordion to the interior panels so the heart pops up cleanly at center.
- Embellish the interior with a short handwritten message around the pop-up heart.
- Test the card open and closed to ensure smooth motion and flat closing.
Layered vellum with moonlit silhouette hearts

On a night when the moon felt close, I experimented with translucent vellum layered over darker paper so silhouettes read like shadows. The outer layer had a subtle sheen and a whisper of coolness to the touch.
Light passing through the vellum softened the contrast and created a gentle halo around each heart. The layers allowed for small surprises where a hidden note peeked through the semi-opaque sheet.
That interplay of soft light, shadow, and text felt quietly intimate, like reading a letter through whispered glass.
Steps
- Cut a slightly smaller vellum panel to overlay a darker card base for contrast.
- Affix thin silhouette heart shapes behind the vellum so they read softly through the translucent layer.
- Place a short message on the vellum using a pigment pen that shows against the softer background.
- Secure the vellum at the edges with narrow adhesive so the center remains gently lifted.
- Slide into a matte envelope that complements the layered tones.
A scratch-off heart that hides sweet words
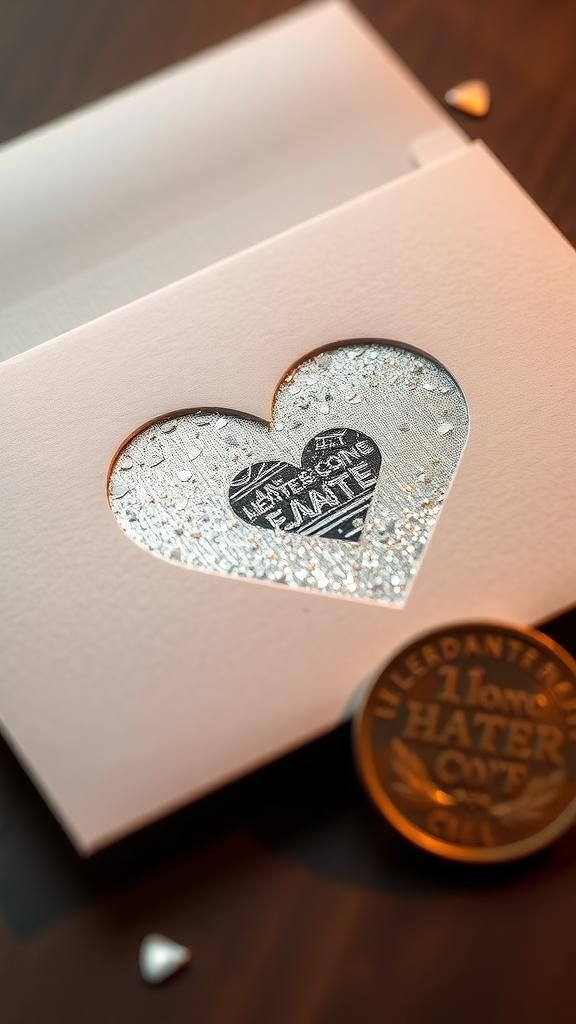
I once watched someone peel a tiny silver patch and laugh when a hidden line of affection appeared. The scratch-off area had a faint metallic scent and left a dusting of shimmering flakes on fingers.
That act of revealing felt playful and slightly conspiratorial, a private game between sender and receiver. The uncovered words contrasted with the opaque coating, creating a moment of small wonder.
It was tactile entertainment that stretched the simple act of reading into a tiny shared ritual, ending in a warm grin and sticky fingertips.
Steps
- Create the message area with a strong contrasting ink on a smooth cardstock panel.
- Mix clear adhesive with metallic acrylic paint to form a scratch-off coating and apply over the message.
- Allow the coating to dry completely until it is opaque and slightly metallic.
- Provide a small coin tucked into the envelope for scratching or instruct to use a fingertip.
- Seal the card and label the outside with a playful hint about a hidden surprise.
Map of meaningful places folded inside

I remember folding a small map that charted the route of first dates and late-night walks. The inked lines felt like map veins, and tiny hearts marked places that held laughter or quiet conversation.
The paper creases carried the memory of having been unfolded in a car or on a park bench. Reading those place names brought a rush of shared images, the smell of a diner coffee or the hum of a streetlamp.
The map made distance feel porous, stitched into a small square that fit a pocket and a memory.
Steps
- Print or hand-draw a simplified map highlighting special locations on quality paper sized to fit the card.
- Mark key spots with small heart icons or dots and label them with brief descriptors.
- Fold the map to fit neatly inside a card or tuck into a narrow envelope pocket.
- Add a short caption on the card referencing one of the places for a personal touch.
- Include a tiny paper band or washi strip to keep the folded map secure.
Tiny jar of confetti with a handwritten tag

There was an afternoon I packed a pinch of confetti into a tiny glass vial and tied a small tag with a nickname. The confetti made a faint paper rustle when the jar turned and the colors flashed like tiny promises.
The vial itself had a comforting little weight that contrasted with the lightness of what was inside. That combination felt playful and earnest at once, the kind of small object that sits on a nightstand and elicits an amused smile when noticed later on a foggy morning.
Steps
- Fill a small glass vial or corked bottle with colorful paper confetti or sequins.
- Prepare a narrow cardstock tag with a brief handwritten note and thread through twine or thin ribbon.
- Secure the tag to the vial neck and add a tiny dab of glue if needed for stability.
- Nest the jar inside the card or a small box cushioned with tissue paper.
- Include a short line on the card that references the tiny celebration contained within.
A fold-out timeline of relationship moments

I once unrolled a narrow paper strip that charted little milestones like a string of beads. Each drawn tick felt like a small drumbeat, and the handwriting varied where memory softened the dates.
The paper had gentle creases from being opened and reread, and some annotations had faint coffee marks at the margins. That strip turned a story into a tactile object that could be unrolled on laps or tables, inviting quiet rereading.
The timeline carried a cumulative warmth, like a necklace of small, ordinary things that together felt meaningful.
Steps
- Prepare a long strip of paper or a narrow accordion fold panel sized to fit inside the card.
- Mark events along the strip with short captions and tiny illustrations to echo the tone of each moment.
- Add subtle icons or small colored dots to give visual rhythm to the timeline.
- Fold or roll the strip carefully and place within a protective sleeve or pocket in the card.
- Write a note on the card referencing one entry as a focal point for the recipient.
A postcard-style vignette from a shared memory

I enjoy sketching a tiny scene from a trip or a café visit and turning it into a postcard that carries a little story. The ink lines sometimes wobble in a friendly way, and light watercolor washes give a suggestion of sky or street.
The card feels like a snapshot written by hand, the kind that prompts a smile when found inside a jacket pocket. There is comfort in compressing a memory into a single image and a few words, a way of handing over a little piece of a day.
Steps
- Choose a memorable scene and render it simply on postcard-sized cardstock with pen and light watercolor washes.
- On the reverse, write a short caption and a personal note referencing the scene.
- Add a faint postmark or stamped detail for an authentic postcard feel.
- Slip into a matching envelope or send as a standalone card.
- Optionally include a small photograph tucked behind the postcard for added texture.
A layered fabric swatch heart on linen paper
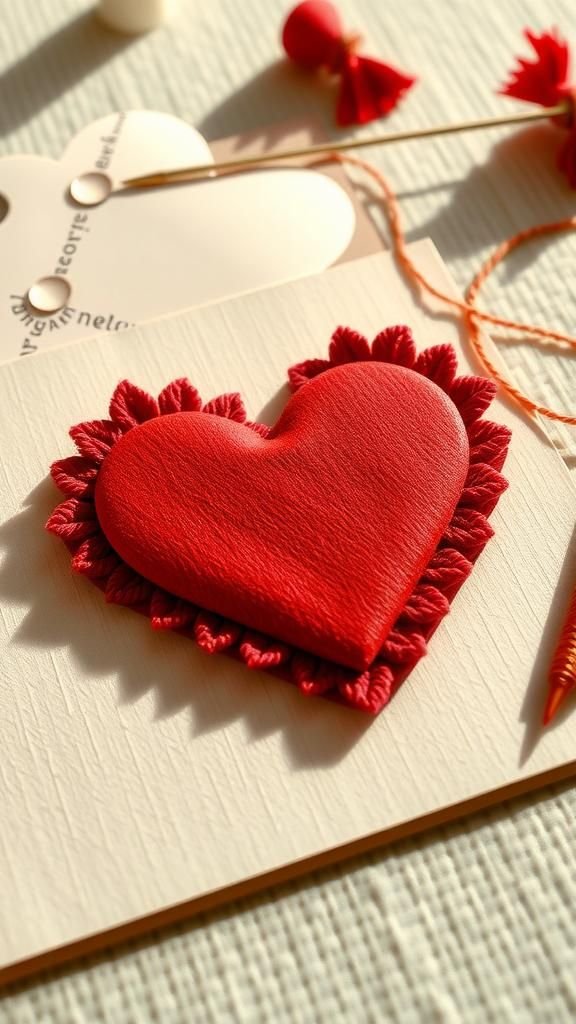
A scrap of linen and a tiny velvet swatch once found their way onto a card, creating a small patchwork heart that was soft under the thumb. The contrast between the coarse weave and the plush pile invited a curious touch, and threads peeked at the edges like little whispers.
I loved how the fabrics told of tactile places: a sweater warm from winter days, a napkin from a favorite café. The card read like a textile memory book, each swatch carrying its own hint of season and scent.
Steps
- Select small fabric swatches with complementary textures and cut them into a heart motif.
- Arrange the swatches on textured paper and secure their edges with a narrow adhesive or fabric glue.
- Add a tiny embroidered stitch or a doodled border around the heart to integrate the pieces.
- Write a short, tactile-focused message inside the card referencing the fabric choices.
- Place in a padded envelope to protect the delicate textile elements during transit.
A mini booklet of love coupons and favors

I once folded tiny vouchers into a neat booklet that felt like a private little contract between two people. Each page had playful promises written in a mix of cursive and block lettering, and the paper rustled with a pleasant thinness.
The whole booklet had a pocket-sized charm, easy to tuck into a wallet and pull out at unexpected moments. There was a warmth in imagining the small reciprocations: quiet breakfasts, borrowed sweaters, or a walk without rushing.
That object read like affection condensed into practical, affectionate gestures.
Steps
- Cut several small matching rectangles of cardstock and stack them to form a tiny booklet.
- Bind the stack along one edge with thread, staples, or a narrow ribbon for a tidy spine.
- Write a short promise or favor on each page with varied lettering styles for personality.
- Add a decorative cover and a small elastic or ribbon to hold the booklet closed.
- Present inside a slim envelope or tuck into a pocket of a favorite book.
A translucent vellum envelope with a lyric inside
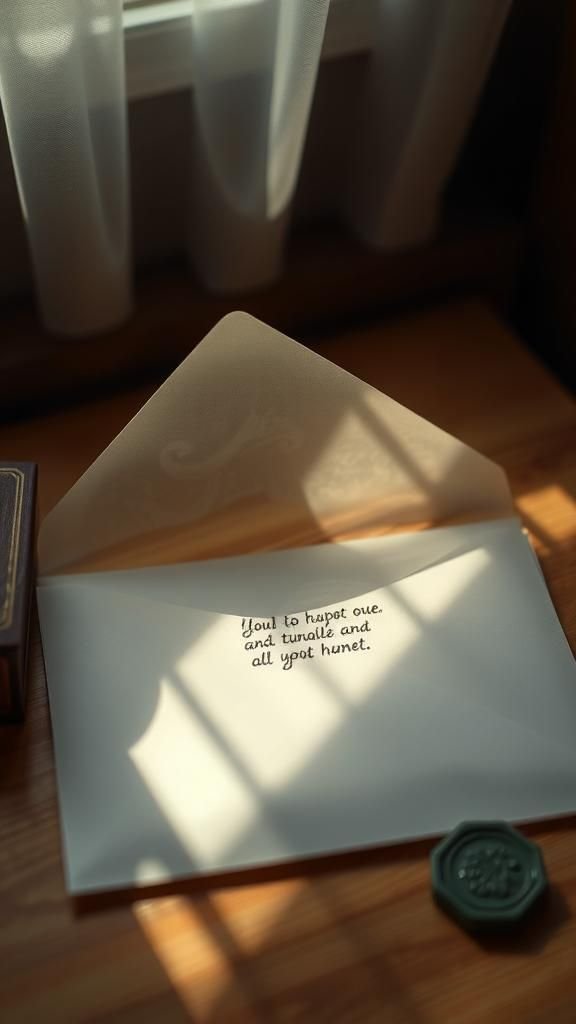
Once I slipped a favorite lyric onto pale paper and slid it into a translucent envelope so letters peeked like secrets. The vellum had a cool, slightly waxy feel and imparted mystery to the lines beneath.
When held to light the words blurred softly, casting a halation that felt gentle and slightly cinematic. The lyric itself carried echoes of a late-night playlist and small shared glances.
Opening the envelope felt like shifting a curtain, letting a familiar melody into the day with quiet theatricality.
Steps
- Choose a short lyric or line that resonates and print or handwrite it on delicate paper.
- Place the written piece into a vellum envelope so the text shows faintly through the material.
- Seal the envelope with a decorative sticker or small wax dab for cohesion.
- Pair with a plain outer envelope for mailing or gifting.
- Add a brief handwritten note on the outer card referencing the lyric’s meaning.
Tiny stitched hearts with visible running stitch

Thread once made a shy appearance on a card as a row of small stitched hearts that caught light like tiny ridges. The needle marks carried a handmade narrative, and thread ends frayed into little tails that felt honest and human.
The tactile contrast between flat paper and raised stitches created a pleasing rhythm under a fingertip. I found myself smiling at the slight irregularities; each stitch carried a small decision about placement and tension.
The overall effect was homespun and careful, the kind of detail that invites a second look.
Steps
- Mark tiny heart shapes lightly on cardstock where stitches will go.
- Pierce small holes along the outline and sew with a simple running stitch using embroidery thread.
- Knot and trim the thread on the back, securing ends neatly with a dab of clear adhesive.
- Pair the stitched panel with a contrasting card base to showcase the texture.
- Write a short note inside referencing the stitched motif for cohesion.
A silhouette photograph printed on textured paper
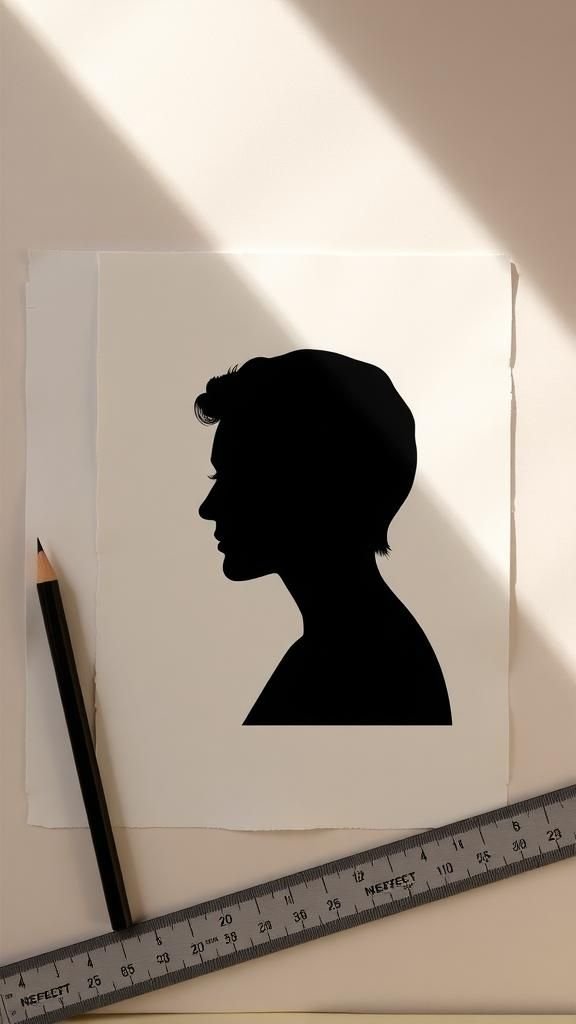
I once converted a silhouette photo into a single printed panel on textured art paper that looked more like a charcoal sketch than a digital print. The edges of the silhouette softened slightly against the tooth of the paper, and light seemed to nestle into the hollows.
The simplicity of shape carried a strong emotional weight; a profile suggested a laugh or a pause without spelling it out. Holding that print felt intimate, like carrying a private silhouette that fit easily into a wallet and kept a presence close throughout the day.
Steps
- Select a simple silhouette photograph and convert it to high-contrast black-and-white.
- Print the image onto textured fine art or cotton rag paper for tactile depth.
- Trim to a postcard or card size and mount on a subtle contrasting backing.
- Add a short handwritten line or date on the margin to anchor the memory.
- Slip into a protective sleeve or envelope to preserve the texture during delivery.
A scented strip that evokes a shared memory

One card carried a sliver of scented paper that released a faint trace of citrus and cedar when brushed. The scent was subtle, rising in gentle waves that evoked a particular market or a winter evening.
The strip itself carried a slightly crisp edge and a faint sheen where fragrance had been applied. That olfactory nudge triggered a rush of small images and sounds, more immediate than words alone.
The card felt like a tiny theater for memory, where a smell could open a doorway to a whole moment shared between two people.
Steps
- Lightly apply a concentrated fragrance or essential oil to a thin strip of absorbent paper.
- Allow the strip to dry completely on a clean surface to avoid transfer stains.
- Affix the scented strip inside the card or tuck into a pocket so the scent is enclosed.
- Write a brief line referencing the memory the scent evokes to guide the recipient.
- Place the card in a sealed envelope to preserve aroma until opening.
A die-cut window revealing layered messages beneath
I loved the way a tiny window cut into the cover created a teasing glimpse of what lay inside, a peek like an exchanged secret. The window’s edge was crisp and cool to the touch, and shadows pooled around the aperture depending on light angle.
Beneath, layered papers showed slivers of color and typography that promised a fuller message when the card opened. That partial reveal felt like an invitation, a small theatrical device that made the act of opening a card feel more deliberate and treasured than a simple glance.
Steps
- Design a cover with a simple die-cut shape that frames a portion of the interior content.
- Prepare interior layers with contrasting colors or typography positioned to show through the window.
- Align and secure the interior panel so the reveal appears intentional when the cover is closed.
- Optionally add a translucent layer behind the window for a softened peek effect.
- Pair with a coordinating envelope to echo the cutout motif.
A pocket card holding a tiny handwritten letter
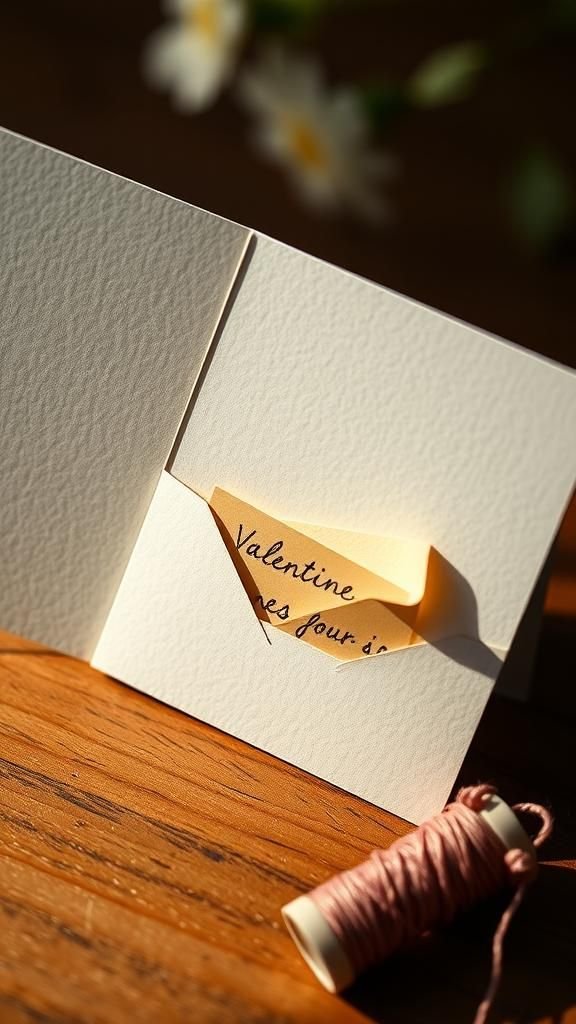
There was a small pocket tucked inside a card that held a very tiny folded note I could unfold in private. The pocket edge had a soft curve and a faintly darker tint where ink met paper, suggesting many hands had lingered over the words inside.
Pulling out the letter felt like revisiting a secret drawer: compact, private, and unexpectedly intimate. The letter’s paper rustled in a comforting, almost confidential way.
It seemed like a small reliquary for a thought someone wanted kept close rather than broadcast.
Steps
- Create an internal pocket panel by securing three edges of a smaller cardstock rectangle to the card interior.
- Fold a tiny note on fine paper and write a short, concentrated message suitable for private reading.
- Slide the folded letter into the pocket and seal the pocket edges firmly.
- Add a small tab or decorative sticker to the pocket for easy retrieval.
- Write a brief line on the card referencing the hidden message to prompt exploration.
A watercolor wash background with gold leaf accents
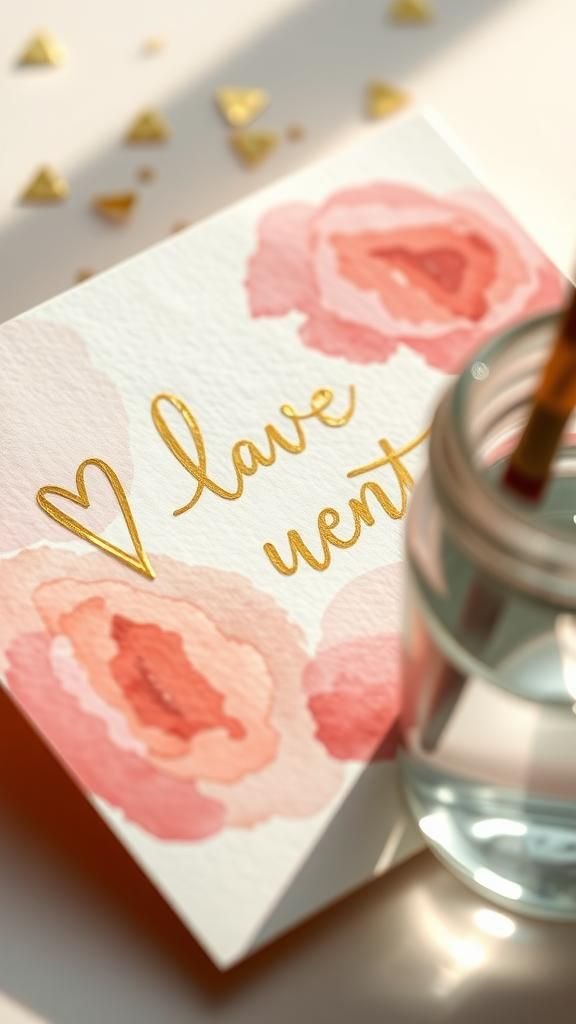
A soft wash of color once bled across the page like late afternoon sky, and tiny touches of gold leaf caught the light like stray laughter. The watercolor edges feathered into the paper, leaving pale gradients and pools where pigment paused.
Gold reflected warmth in small flashes, and the slightly raised leaf edges created a tactile hint beneath fingertips. The combination felt delicate and quiet, like a gentle applause around a short phrase.
It read like a small celebration of color and light, restrained but luminous in its way.
Steps
- Apply a gentle watercolor wash across the card surface, allowing soft gradients and organic edges.
- Once dry, apply an adhesive size in select areas and lay small pieces of gold leaf carefully.
- Gently remove excess gold leaf to reveal precise accents that catch the light.
- Add a short handwritten sentiment in a contrasting pigment to sit atop the wash.
- Finish by mounting the card on a subtle backing to frame the artwork.
A ticket-style card for a planned date night

I once crafted a narrow card modeled after an event ticket, the perforated edge and typography evoking a small promise of an outing. The cardstock felt firm and slightly grainy, like a keepsake meant to be saved.
The type choices nudged toward retro while the printed details hinted at a particular evening and a hopeful itinerary. Handing over the ticket felt ceremonial, a playful nudge toward shared time.
The object carried anticipation, as if a small paper pass could make an ordinary evening feel designated and quietly awaited.
Steps
- Design a ticket layout on cardstock with typographic elements and an optional perforated section.
- Print the ticket on heavyweight paper and create a perforated edge with a scoring tool or decorative scissors.
- Fill in the date and a brief description of the planned evening in a warm handwritten style.
- Nest the ticket inside a matching envelope or tuck into a folded card.
- Present the ticket with a short verbal invitation to frame the gift.
A folded map heart created from travel brochure bits

Scraps of maps from places visited came together as a collage heart that felt like a stitched travelogue. The glossy bits contrasted with matte paper where folds caught the light differently, and place names peeked like little captions.
The heart surface had slight irregularities where edges overlapped, creating small ridges you could feel when you ran a finger across them. That patchwork carried a sense of motion and shared routes, a little atlas condensed into an emblem.
It read like an encouragement to keep moving together, one small paper fold at a time.
Steps
- Cut map scraps or brochure pieces into small shapes and arrange them in a heart formation on cardstock.
- Adhere the pieces with thin adhesive, smoothing overlaps to avoid bulky ridges.
- Trim the heart shape and mount onto a contrasting card base for definition.
- Add a tiny handwritten caption naming a favorite place found within the collage.
- Seal with a thin protective varnish if the collage will be handled frequently.
A minimalist card with a single sewn initial
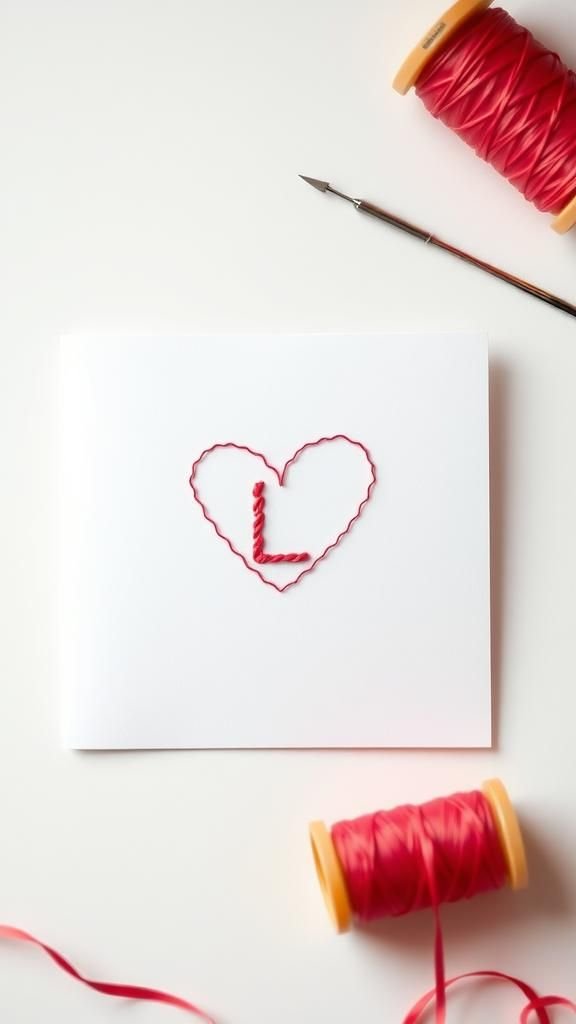
A tiny stitched initial once appeared at the corner of a stark white card, simple and quiet against the clean negative space. The thread created a delicate relief and a hint of color that felt intimate without fuss.
The presence of a single letter suggested a private code, a way of addressing someone with restraint. The minimalist approach made each tiny imperfection in the stitch more noticeable and endearing.
It was proof that a small, focused gesture could hold weight and that less could still feel abundant when chosen carefully.
Steps
- Mark a single letter lightly on thick white cardstock where the stitch will appear.
- Pierce tiny holes along the letter outline and sew with contrasting embroidery thread.
- Secure thread ends on the back with a neat knot and trim excess closely.
- Pair the sewn panel with a simple envelope to preserve the minimalist aesthetic.
- Add a brief handwritten line inside to balance the exterior’s restraint.