Spring always feels like an invitation to make things that flutter. I remember a rainy afternoon turning into a messy, colorful project session where simple paper became a tiny garden of butterflies; that first table full of scraps and laughter is why I keep coming back to spring butterfly paper craft ideas.
These spring butterfly paper craft ideas are friendly to any skill level and delightfully tactile. I often bring a stack of patterned scraps and a mug of tea, letting colors and textures steer the session until a whole swarm of playful wings appears on the table.
Delicate tissue paper butterfly window hangers
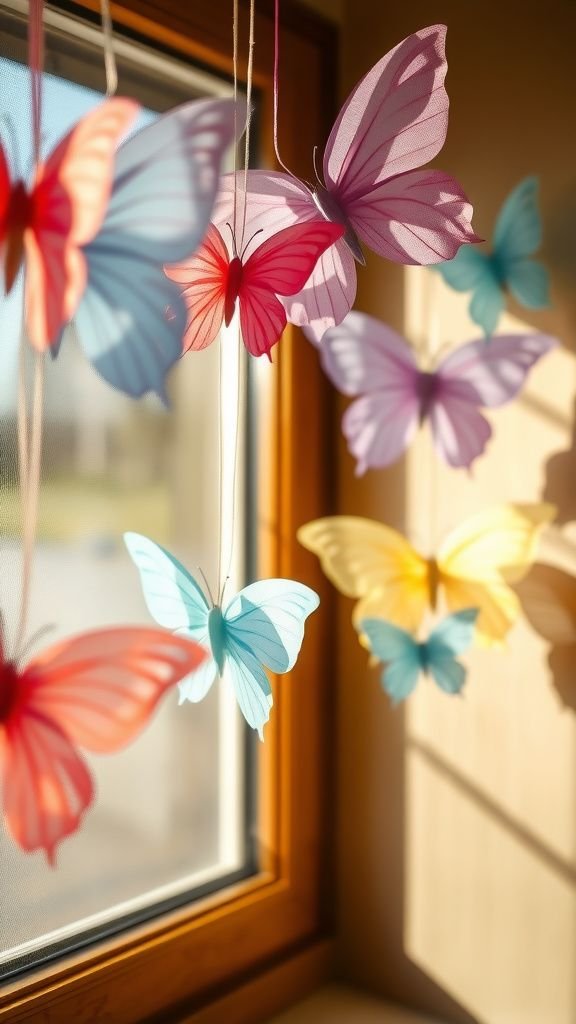
I loved watching sunlight filter through thin tissue wings, casting jewel-toned patches on the floor like miniature stained glass. The tissue has a papery whisper when it moves and the wings feel feather-light between fingers.
I often chose colors that echoed outdoor blooms, pairing soft corals with mint and pale lavender. The tiny shadow dances across the sill when a breeze passes, and the whole setup brings a warm, casual joy to a quiet morning.
Each hanger carried a slightly different curve, which made the whole display feel hand-crafted and personal.
Steps
- Layer two or three colors of tissue paper and mark wing shapes on the top layer.
- Cut along the marks to create pairs of wings and glue short lengths of thin wire or floral stem between them for a slight bend.
- Twist a small loop at the top of the wire and thread a clear fishing line for hanging, spacing multiple hangers along a window rod.
Accordion-fold watercolor wing butterflies for mantel
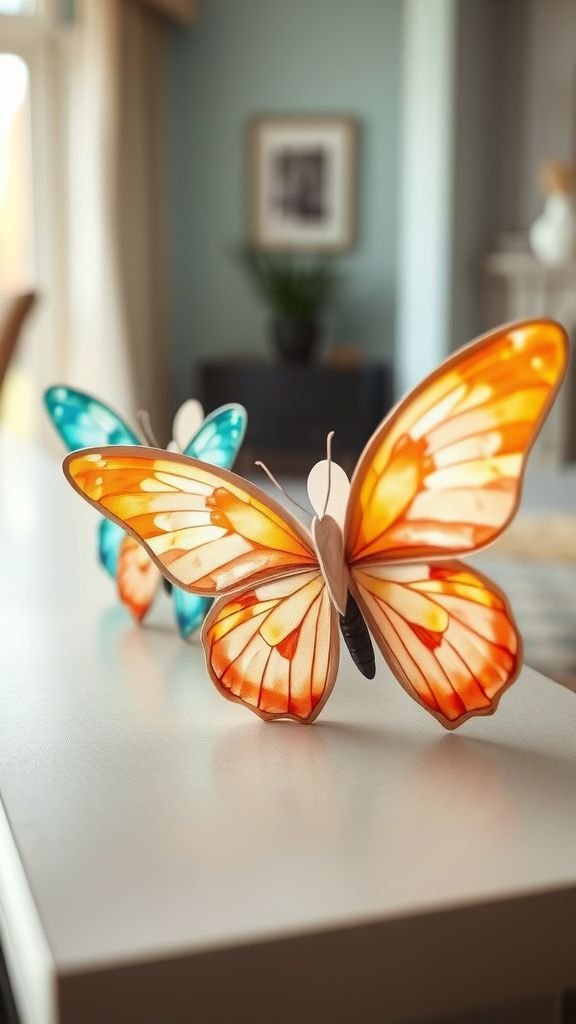
Watercolor on crinkled paper gave these wings a soft, dreamy quality that felt like small pieces of sky. I remember the scent of wet paint and the way pigment pooled at the edges, leaving delicate gradients.
The accordion folds added a playful bounce so wings opened and closed with a gentle nudge, catching air in a satisfying, papery rustle. Arranged along the mantel, they provided a rhythmic pattern of color and shadow.
The combination of fluid paint and crisp folds made each butterfly feel part painting, part tiny sculpture.
Steps
- Paint watercolor washes on heavyweight paper and allow them to dry flat.
- Fold painted paper accordion-style and pinch the center to form wings, securing the middle with a narrow strip of cardstock or tape.
- Add a small paper body and bend the wings slightly for dimension, then arrange on a mantel or shelf.
Hand-painted paper butterflies strung on floral garland
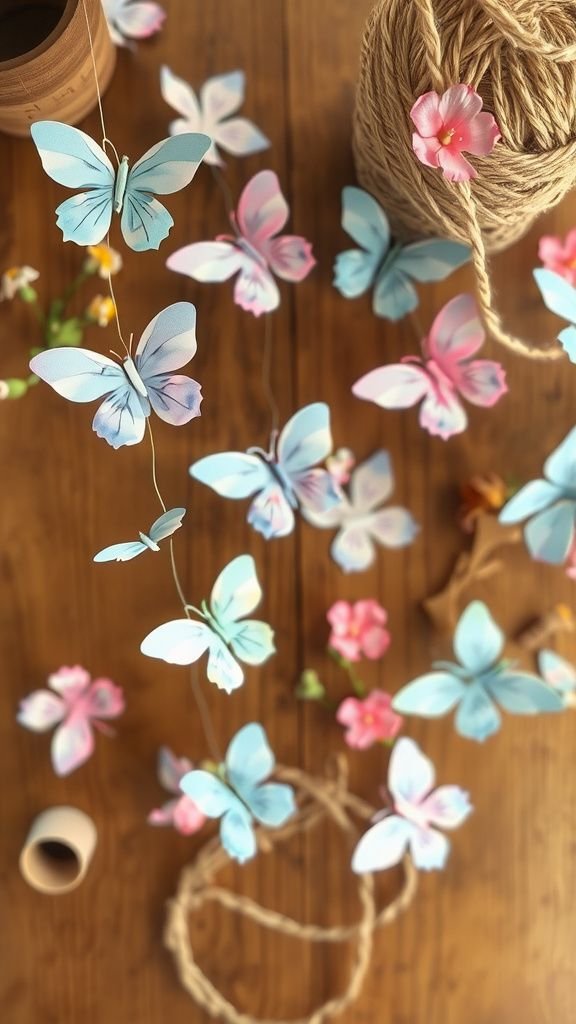
These painted paper butterflies mingled with tiny faux blossoms and felt like a pocket of spring draped across the room. I loved holding a painted wing and feeling the tooth of watercolor paper under my thumb; each brushstroke left a small ridge that caught the light.
The garland moved with a lazy rhythm whenever a door opened, and the layered colors felt like a conversation between paint and paper. Hanging above a bed or doorway, the whole strand brought a soft, celebratory mood, and the tiniest irregularities made every piece feel like a small keepsake.
Steps
- Paint butterflies on mixed-weight paper and let them dry completely.
- Punch small holes at the tops of the butterflies and thread them onto a length of twine, interspersing with faux flowers.
- Tie loops at each end of the twine for hanging and space the elements evenly along the garland.
Layered cardstock monarch-inspired wall cluster installation

Creating a cluster of layered cardstock butterflies produced a satisfying, architectural feel on the wall. The heavier cardstock surfaces had clean edges and a slight shadow where layers met, giving each wing a sculptural presence.
I arranged warm oranges with deep ambers and soft cream tones, thinking of gardens mid-afternoon. From across the room the grouping suggested motion, and up close the crisp edges and paper grain rewarded inspection.
The overall cluster read like a small migration paused on plaster, playful yet refined, bringing an energetic focal point to the room.
Steps
- Trace varying butterfly silhouettes onto cardstock in complementary colors and cut them out.
- Layer smaller wing shapes atop larger ones and adhere at the center to create a dimensional wing effect.
- Mount each layered butterfly onto foam mounting squares and arrange them on the wall as a cluster, staggering heights and angles.
Origami fluttering paper butterfly mobiles for balconies?
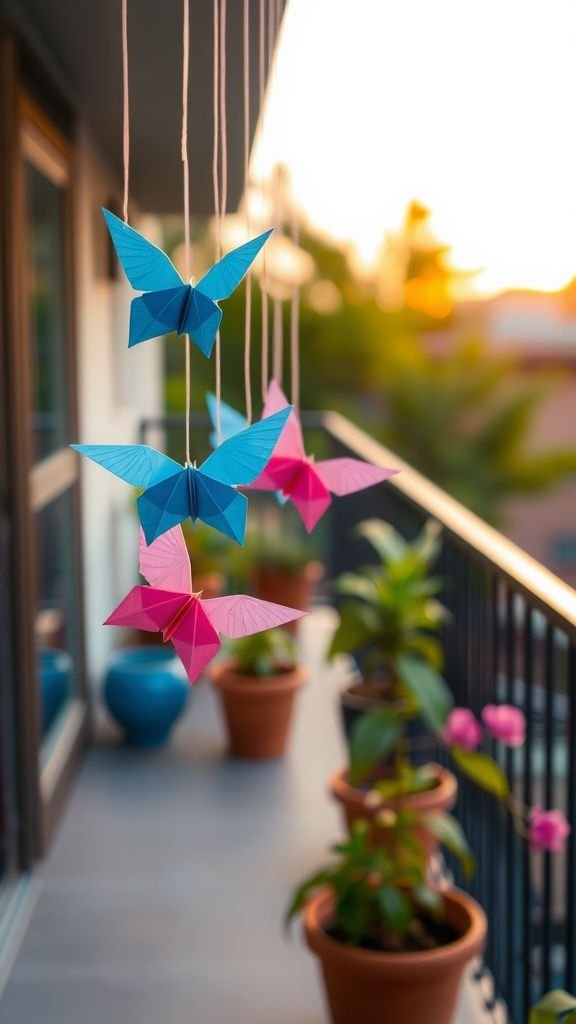
I enjoyed folding each origami butterfly while the balcony breeze drifted through, making the tiny shapes twitch like nervous birds. The crisp creases of origami paper contrasted with the soft plant leaves outside, and the sun created bright highlights along the fold lines.
Hanging several from different lengths created a lively vertical display, and the sound of paper brushing paper against a railing had a small, soothing rhythm. Each folded form held a geometry that felt calm and thoughtful, a collection of little moments that brought a balcony to life.
Steps
- Select lightweight origami paper with one colored side and one pale side and fold butterfly bases following a simple origami pattern.
- Thread clear monofilament through the center of each folded butterfly and knot securely, varying the lengths for visual interest.
- Suspend the strings from a small hoop or driftwood and hang the mobile on the balcony where it can catch gentle breezes.
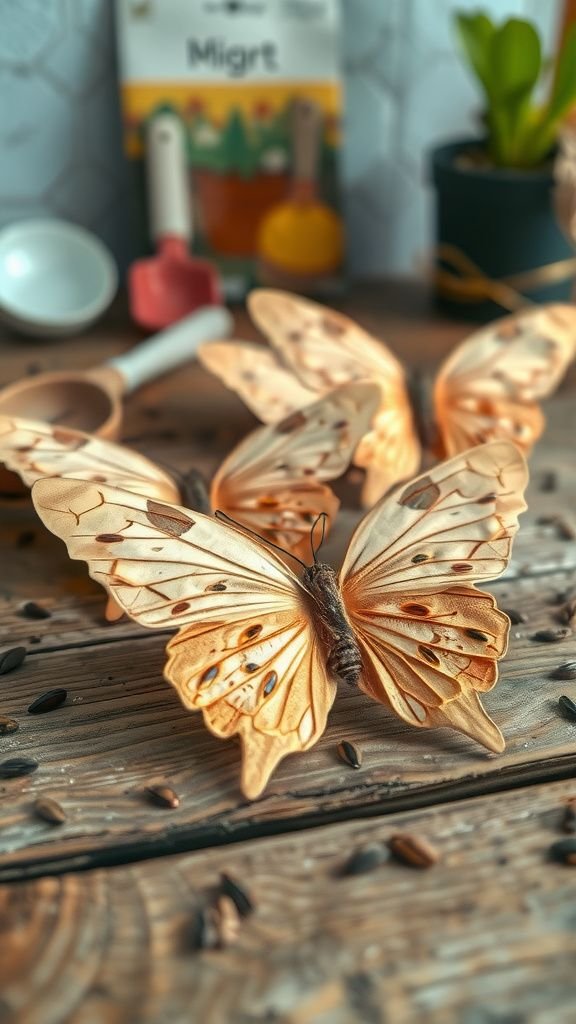
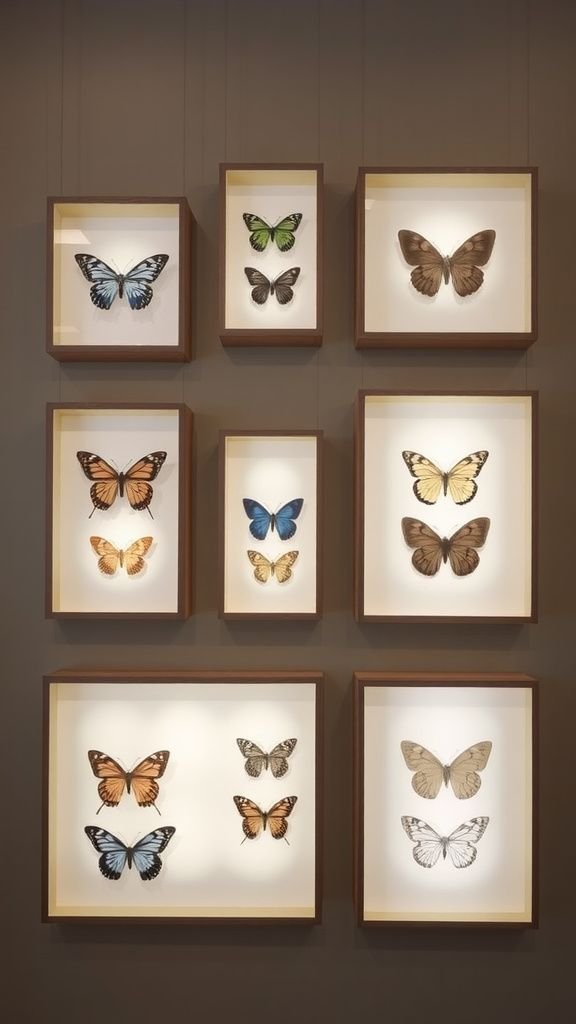
Pressed paper butterflies in glass frame display
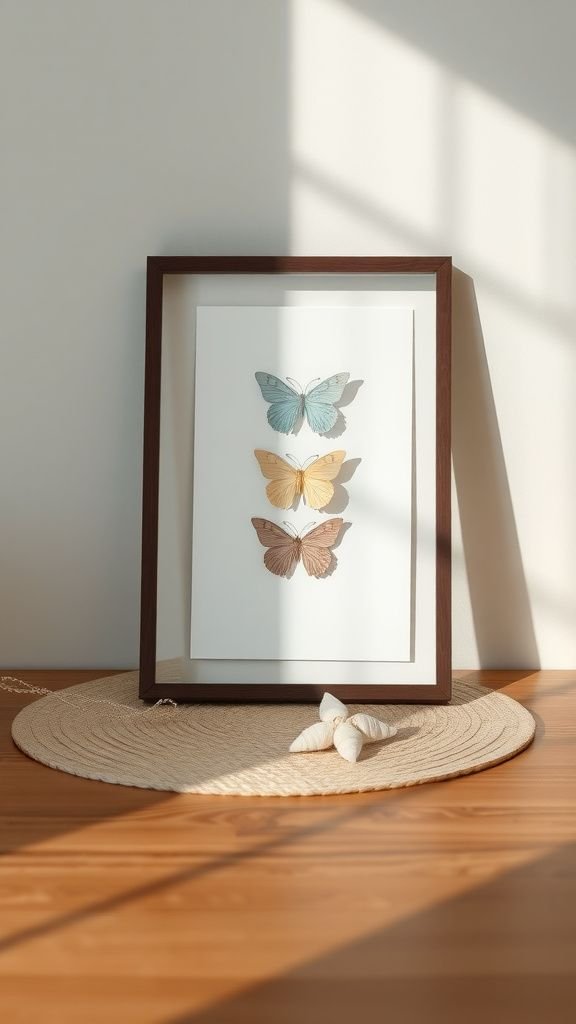
A glass-framed arrangement of pressed paper butterflies felt like holding a tiny museum exhibit at home. The paper lost a bit of its fluffy character and gained a refined, pressed elegance under glass.
Pressing smoothed edges and deepened pigment nuances, creating subtle variations in tone that read like aging petals. When light hit the framed pieces, faint translucence revealed itself along the thinnest areas, and the surrounding mat added a quiet gallery feel.
The whole piece had a calm, contemplative quality that fit well on a hallway wall or a bedside shelf.
Steps
- Press delicate paper butterflies between heavy books or in a flower press until flattened and dry.
- Arrange the pressed butterflies on a clean mat board, experimenting with spacing and composition.
- Place the mat and arranged butterflies into a glass frame, sealing carefully and hanging at eye level.
Mixed-media collage butterflies with fabric accents
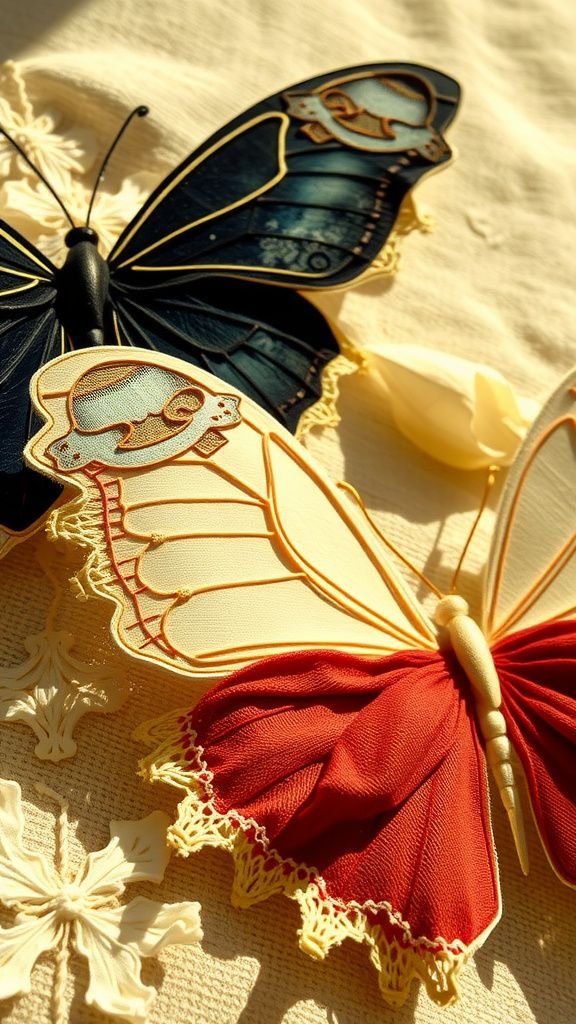
Combining paper with tiny swatches of fabric introduced unexpected textures into each butterfly. A scrap of linen, a velvet corner, and a touch of lace created contrasts between smooth paper and soft textile.
I enjoyed the tactile mix when fingertips grazed wings; some areas were velvety, others crisp. The patterns on fabric added a depth that paint alone did not, and the assembled pieces tended to look like small heirlooms.
Displayed in a shallow tray or mounted singly, each collage felt layered with personal stories, as if the materials were collected from small adventures.
Steps
- Cut butterfly shapes from mixed-weight papers and select coordinating fabric scraps for accents.
- Adhere small fabric pieces to wing surfaces, smoothing edges and layering for texture and depth.
- Add paper antennae and mount finished collage butterflies on cardstock or frame them.
Spring confetti butterfly pop-up cards for birthdays
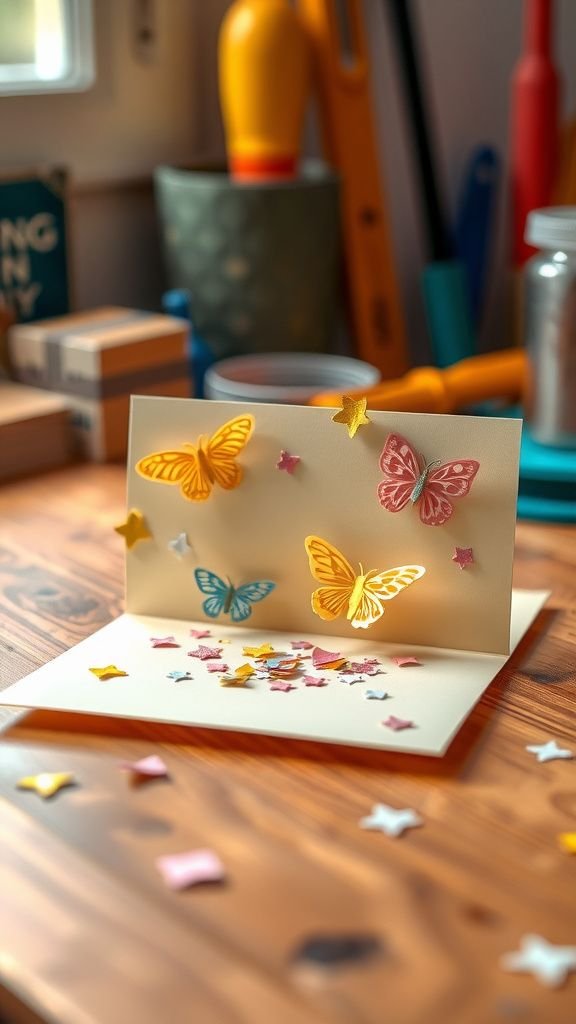
Opening a pop-up card to reveal a burst of paper butterflies felt like a small celebration every time. The inner pop surfaces caught light differently than the flat card face, and tiny confetti bits shimmered when the card was tilted.
I liked the moment someone lifted the flap and the three-dimensional shapes unfolded with a quick, satisfying motion. The palette often leaned toward cheerful spring colors, and the interior shadows gave the butterflies a believable depth.
These cards felt personal and slightly theatrical, the sort of handmade note that makes a table feel warmer.
Steps
- Score the card base to create interior pop panels and design butterfly shapes that will fold out when opened.
- Cut pop-up butterflies from patterned paper and glue their centers to the pop panels so wings extend outward.
- Sprinkle a few paper confetti pieces inside before sealing, and decorate the exterior with complementary patterns or stamps.
Charming doily-winged butterfly tea-light holders on tables
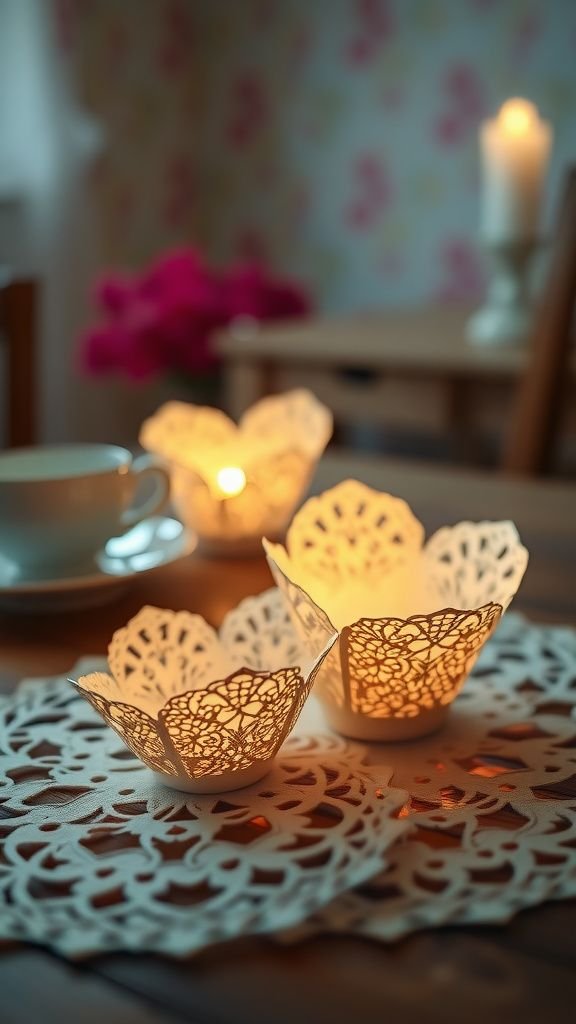
Paper doilies turned into delicate wings that shimmered under candle glow, casting lace-like shadows across tabletops. The thin paper allowed a soft diffusion of light, and the tiny perforations projected intricate patterns nearby.
I enjoyed the quiet, intimate atmosphere created by a row of these holders during a late evening tea; the warm flicker complemented pastel doily tones and a slightly musty paper scent that seemed cozy rather than old. The combination of fragile texture and warm light felt tender, and each holder read like a miniature lantern with a playful twist.
Steps
- Shape small paper doilies into wing forms and secure them around a simple paper or glass tea-light base.
- Add a paper body at the front of the wings and ensure the tea-light fits snugly and safely inside the holder.
- Arrange holders along a table as a soft centerpiece, keeping flame safety in mind and never leaving lit candles unattended.
Patterned scrapbook paper butterfly magnets for fridges

Small butterflies made from patterned scrapbook sheets brought quick bursts of color to a refrigerator door, each magnet holding a note or a photo with a playful charm. I liked how the printed motifs on the paper—florals, geometrics, tiny polka dots—became part of the wing personality.
The flatness of the magnets contrasted with the rounded fridge surface, creating tiny coastal-like accents in the kitchen. Every scrape of a postcard released a faint papery rustle, and swapping wings across the seasons felt like refreshing the room without much fuss.
Steps
- Cut butterfly shapes from patterned scrapbook paper and back them with thin cork or stiff cardstock for stability.
- Affix small round magnets to the back of each butterfly using strong adhesive.
- Place magnets on the fridge to hold notes or photos, mixing patterns and colors for a lively display.
Seed-paper butterflies that plant wildflowers in spring?
Seed-infused paper wings felt like a promise tucked into an envelope; the texture was fibrous and earthy, and the idea that they might yield real green patches later held a quiet thrill. When pressed between fingertips, the embedded seeds created tiny bumps that reminded me of summer fields.
Mailing one of these as a greeting felt like giving a small, living memory rather than a simple card. The scent carried a faint papery, soil-like note, and there was a contemplative pleasure in thinking about a future bloom linked to a tiny piece of paper.
Steps
- Blend recycled paper pulp with native wildflower seeds and press the mixture into butterfly-shaped molds, letting it dry thoroughly.
- Trim edges and optionally decorate with water-based inks or natural dyes once dry.
- Plant the seed-paper butterflies in a small pot or garden patch according to seed depth guidelines and keep moist until seedlings appear.
Paper quilling butterflies with curled filigree wings
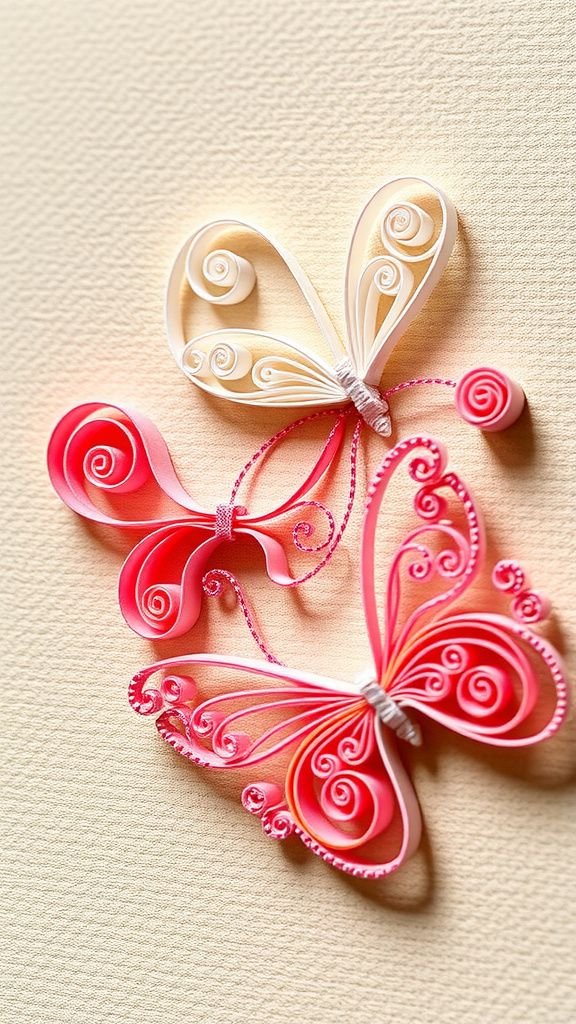
Quilled butterflies displayed a delicate filigree that felt both intricate and charming. Thin strips of paper curled into tight coils and open spirals, creating wings that seemed airy yet ornate.
I appreciated the tiny tactile contrast between the smooth rolled strips and the matte paper backing. The shadows cast by the quilled edges added a lace-like silhouette on the surface beneath.
Arranging a few quilled pieces together felt like composing a small garden embroidery, where each coil contributed a shimmering hint of texture that drew the eye closer.
Steps
- Create quilling coils and shapes from narrow paper strips using a quilling tool and glue the coils to form wing patterns.
- Draw or cut a simple paper body and attach the quilled wings to its sides.
- Mount finished quilled butterflies on cardstock or shadow boxes for display.
Watercolor resist butterflies on handmade paper hangings

The wax-resist technique on handmade paper produced wings with luminous, watermarked edges that looked almost dew-kissed. The handmade sheet gave an irregular deckled edge and a slightly rough surface where pigment pooled in small, pleasing crescents.
The resist lines stayed crisp, creating veins and patterns that read like the skeleton of a leaf. Hanging a few of these pieces together created a small series that felt poetic, like a page torn from a sketchbook.
The whole effect had a contemplative, quiet energy that suited a reading nook or studio wall.
Steps
- Draw butterfly vein patterns with a wax resist medium on handmade paper and apply watercolor washes over the surface.
- Allow the paint to dry completely, then gently remove excess wax if desired to reveal crisp resist lines.
- Mount or hang the paper on simple dowels or within floating frames to show off deckled edges.
Wallpaper-sample origami butterfly bookmarks for gardeners
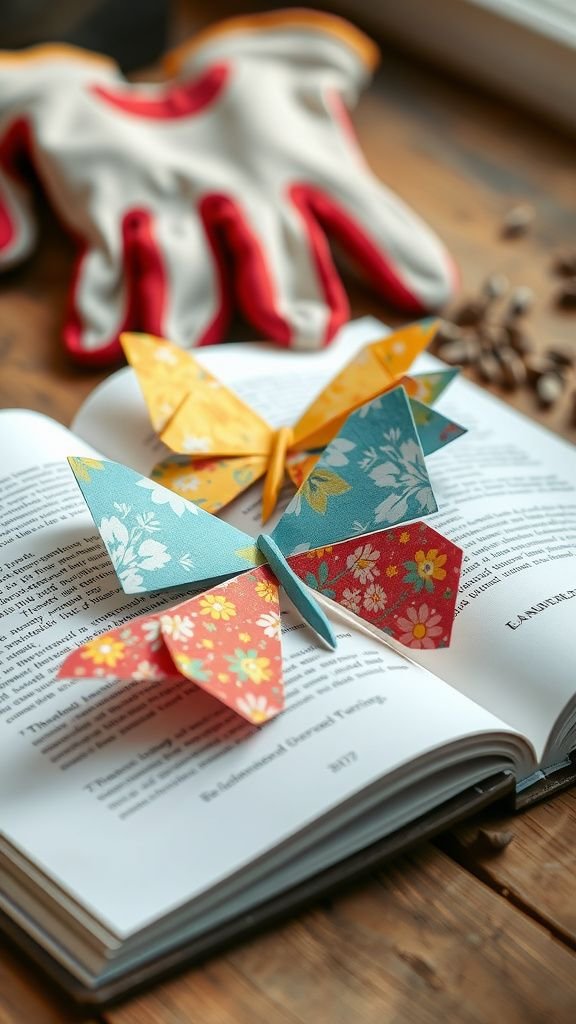
I enjoyed folding bookmark butterflies from leftover wallpaper samples, which often had saturated prints and sturdy weight. The heavier paper felt substantial in a book corner, and the repeat patterns created a bold wing surface that peeked from pages like a secret.
Pressing the folded shape between book pages left a faint, reassuring crease and the bookmark rode happily between chapters. The tactile pattern under thumb and the faint scent of paste from older samples added a slightly nostalgic charm.
These small, practical butterflies felt like meeting a friend at the margins of a reading session.
Steps
- Fold wallpaper sample squares into origami butterfly shapes following a compact bookmark pattern.
- Ensure the base of the folded butterfly forms a snug corner that can slide over book pages.
- Trim any excess and decorate lightly with markers or stamps for a personal touch.
Papier-mâché butterfly sculpture for centerpieces on tables
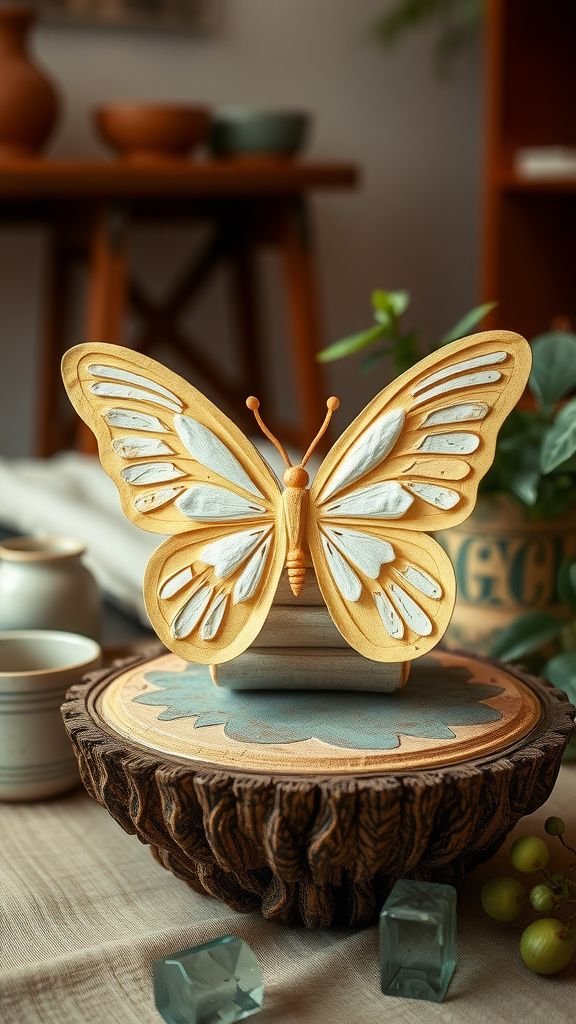
A papier-mâché butterfly took time but the resulting centerpiece had a whimsical, handcrafted heft. The layered paper surface held tiny bumps and seams that read like landscape ridges when painted.
I enjoyed the contrast between the paper’s raw grain and smooth painted areas where color pooled. Placed atop a low bowl or among fresh greenery, the sculpture became a conversation piece, its scale lending a gentle drama to a table.
The whole object felt slightly theatrical yet homey, as if a story had settled into the room and decided to linger.
Steps
- Create a simple armature from wire and foil, then layer strips of paper soaked in paste to build the butterfly form.
- Once dry and firm, sand lightly and apply gesso or primer before painting.
- Paint the sculpture in the desired palette and place it on a decorative base or low bowl for a table centerpiece.
Bright crepe paper flower-and-butterfly wreath for doors
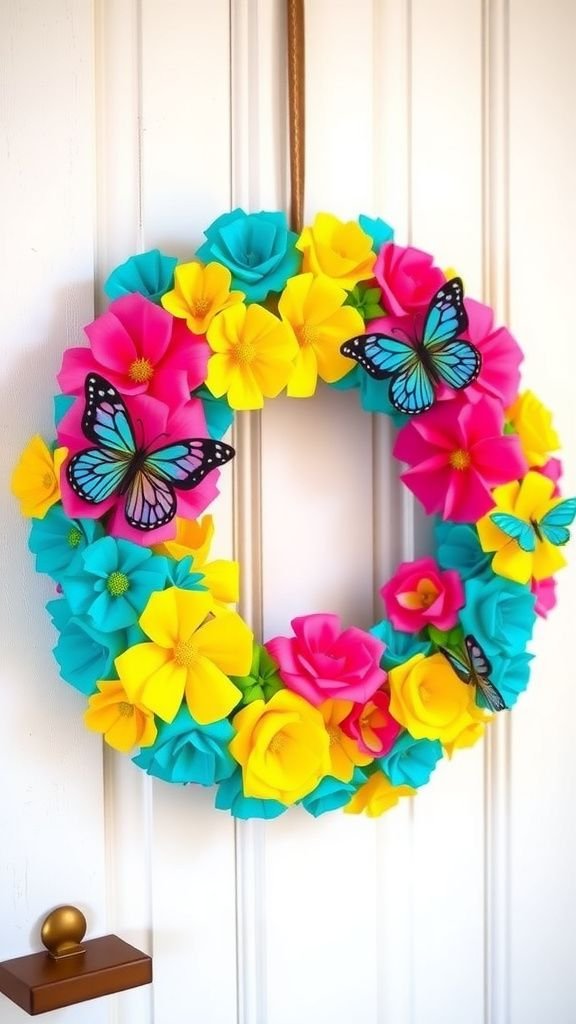
Crepe paper offered a springy, tactile surface that felt playful when shaped into blooms and wings. The lightly ribbed texture caught light differently across each petal and wing, creating soft highlights and shadow lines.
I liked how the wreath curved naturally, the paper elements lending movement and a casual cheerfulness to an entryway. Colors leaned bright and optimistic, and the slightly crinkled finish gave a handmade, festive vibe.
Each time the door opened, the wreath would sway a hair, a tiny reminder of slow afternoons spent arranging color and form.
Steps
- Form crepe paper flowers and butterfly elements by shaping petals and wings from strips and securing centers with floral wire or tape.
- Attach the paper elements to a foam or wire wreath base, layering for fullness.
- Add a ribbon loop for hanging and trim any stray edges for a neat profile.
Mini butterfly envelope seals with wax look
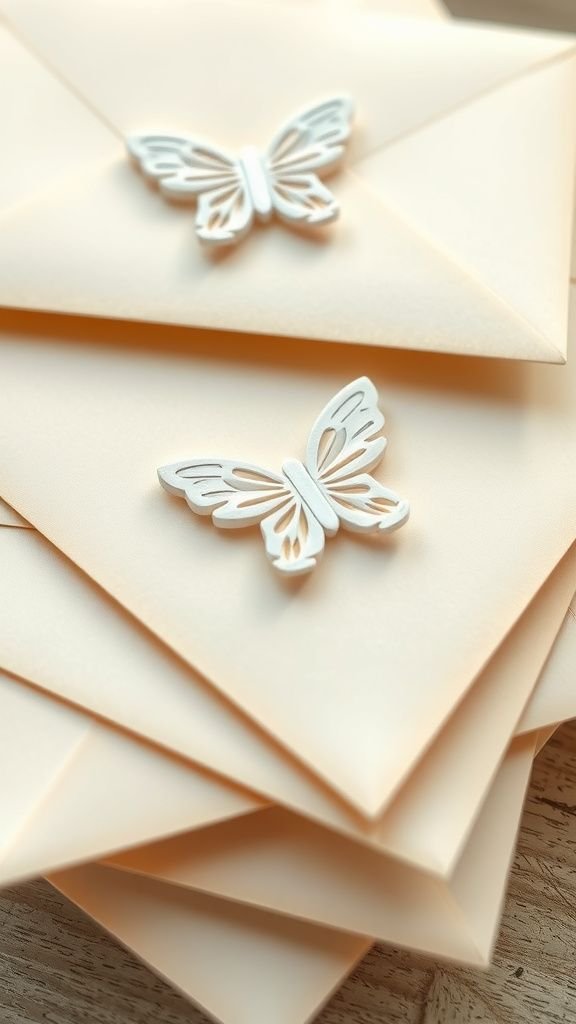
Tiny paper butterflies folded into envelope seals had a charming, quasi-vintage vibe that felt delightfully tactile. The little seals read like miniature stamps and carried a subtle weight depending on paper choice.
I liked slipping one onto a corner of an envelope and imagining the recipient smiling at the small, crafted touch. The edges sometimes curled slightly over time, adding character, and the variety of patterned paper meant each seal felt individualized.
The overall effect on a stack of letters was quietly celebratory, like wrapping a mundane task in a small moment of care.
Steps
- Fold or die-cut small butterfly shapes from lightweight decorative paper sized to fit envelope corners.
- Crease gently where needed and adhere the butterfly to the envelope with a small dot of glue.
- Optionally add a faux wax dot made from colored paper or a sticker for an old-fashioned finish.
Stained paper effect lampshade with flutter motifs
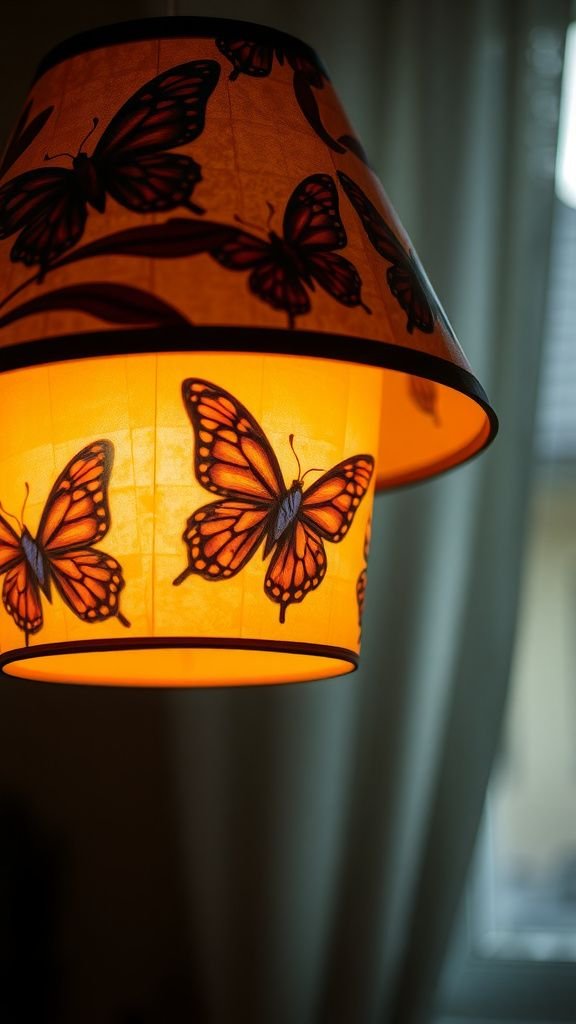
A lampshade decorated with stained paper butterflies produced warm, mottled light that felt like dusk caught in paper. The stained areas absorbed and scattered light, and the small wing silhouettes cast delicate shadows across nearby surfaces.
I often chose deeper, amber tones toward the bottom and paler washes near the top so the glow graduated softly. The craftiness of the paper was apparent in gentle imperfections and bleed lines, which made the lampshade feel lived-in and layered.
The overall mood was restful and slightly nostalgic, ideal for a cozy reading corner.
Steps
- Stain sheets of thin paper with tea or diluted washes to achieve varied tones and allow to dry.
- Cut butterfly silhouettes from the stained paper and arrange them on a plain lampshade, adhering with a thin, heat-safe adhesive.
- Ensure there is adequate air gap between paper and bulb and use a low-heat LED bulb for safe, warm illumination.
Butterfly silhouettes in layered vellum frames
Layered vellum offered a soft, translucent quality that gave butterfly silhouettes a floating presence within frames. Each sheet blurred what’s behind it just enough to suggest depth without losing the crispness of silhouette edges.
I liked arranging multiple framed panels in a vertical line where the translucency created a subtle overlap that changed with the room’s lighting. The vellum felt silky under fingertips and the edges of the frames softened the overall composition.
This approach read like a quiet study of form, each layer adding a whisper of motion and a gentle sense of calm.
Steps
- Cut butterfly silhouettes from dark paper and mount them between layers of vellum in small frames.
- Space multiple frames in a column or grid to create a sense of depth and repetition.
- Hang the frames where indirect light can pass through the vellum to enhance translucency.
Chalk-drawn butterfly templates for tracing fun

Chalk-drawn templates brought a playful, hands-on quality to marking butterfly shapes on rougher papers. The chalk left soft, erasable lines that felt forgiving and experimental, and the dusty residue under fingers created a nostalgic, schoolyard sensation.
I enjoyed sketching a quick template on a slate board and then tracing it onto colored papers, watching each outline take form. The result often carried a subtle chalk halo where pigment rubbed, lending a slightly raw, creative energy to the cut pieces.
This method felt spontaneous and friendly, perfect for casual group crafting sessions.
Steps
- Sketch butterfly templates on a chalkboard or cardstock using chalk for easy erasing and refinement.
- Transfer the chalk outlines to colored papers by tracing or rubbing, then cut out the shapes.
- Refine edges with a soft eraser if needed and decorate the butterflies with additional chalk or pastel accents.
Game: matching paper butterflies memory set
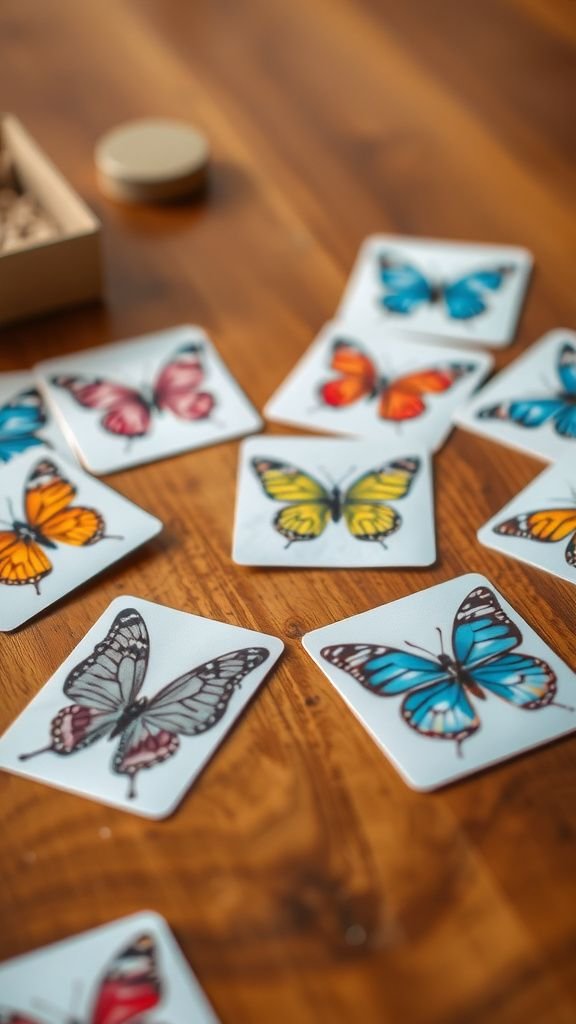
Creating a memory game with paired butterfly cards felt like turning paper scraps into playful learning moments. Each pair had a distinct pattern or colorway which made pulling a match satisfying and visually joyful.
The cardstock held up well through repeated shuffling, and the tactile act of flipping cards created a pleasant little ritual. Playing with friends or family, the table filled with laughter as mismatches showed unexpected color pairings.
The small format made it portable, and the simple rules let the paper designs take center stage, inviting attention to pattern and color.
Steps
- Design matching pairs of butterfly faces on sturdy cardstock and print or hand-draw the designs.
- Cut the cards to uniform size and back them with a plain colored sheet to conceal images when face-down.
- Shuffle and play memory-matching rounds, storing the set in a small box or bag for travel.