
Teacher appreciation handmade gift crafts bring a warm, personal touch to thank-you moments and classroom farewells, turning simple supplies into keepsakes that carry texture, color, and handwriting. These teacher appreciation handmade gift crafts can feel like a little piece of the school day folded into a small object.
I remember a student folding a tiny paper star and tucking it into my mug; the small gesture brightened a long week of grading and stayed on the desk for months.
That quiet memory shows why teacher appreciation handmade gift crafts can linger longer than the seasonal rush.
Hand-painted mug with heartfelt notes from students

I keep thinking of the warmth that a painted mug brought across cold mornings. The glossy ceramic catches light in a way that makes scribbled messages look almost like tiny confetti.
Paint textures show faint ridges where a child pressed harder, and little smudges of color feel honest and human. When the mug fills with steam the paint seems to glow and the handwritten names peek through fog.
It sat on the desk, a gentle reminder of small voices and the soft chaos of classroom life.
Steps
- Gather a plain ceramic mug, oil-based markers or ceramic paints, rubbing alcohol, and a pencil for sketching.
- Wipe the mug clean with alcohol, sketch names or doodles lightly with pencil, and trace with markers or paints.
- Allow the design to dry completely, then cure the mug according to paint or marker instructions so the surface becomes wash-resistant.
- Rinse gently and wrap in tissue or place in a simple gift box for presentation.
Scented jar candle with layered dried flowers
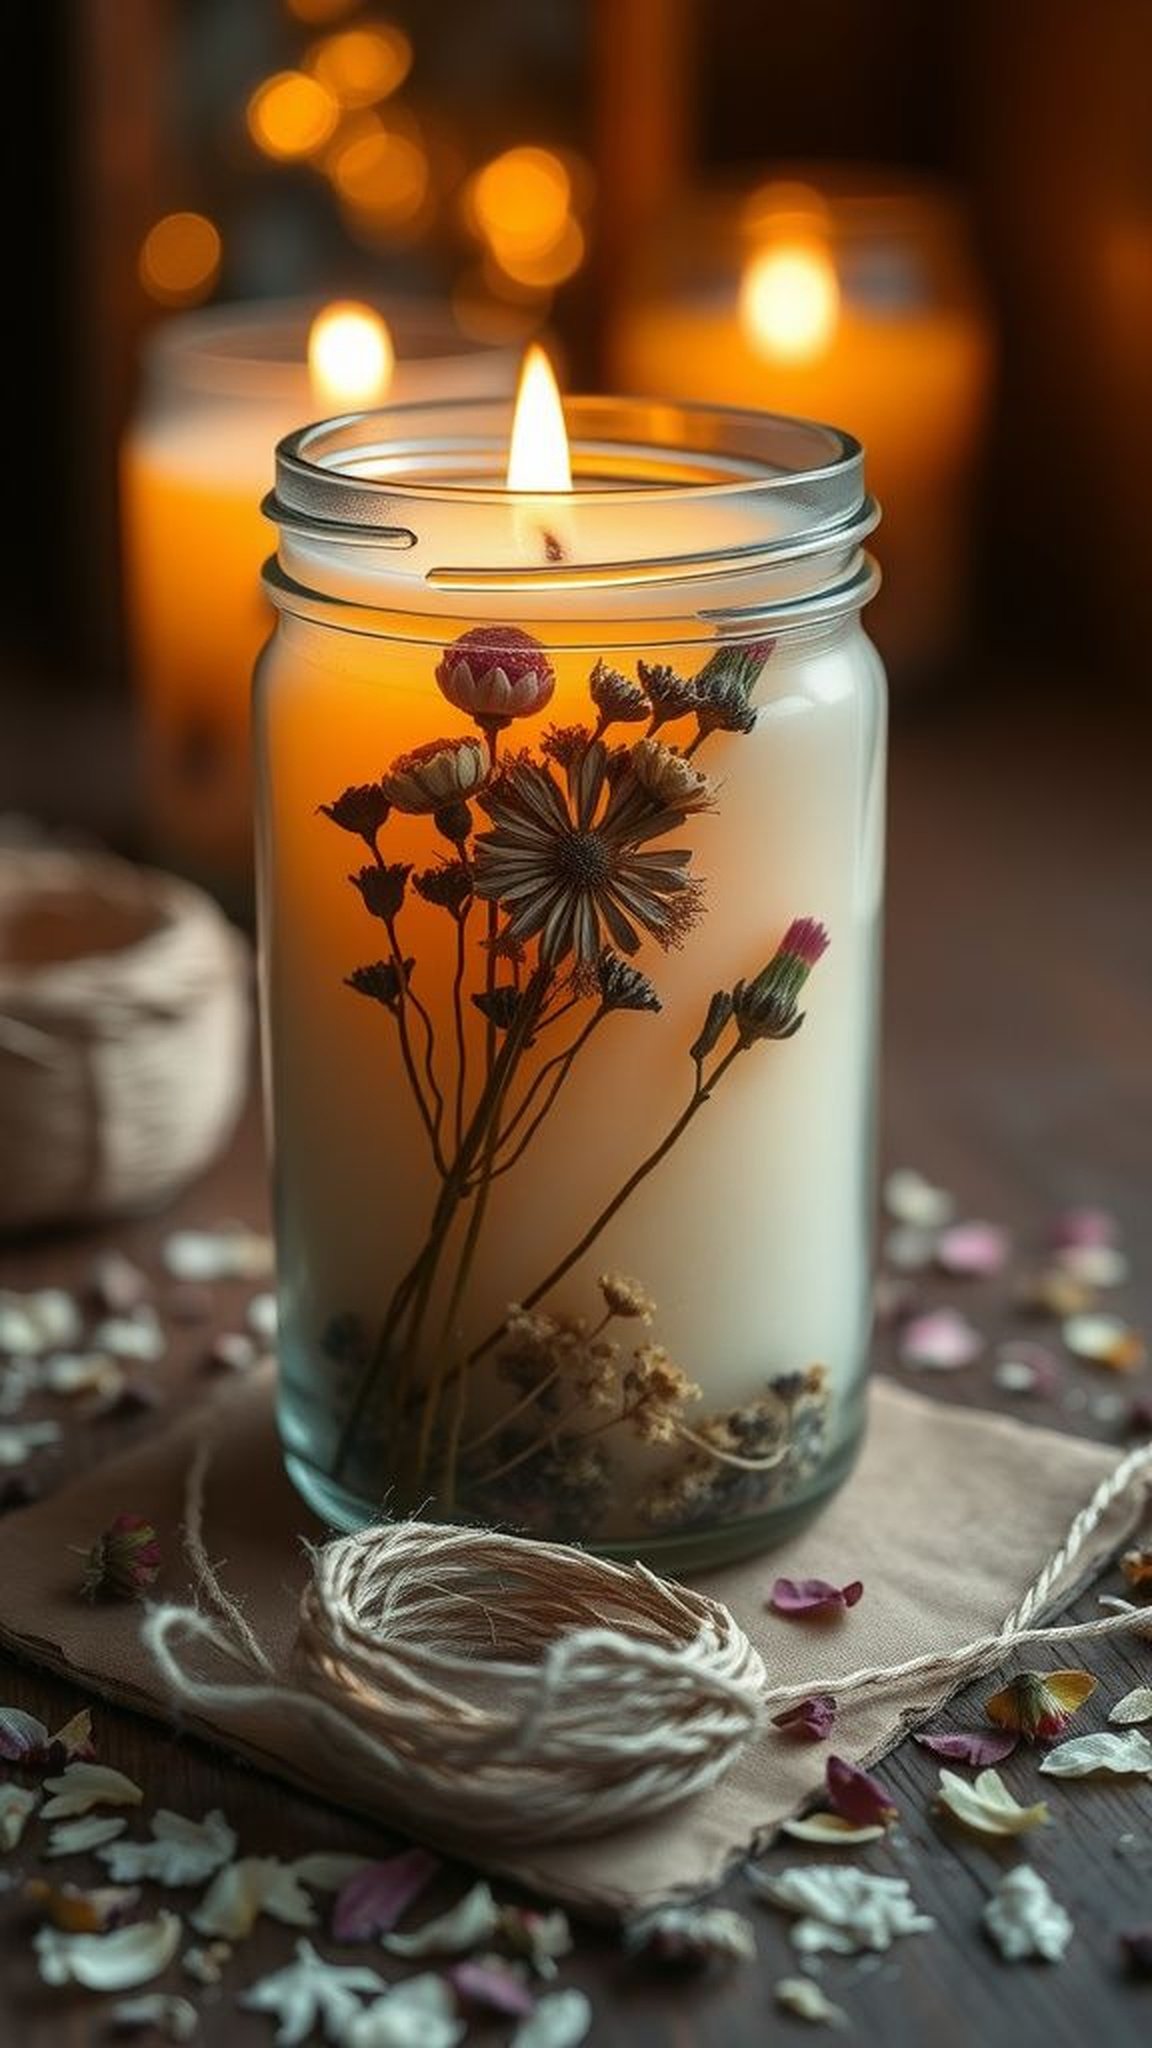
There was a quiet pleasure in watching a jar candle glow while dried petals brushed the glass like muted confetti. The wax surface catches tiny fragments of botanical texture and emits a faint herbal scent that calms late afternoon grading.
Layers of color from pressed blooms show through the clear jar, and the wick creates a small, steady center of light. The jar feels weighty in the hand, and the first gentle scent when lit pulls memories of recess bells and sunlit hallways into the room.
Steps
- Select a heat-safe glass jar and pick a soy or paraffin candle wax suitable for container candles.
- Melt the wax carefully, stir in fragrance oil chosen for a calming floral or citrus note, and let it cool slightly.
- Press a layer of dried flowers against the glass, anchor a pre-tabbed wick in the jar center, pour the wax slowly, and allow the candle to set undisturbed.
- Trim the wick to an appropriate length and label the jar with a handwritten tag.
Personalized notebook with hand-stamped cover design
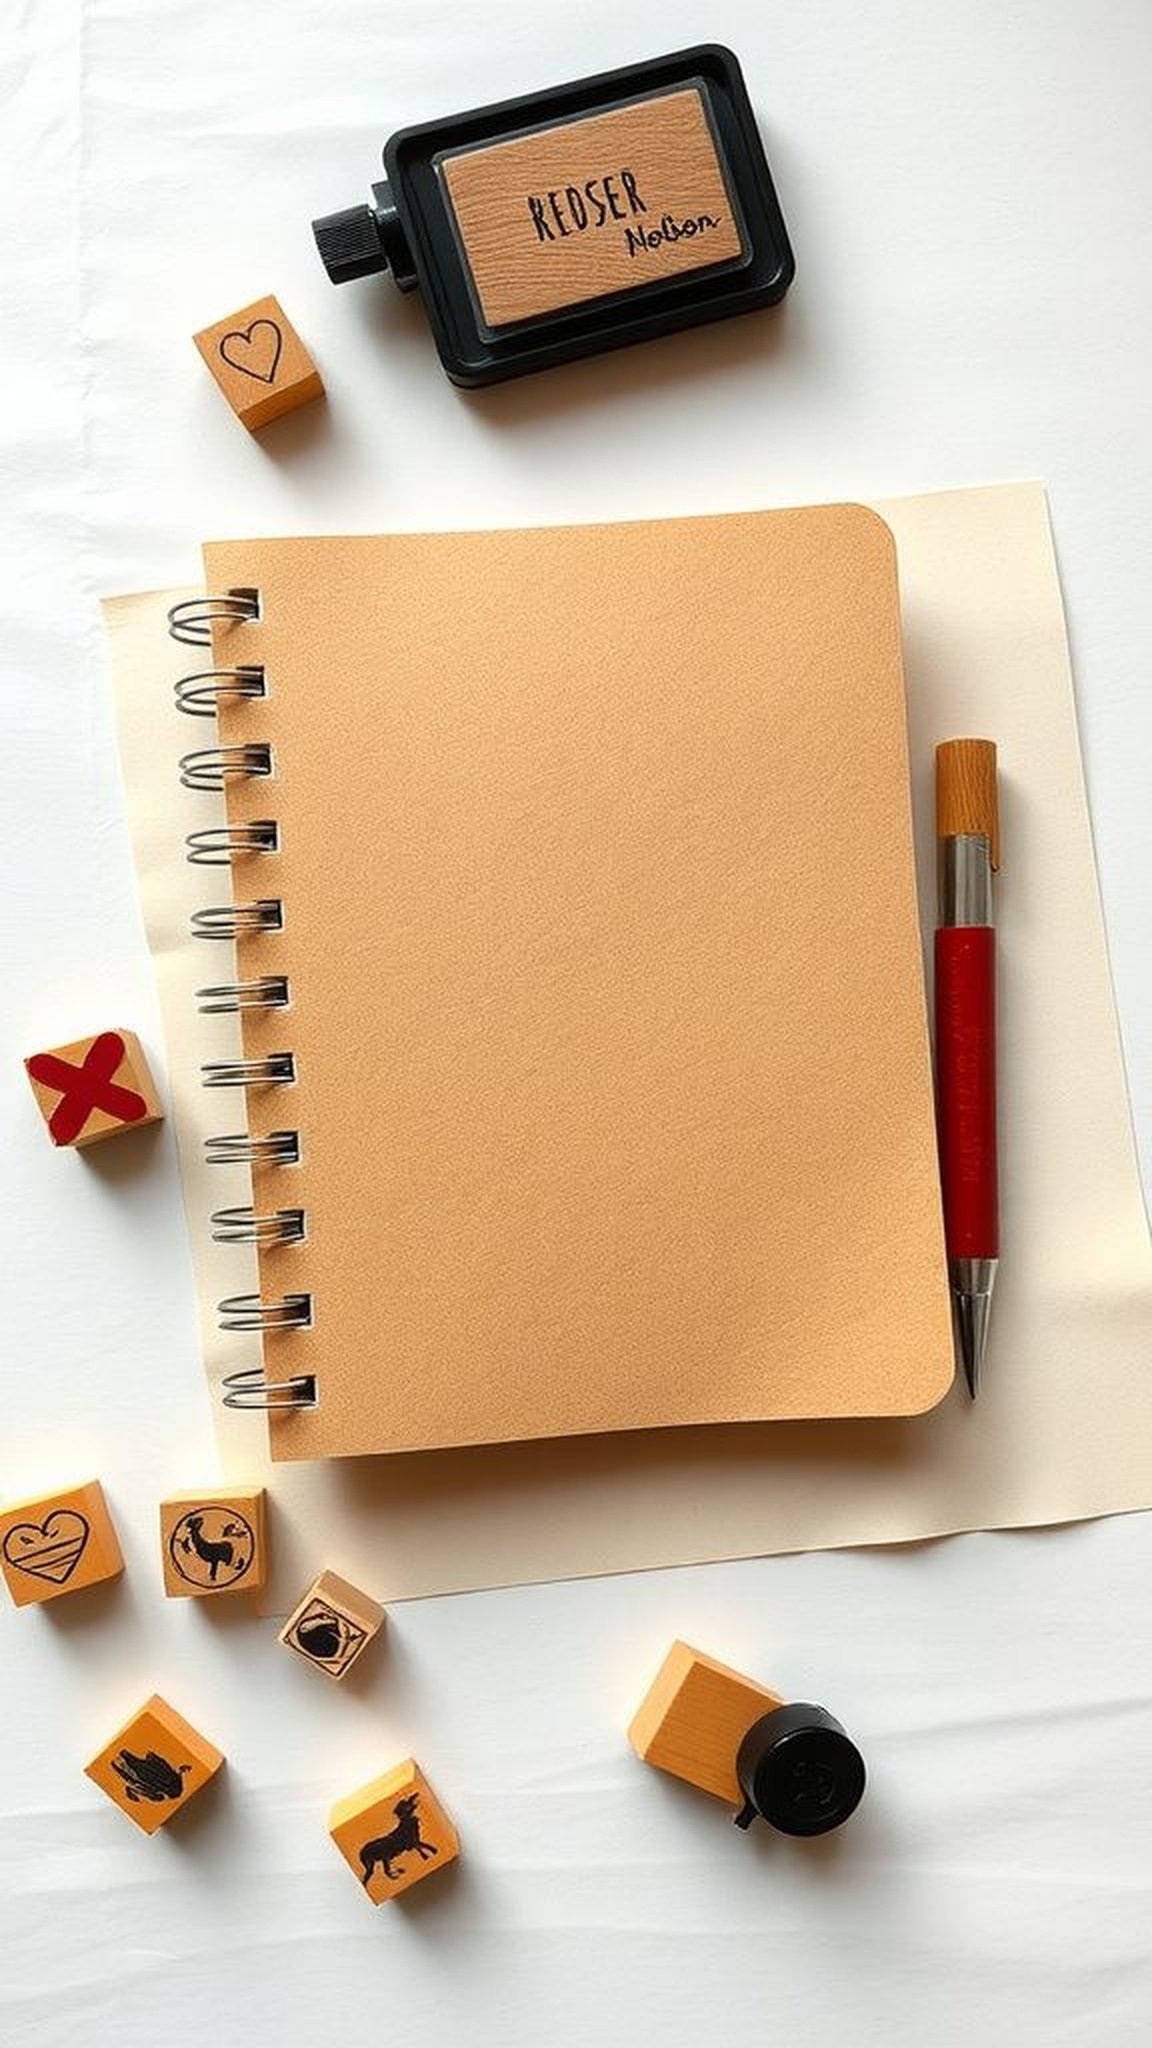
A cover with hand-stamped letters feels like a whisper from a classroom table. The texture of ink presses into paper and carries tiny irregularities that hint at human hands and quick lunchtime creativity.
The pages inside smell faintly of paper and binder glue, and the weight of the notebook settles pleasantly when flipped open. A teacher might tuck it under a stack of essays and catch a glimpse of a stamped doodle that brings a smile.
The cover becomes a small archive of the school year.
Steps
- Choose a blank notebook with a sturdy cover and select alphabet or motif stamps with an ink pad suitable for paper.
- Plan a layout lightly with pencil, press stamps evenly across the cover to create names, motifs, or a pattern, and allow the ink to dry.
- Add small decorative touches like washi tape along the spine or a handwritten dedication on the first page.
- Wrap the notebook with twine or place it in a simple sleeve for gifting.
Jar of gratitude notes with colorful folded paper

The jar held a scatter of folded colors and the sound of paper brushing paper when tilted. Each tiny note gave off the faint scent of classroom markers and hurried lunchtime handwriting.
Peeking inside felt like finding a cluster of small, bright promises; names and short sentences curled into private little pages. The glass refracted light across the writing and created a mosaic of ink and color.
That jar became a slow reveal, something to pull out on weary afternoons and read through like a stack of tiny, personal postcards.
Steps
- Select a clear glass jar and cut or prepare strips of colorful paper suitable for writing small notes.
- Provide pens in dark ink and invite contributors to write brief messages, fold each note neatly, and drop them into the jar.
- Seal the jar with a lid and add a decorative label or tag indicating its purpose.
- Present the jar with a small card encouraging the recipient to open a note when needed.
Pressed flower bookmark that smells faintly of summer

A pressed flower bookmark feels like a small corridor of sunlight between pages. The fragile petals lay flat and carry tiny veins that are visible against translucent paper.
The paper edges have a soft tooth that crinkles slightly when moved, and the scent of dried blooms can call up recess memories. The bookmark slips between pages with a whisper and leaves a small impression of color along the book’s edge.
Every pull from the spine brings a tactile reminder of a shared year and the slow turning of time.
Steps
- Select small, flat flowers and press them between absorbent paper under weight until fully dried.
- Arrange the pressed flowers on a strip of sturdy cardstock, cover with a clear laminate or place between two pieces of laminating film, and seal the edges.
- Trim the bookmark to a pleasing shape and punch a hole at the top for a ribbon if desired.
- Tie a short ribbon through the hole and add a tiny handwritten tag if wished.
Hand-sewn pencil pouch with playful fabric choices
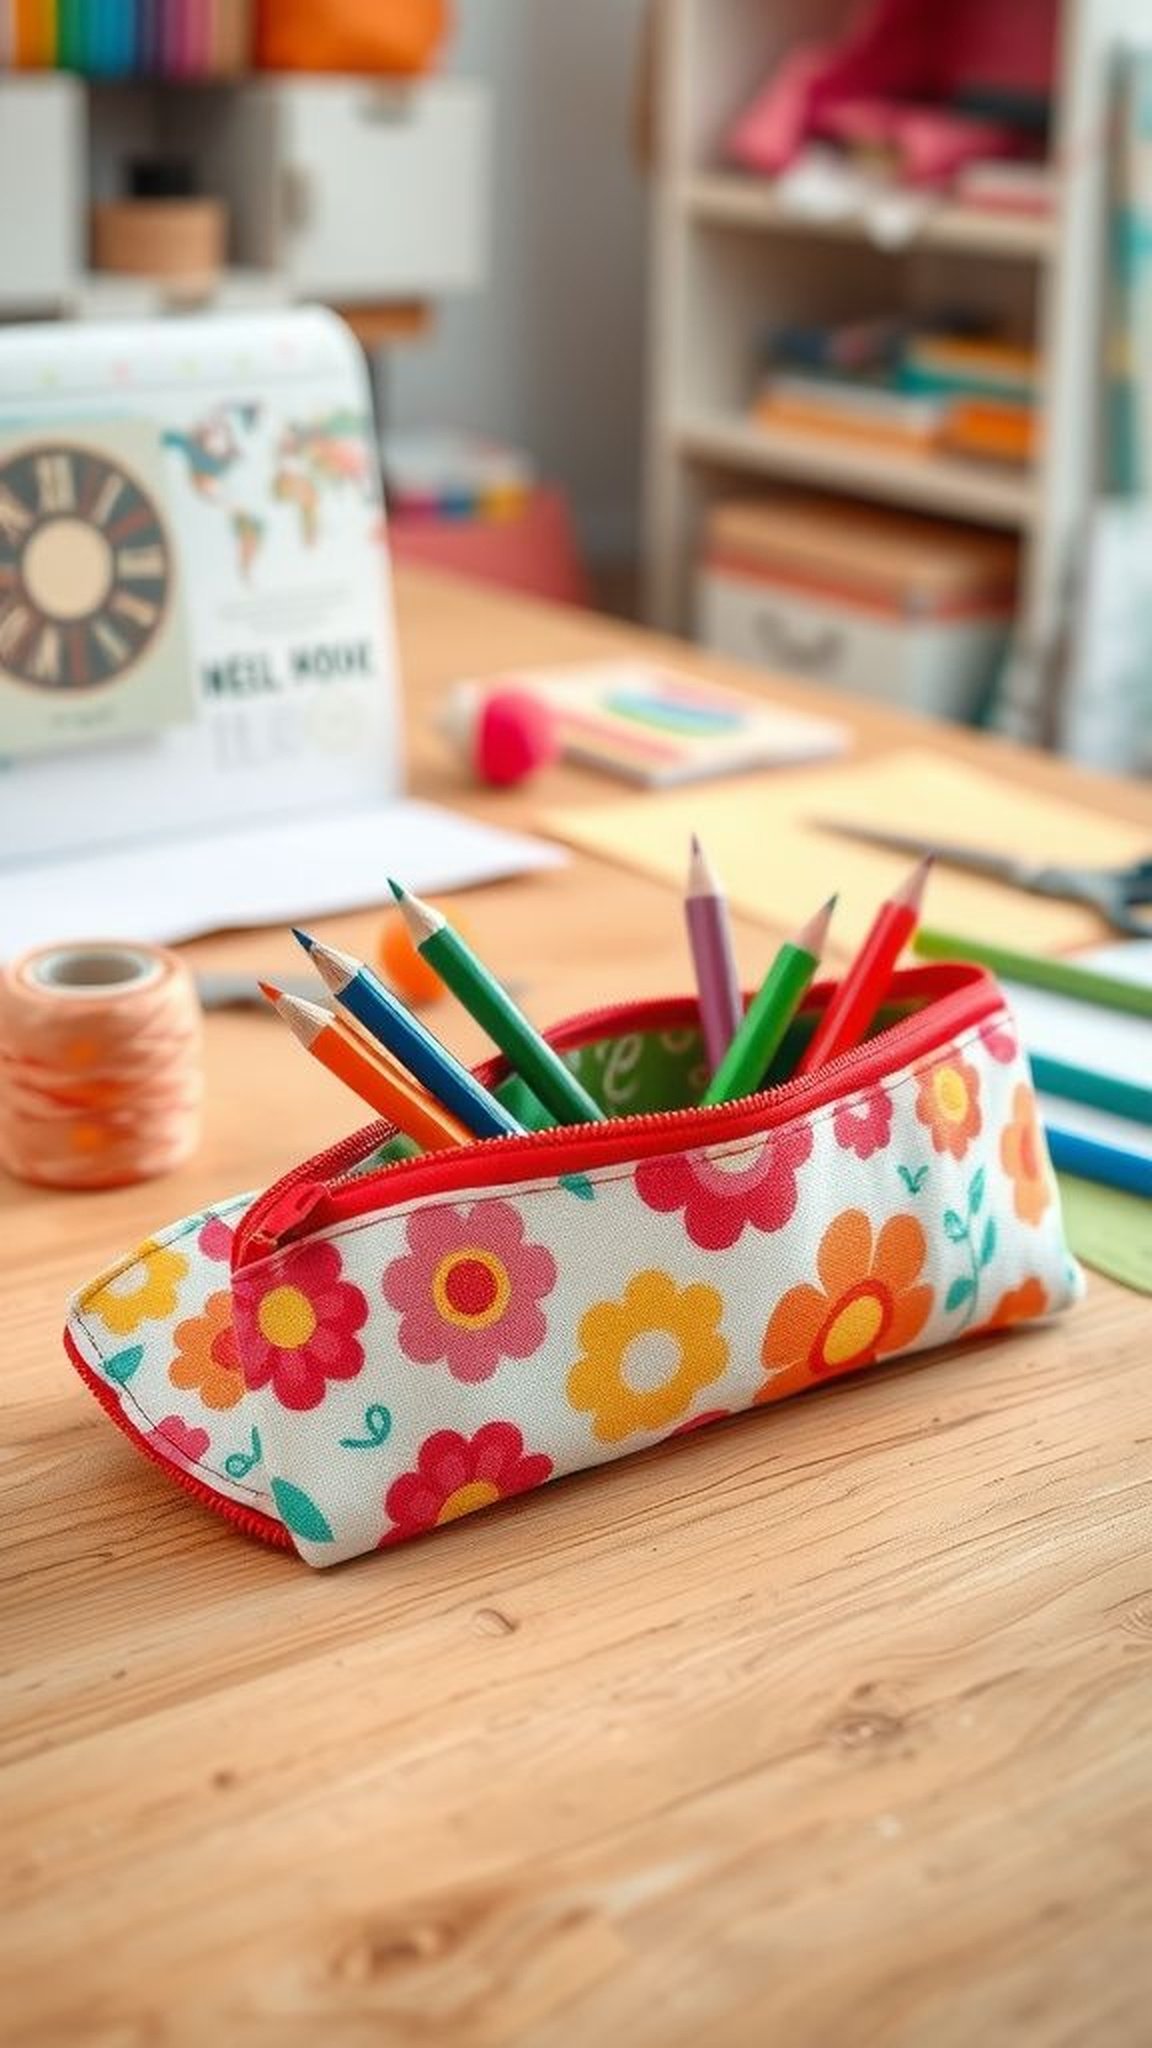
The fabric chosen for a pencil pouch carries the story of tactile comfort; a cotton print feels familiar while a linen blend has a pleasant roughness. Seams show little puckers where the stitching gathered the cloth, and the zipper slide gives a small metallic click when opened.
Little pouches smell faintly of fabric softener or the workshop where they were made. Tucked inside are pens that rattle and erasers that have softened edges.
That soft, zipped shape becomes a small portable island of classroom tools that travels home each day.
Steps
- Choose a roomy piece of fabric and a coordinating zipper sized to the pouch width, then prepare a simple pouch pattern.
- Fold the fabric right sides together, pin the zipper in place along the top edge, and sew the side seams securely with appropriate seam allowances.
- Turn the pouch right side out through the zipper opening, press the seams gently, and topstitch if desired to secure the zipper.
- Place assorted pens and pencils inside and consider adding a small sewn pocket on the interior for tiny items.
Chalkboard planter that invites seasonal notes
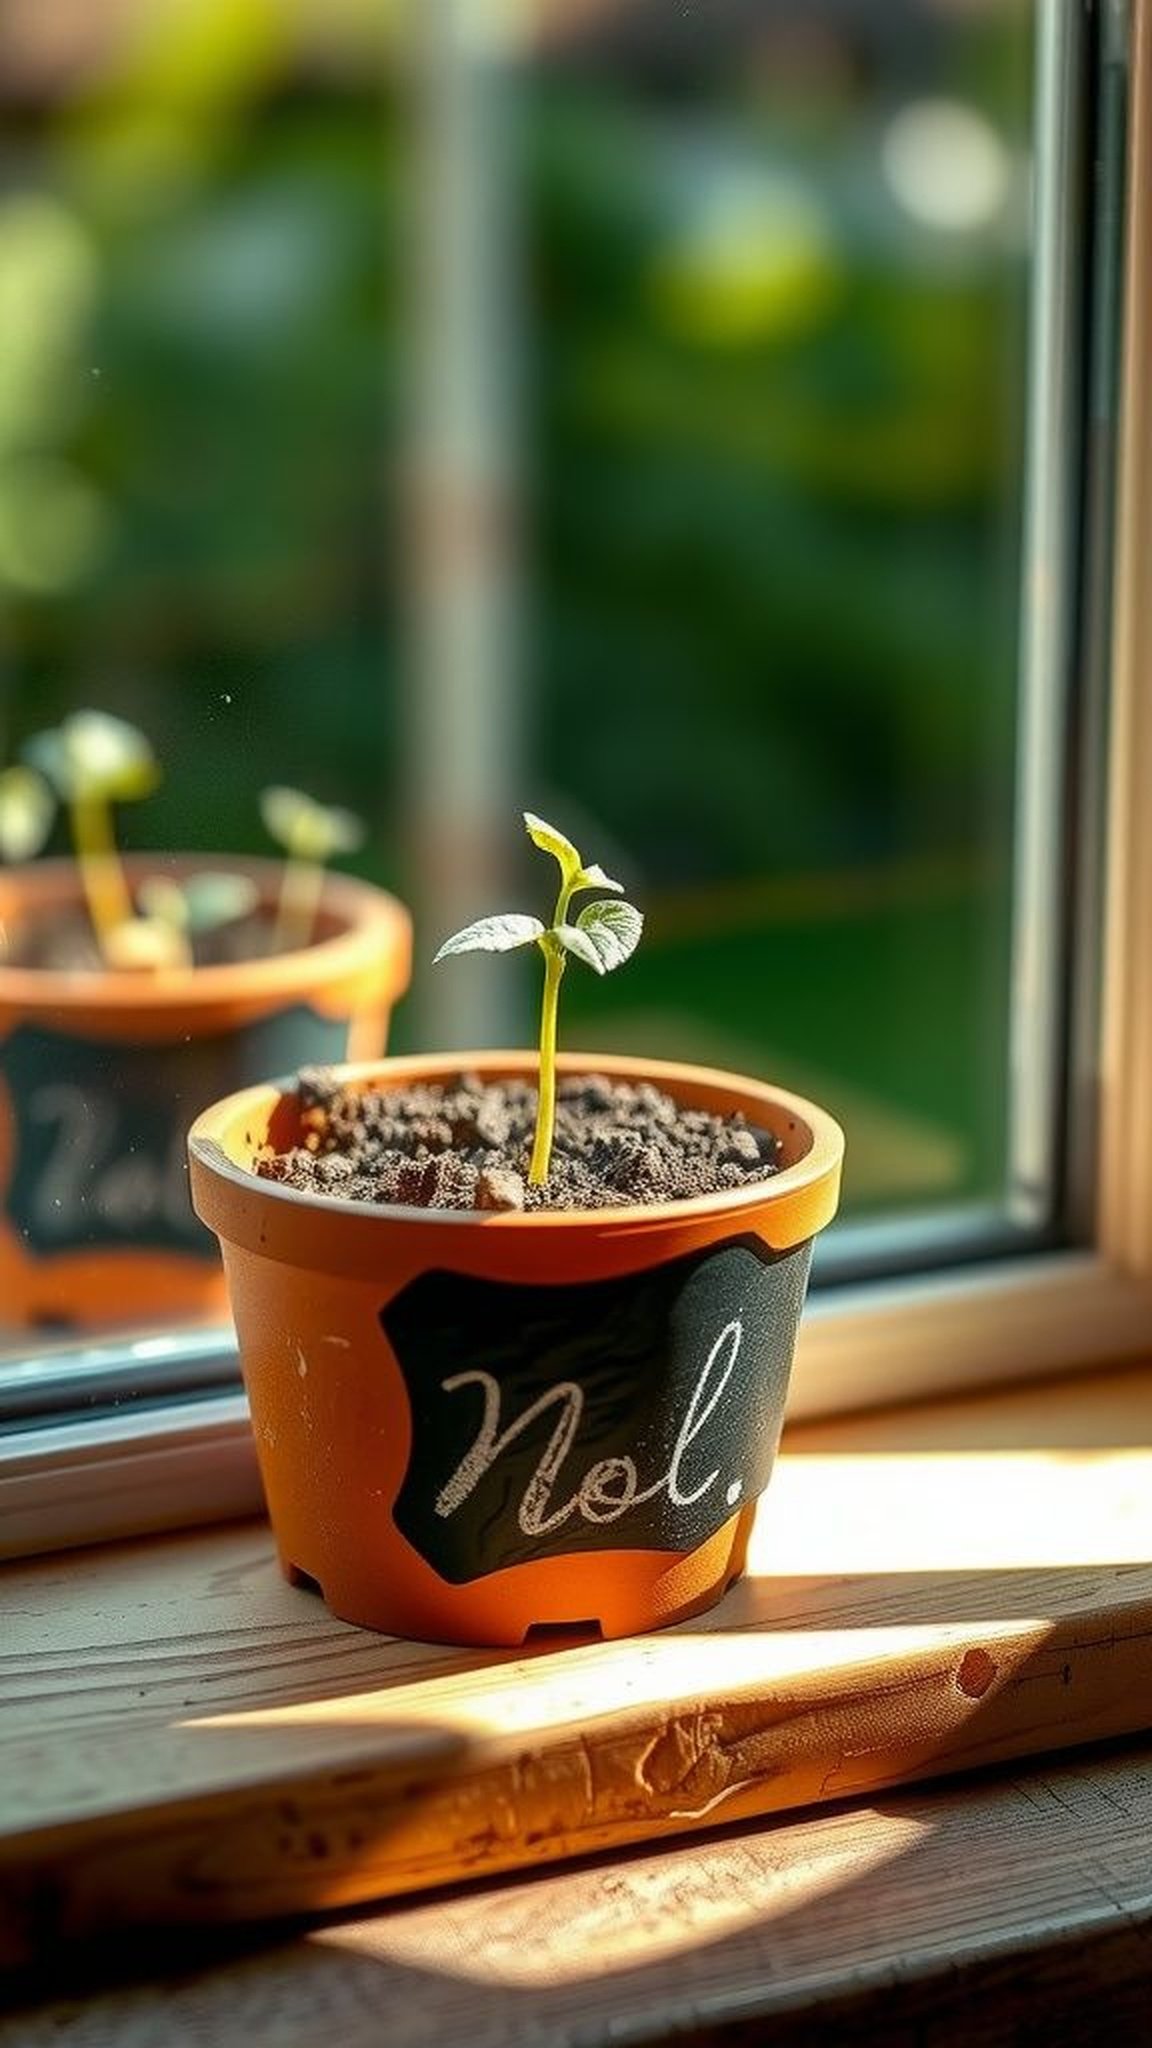
A small planter with a chalkboard label carries the smell of damp soil and a faint green freshness. The dark matte board invites quick scrawls that change with weather and mood, and the contrast between chalk white and black is satisfying to the eye.
Tiny seedlings push through with fragile stems, and the little pot gathers water at the base in a soft, quiet way. When a note is written on the chalk surface it feels like a small conversation between plant and person, a daily check-in that brightens windowsills.
Steps
- Select a small terracotta or ceramic planter and apply a chalkboard paint area or attach a pre-made chalkboard label.
- Fill the planter with potting soil suited for the chosen plant, press in the seedling or seeds gently, and water sparingly to settle the soil.
- Allow the plant to establish in bright, indirect light and write a seasonal note on the chalkboard label with chalk.
- Include a short care note on a tag so the recipient knows ideal watering and light conditions.
Hand-stamped cookie tin with a vintage ribbon
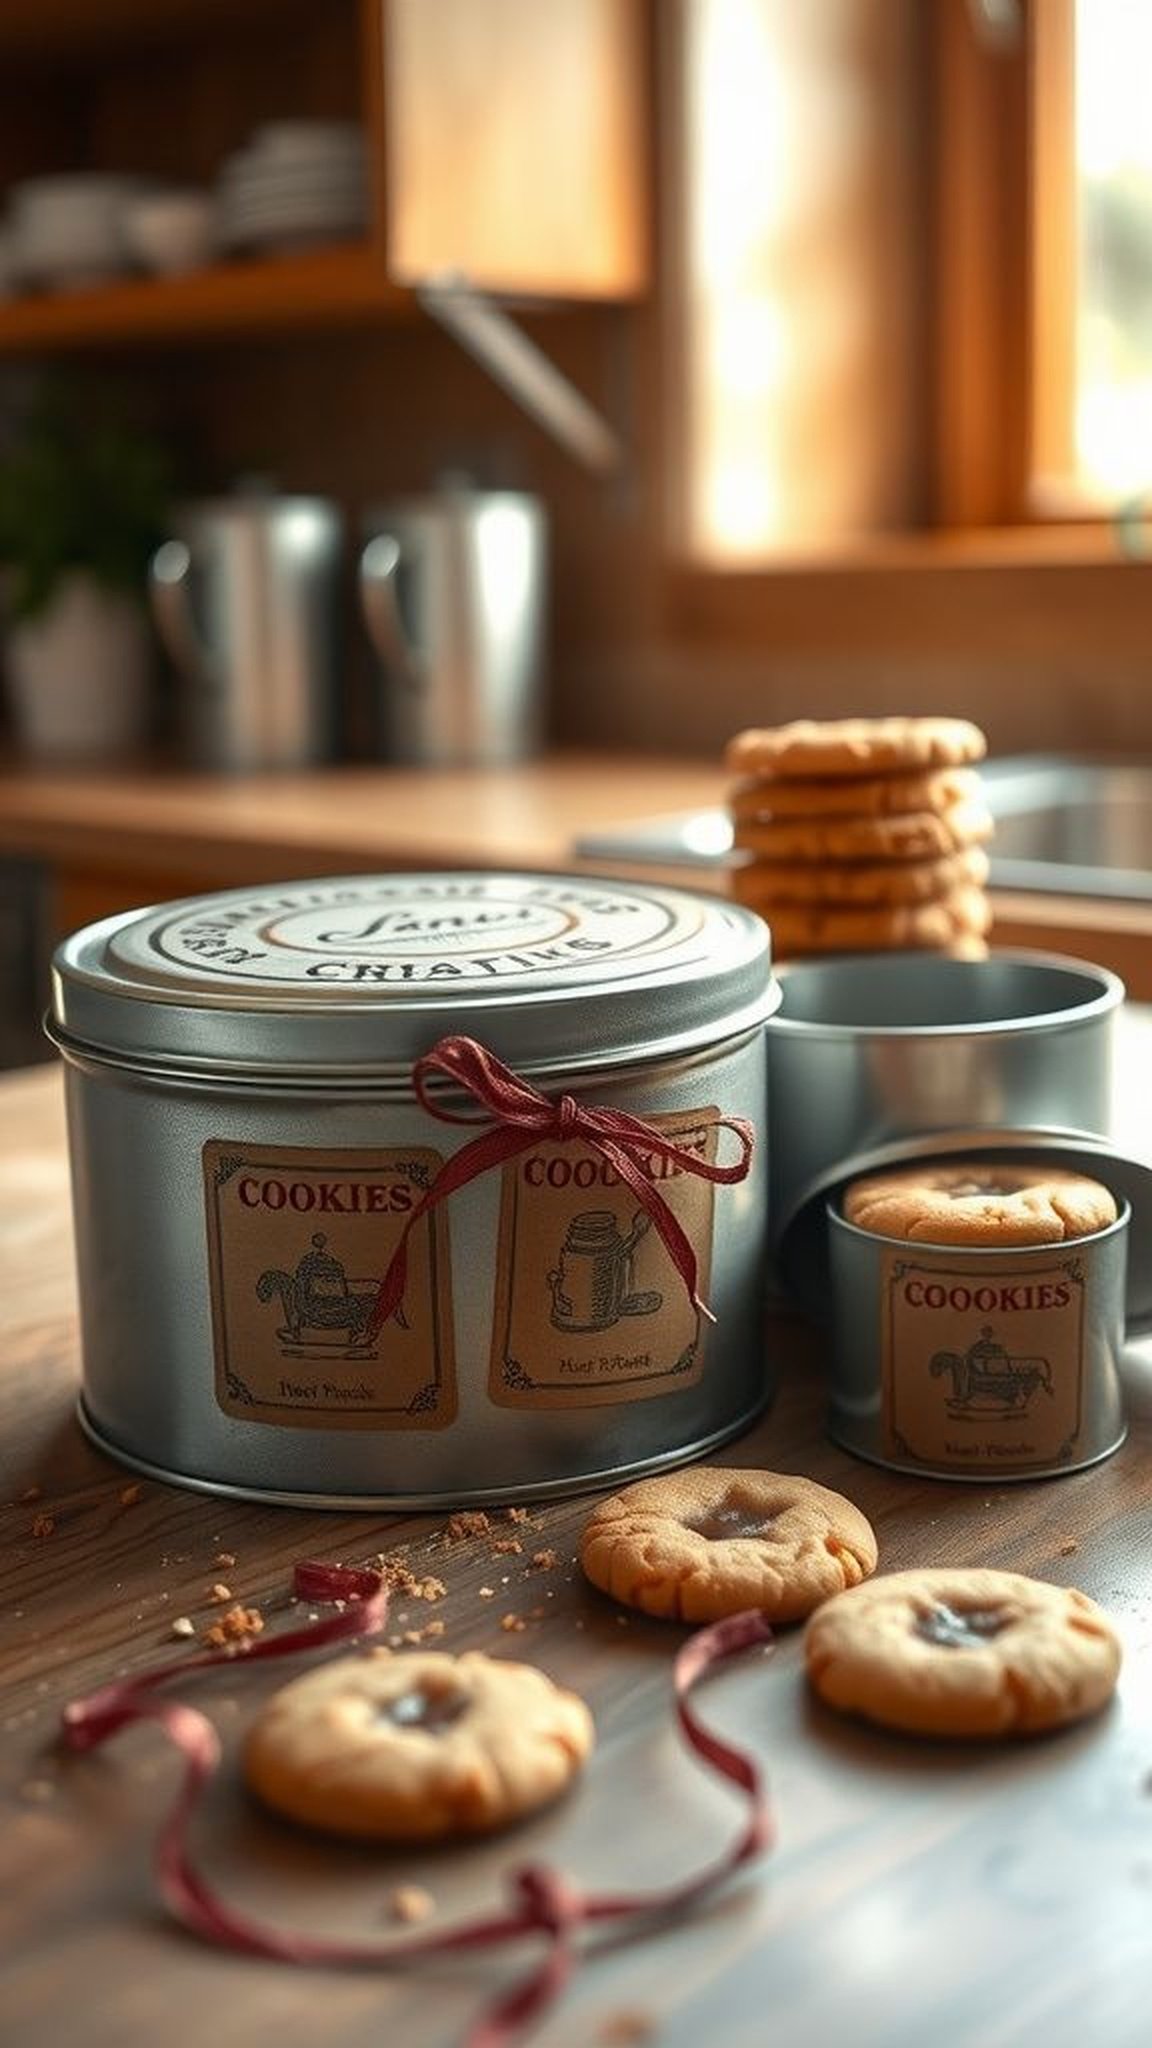
A metal tin stamped with a simple motif has the faint metallic smell of the kitchen and the sweet ghost of baked spice within. The stamped pattern presses into recycled paper labels that wrap the tin, creating a slightly uneven texture that feels handmade.
The ribbon ties with a soft rustle and sits in the lap like a small present. Inside, a stack of cookies leaves sugary crumbs that settle into the corners, and the lid closes with a soft, reassuring click.
That tin becomes a slow, edible hello at the end of the day.
Steps
- Choose a clean metal tin and prepare kraft paper labels for stamping with ink designed for paper surfaces.
- Arrange a repeating stamped motif around the tin, affix the labels neatly, and secure with a vintage-style ribbon tied in a simple bow.
- Bake or source a batch of cookies, layer them inside with parchment separators, and seal the tin to preserve freshness.
- Add a small handwritten note attached under the ribbon for a personal touch.
Watercolor thank-you card set with soft washes

Watercolor cards carry the gentle bleed of pigment into paper that feels like a sigh. Each wash layers translucent color so that edges soften and pigments mingle, creating hues that are hard to recreate with a printer.
The paper has a gentle tooth, and fingertips gather tiny flecks of pigment on the corners. Opening the envelope gives a soft whisper and a faint smell of paint and paper.
Those cards become slow messages; the recipient can feel the hand that brushed the wash and imagine the quiet moment of creation.
Steps
- Select heavyweight watercolor paper and prepare a palette with a few harmonious pigments for soft washes.
- Wet the paper slightly and apply broad, translucent washes, allowing colors to blend naturally before drying between layers.
- Fold the dried sheets into card form, pair each with an envelope, and handwrite brief thank-you notes inside.
- Bundle the card set with a ribbon or place in a small box for a tidy presentation.
Embroidered handkerchief with delicate initials

A cotton handkerchief embroidered with initials feels gently domestic and surprisingly tender. The thread sits on cloth in tiny ridges and carries the coolness of fabric that has been pressed and folded many times.
Stitch patterns catch the light at odd angles and invite a closer look at tiny knots and careful spacing. There is a faint scent of starch or linen that suggests sun and ironing boards.
When unfolded during a long afternoon it offers a quiet, almost ceremonial moment beneath scattered papers and classroom clutter.
Steps
- Choose a soft cotton or linen handkerchief and select an embroidery thread color that complements the fabric.
- Transfer a small monogram or simple motif onto the fabric, secure it in an embroidery hoop, and stitch using basic embroidery techniques.
- Remove the hoop, trim any loose threads, and press the handkerchief gently for a crisp finish.
- Fold carefully and present with a small card explaining the monogram if desired.
Clay apple paperweight with textured glaze
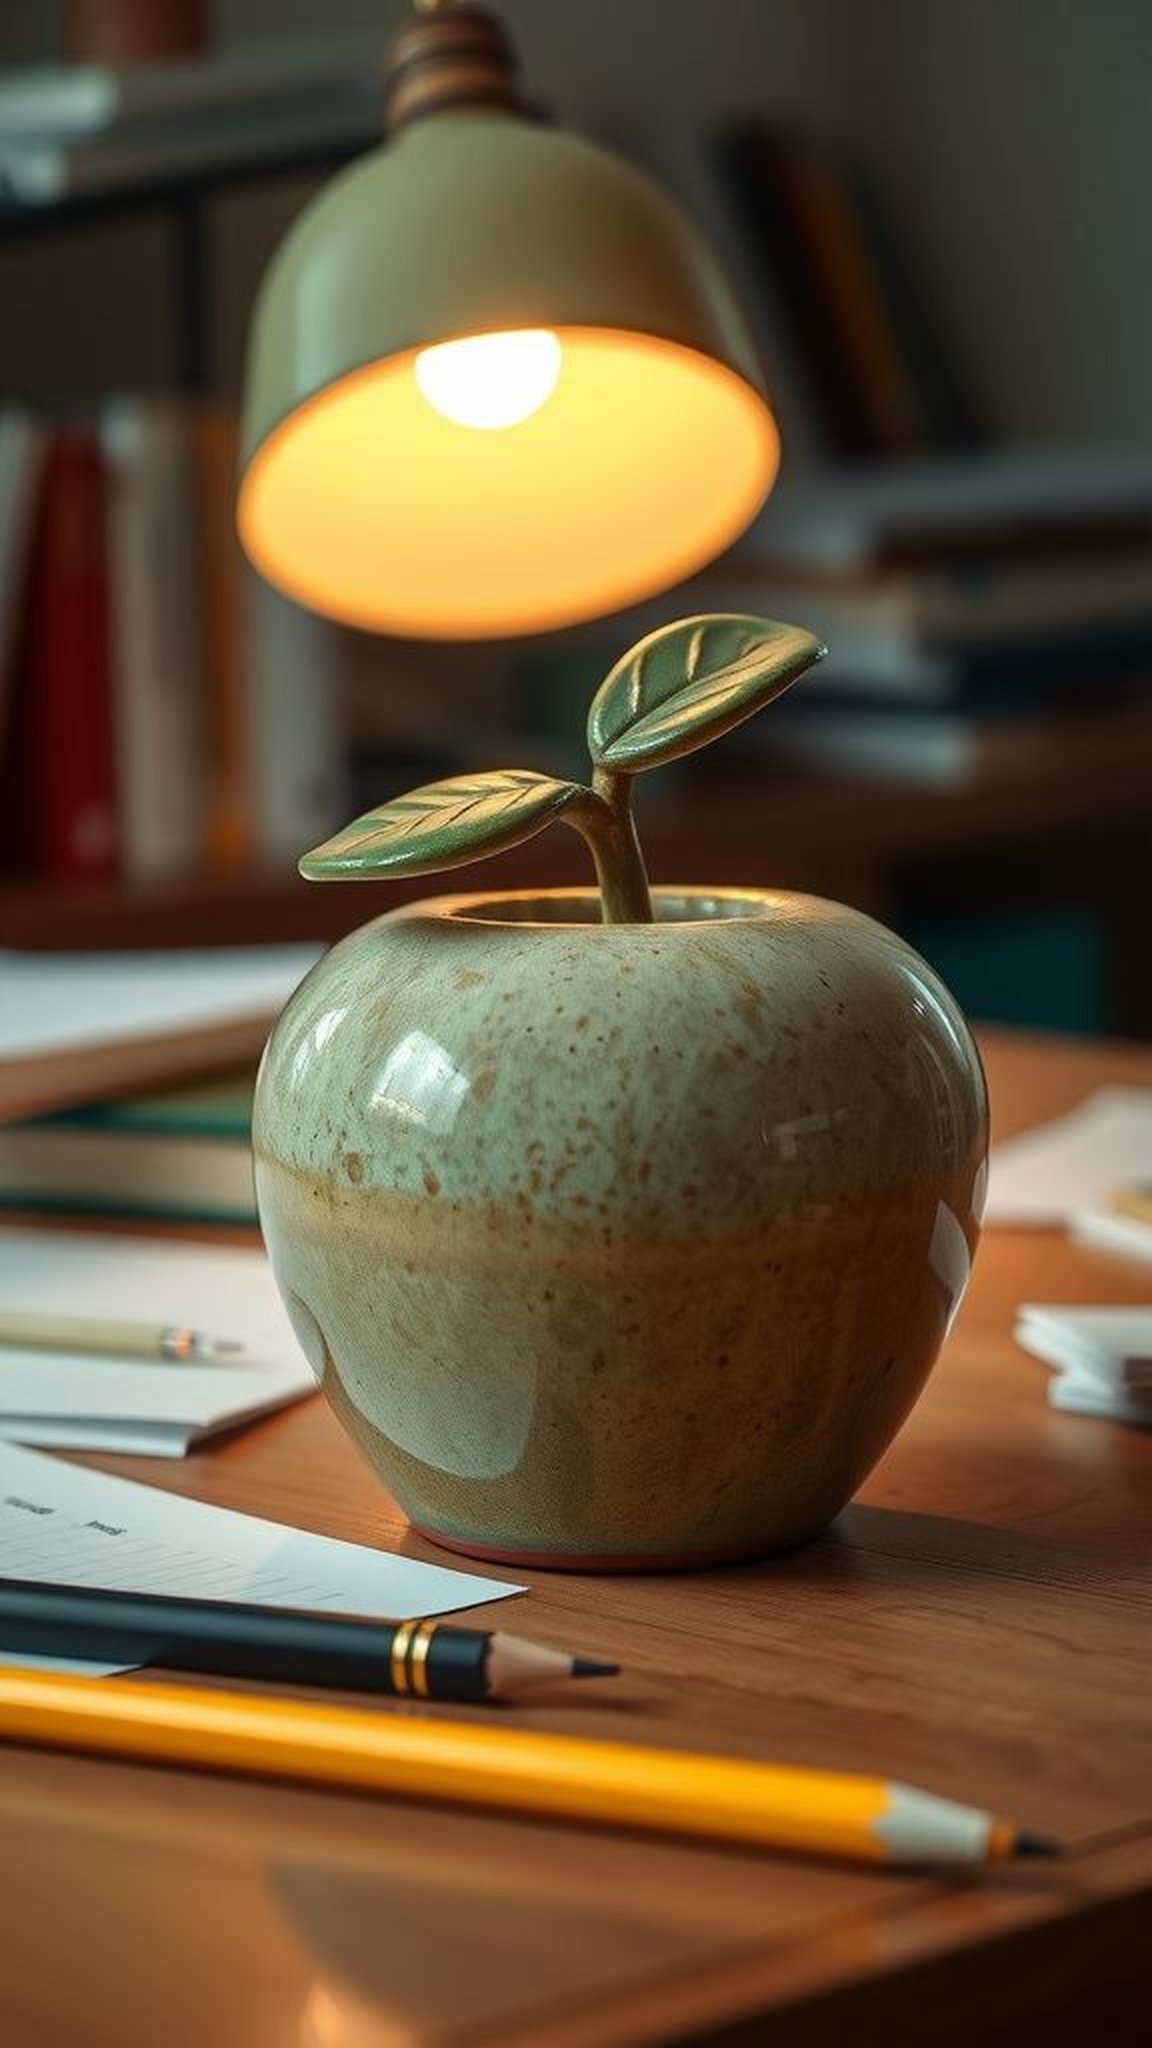
The clay apple sits heavy and cool in the palm, a little sculpture of classroom symbolism. Fingerprints left in the clay before firing become part of the texture, and the glaze pools in crevices to create glossy highlights against matte areas.
The first time it caught light across a pile of papers, it felt like a tiny sun that kept essays from scudding about. The tactile weight calms restless hands and the faint earthy scent from the kiln lingers in memory.
It is small enough to be personal but substantial enough to steady a desk.
Steps
- Prepare a small lump of air-dry or kiln clay and shape it into an apple form, adding a tiny stem and subtle surface details.
- Allow the clay to dry fully or bisque fire if using kiln clay, then apply glaze or paint chosen for the finish.
- Fire the glazed piece again if required or let painted layers cure until fully stable.
- Wrap in soft tissue and place in a protective box for gifting.
Layered cookie mix in a mason jar with tag
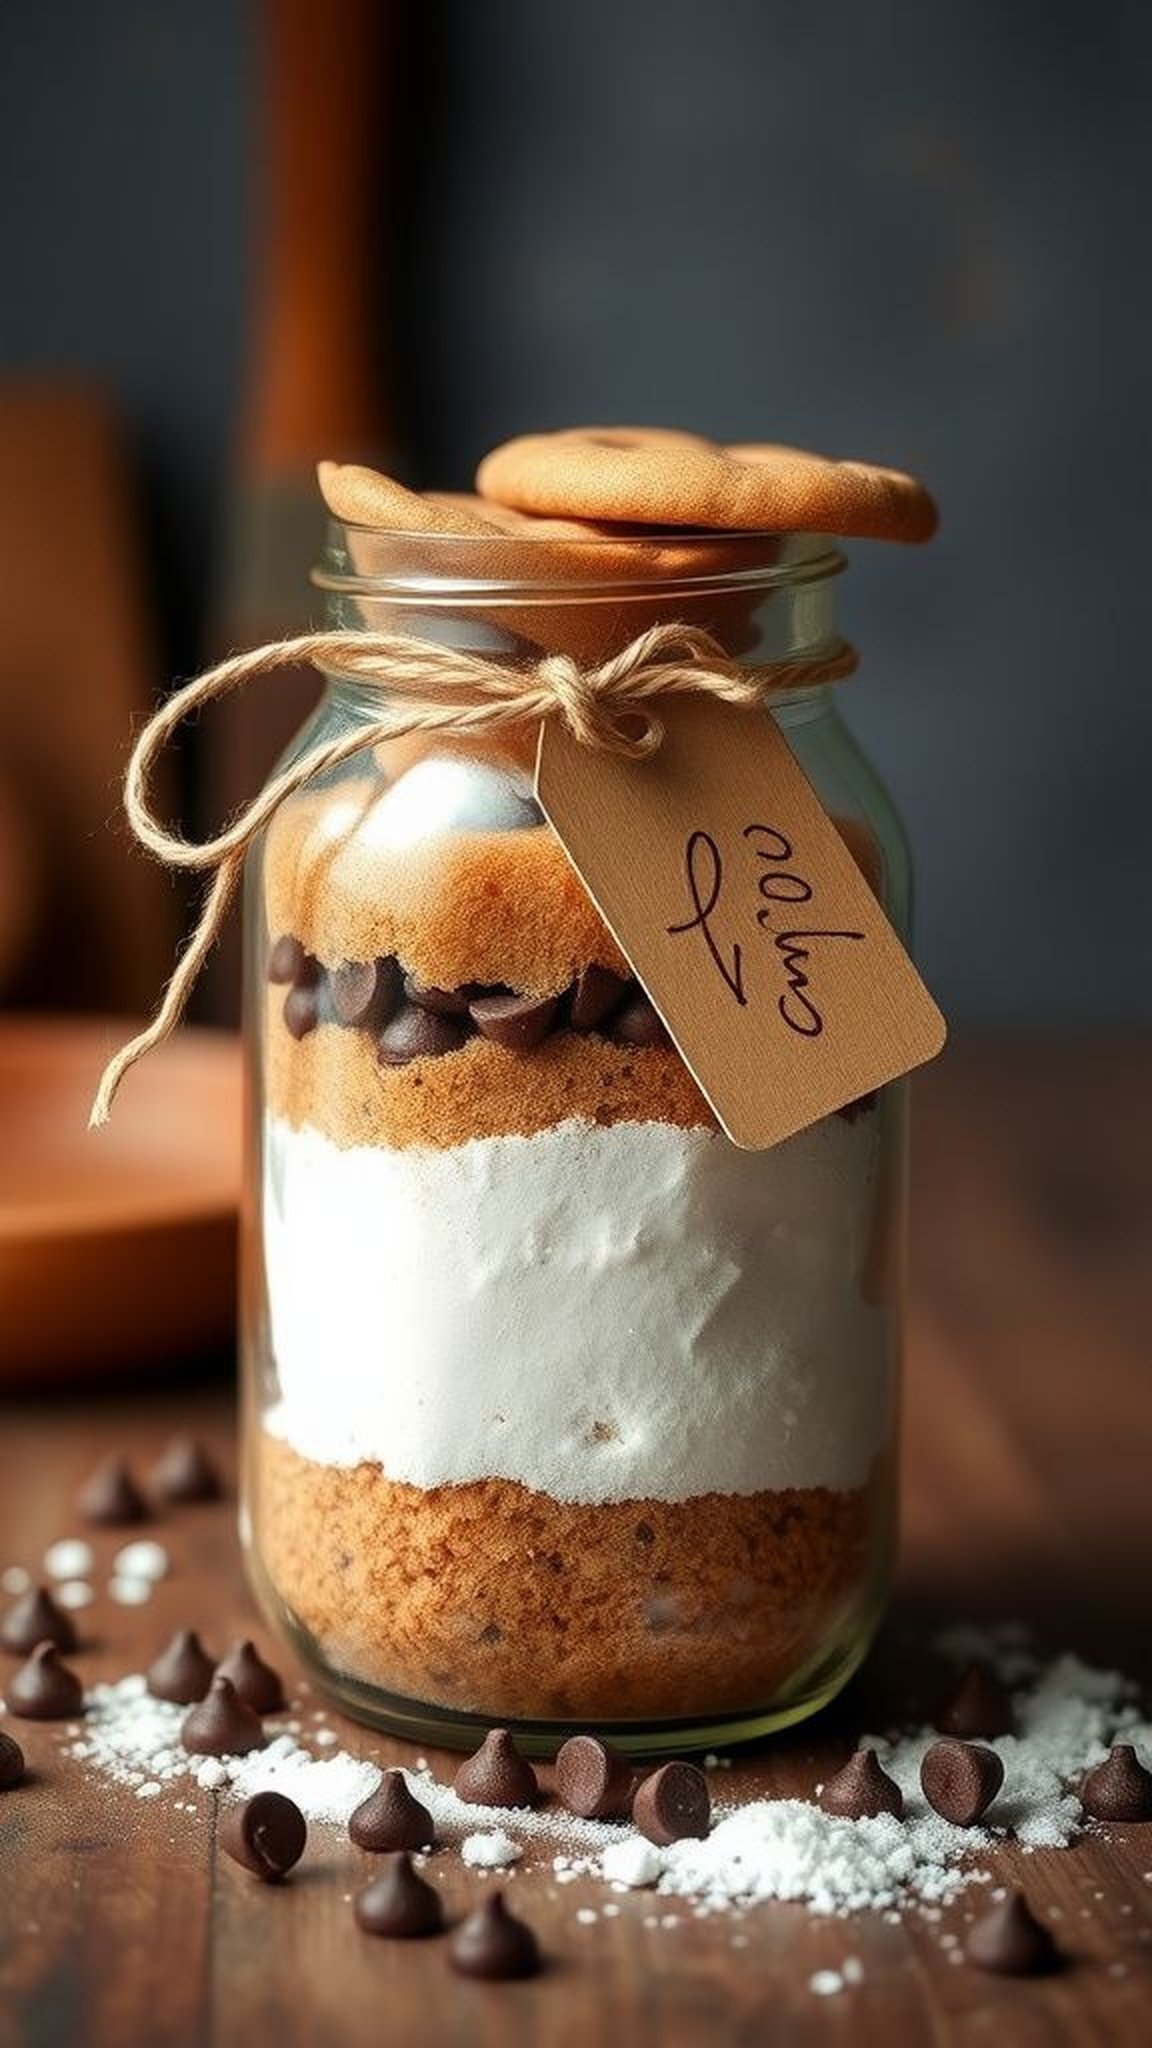
A jar filled with layers of dry ingredients looks like a simple landscape of browns, creams, and tiny chocolate islands. Each grain of sugar and speck of cocoa adds to the illusion of strata, and the clear glass makes the layers feel like an edible ornament.
The jar gives off a faint pantry smell and the ribbon at the neck rustles softly when moved. The attached tag carries a brief, warm note and the combination sits on a shelf like a promise of a quiet baking afternoon to come.
Steps
- Select a clean mason jar and measure dry ingredients carefully to create distinct visual layers starting with heavier items at the bottom.
- Spoon each ingredient gently into the jar to maintain clean separations, finishing with chocolate chips or sprinkles on top.
- Seal the jar securely, attach a decorative tag with baking instructions and suggested cooking times, and tie with twine or ribbon.
- Present in a small gift bag or box for a neat appearance.
Decorated clipboard with cheerful printed collage
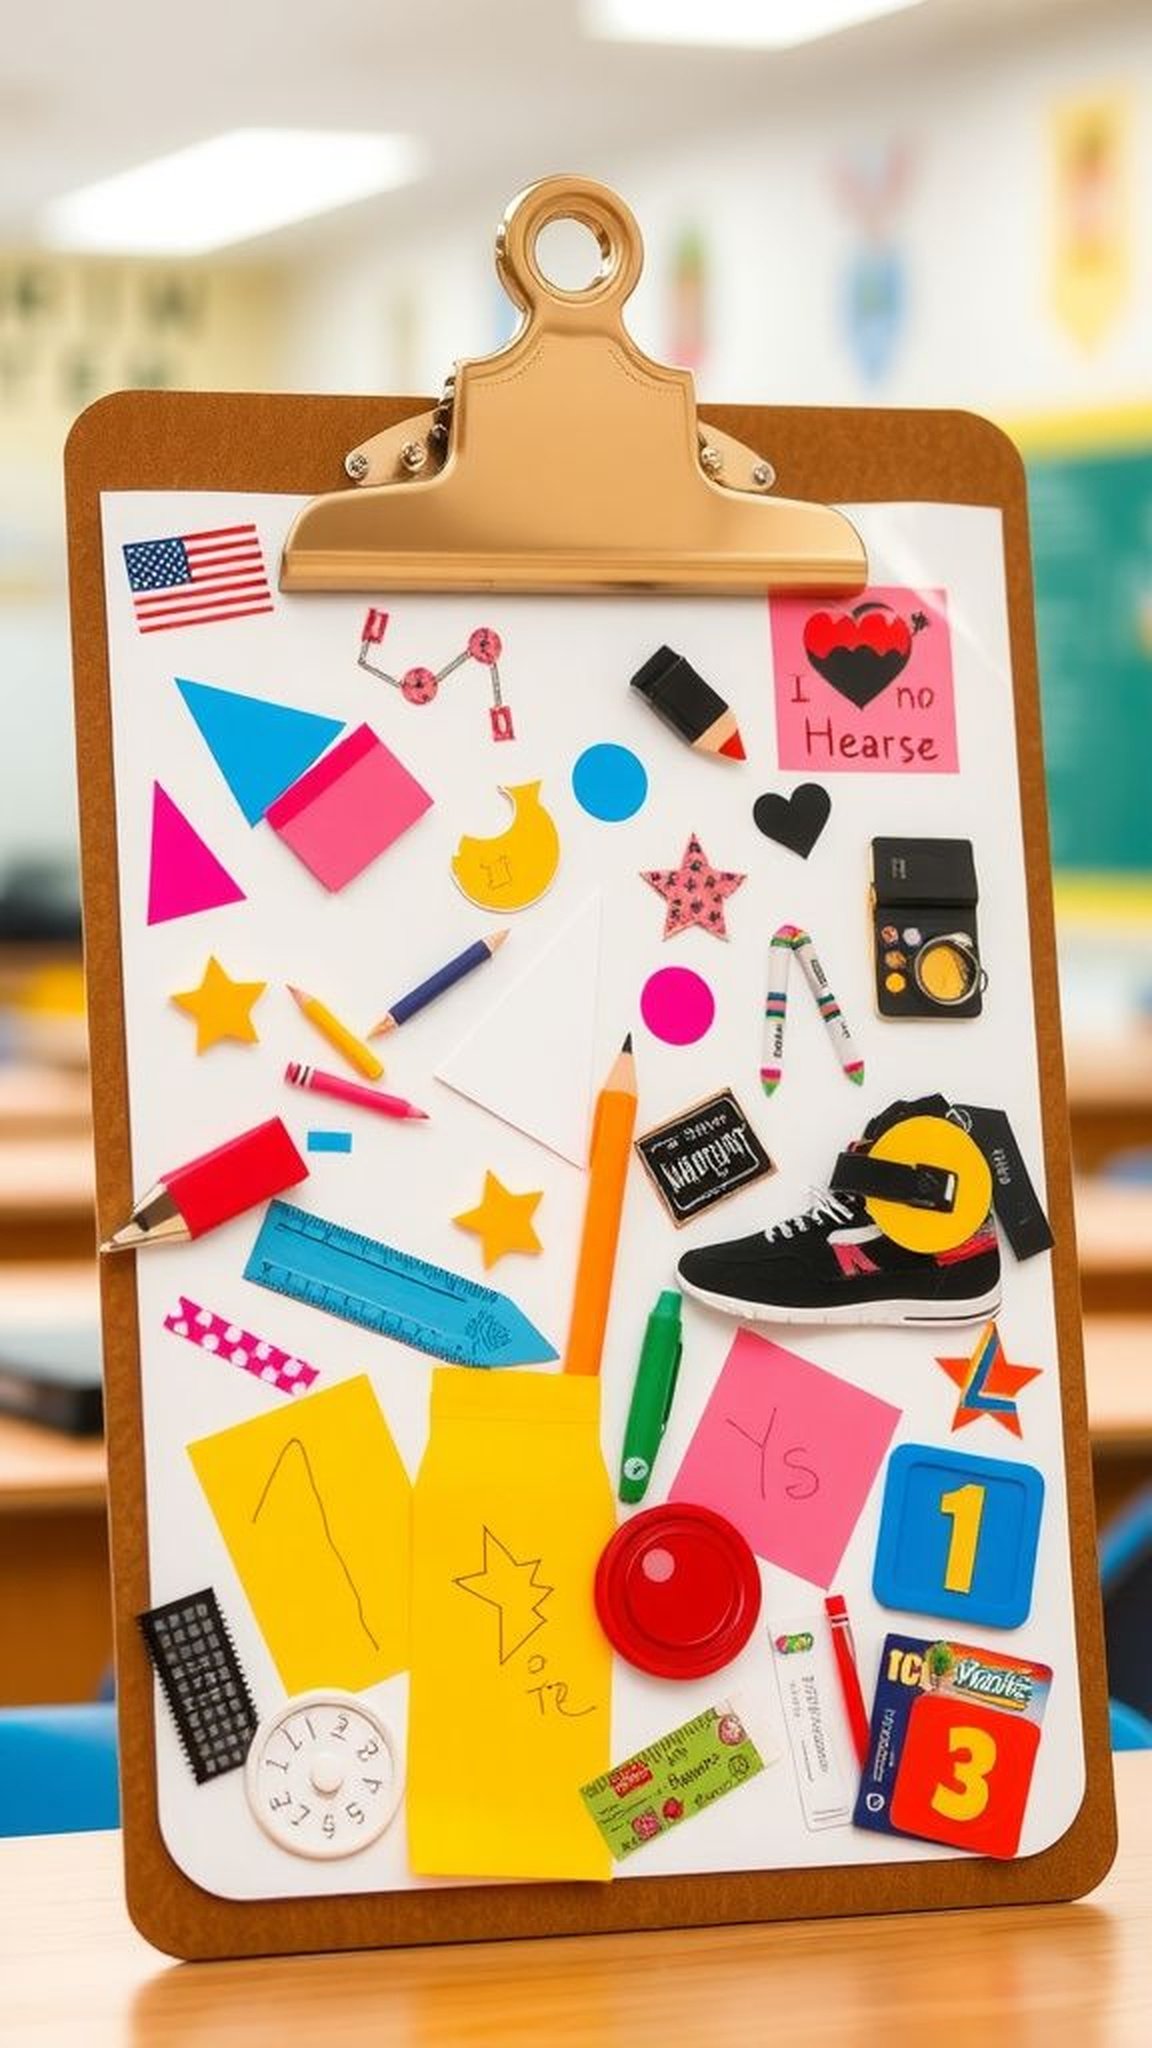
The clipboard becomes a tiny portable wall when decorated with a collage of prints, stickers, and snippets of student artwork. Its surface gathers the textures of paper edges and glue, and the metal clip clicks with a reassuring sound.
Bright scraps peek out from beneath protective varnish and the whole piece feels resilient and ready for lists, notes, and schedules. Carrying the clipboard across the classroom brings little glimpses of these layered images into daily routines and turns a functional object into a cheerful companion for lesson planning.
Steps
- Select a sturdy clipboard and arrange printed images, patterned paper, and small artwork into a pleasing collage on the face.
- Adhere the elements with a suitable adhesive, smooth out any bubbles, and apply a clear sealer or decoupage medium to protect the surface.
- Allow the finish to dry fully, reattach the clip if removed, and optionally add a small name label at the top.
- Place a pad of paper or a set of notes under the clip for immediate use.
Fabric-wrapped pen set tied with twine

Pens wrapped in a strip of patterned fabric feel softer and more personal than a plain plastic barrel. The fabric muffles the metallic clink when pens are bundled together, and the texture under the thumb changes how the pen feels in hand.
A small twine bow adds a country table kind of comfort, and the scent of fabric stores seems to linger faintly. Each pen slips into a pocket or pencil case and becomes a tiny reminder of care.
The bundle sits neat on a teacher’s desk like a small supply of friendly tools.
Steps
- Choose a selection of quality pens and cut coordinating fabric strips long enough to wrap each pen snugly.
- Wrap the fabric around each pen and secure it with a piece of twine or a thin elastic band, knotting the twine for a decorative finish.
- Bundle the wrapped pens together, tie with an additional length of twine, and attach a small label indicating ink color if desired.
- Place the set in a small box or sleeve for tidy presentation.
Mini succulent terrarium in a recycled jar
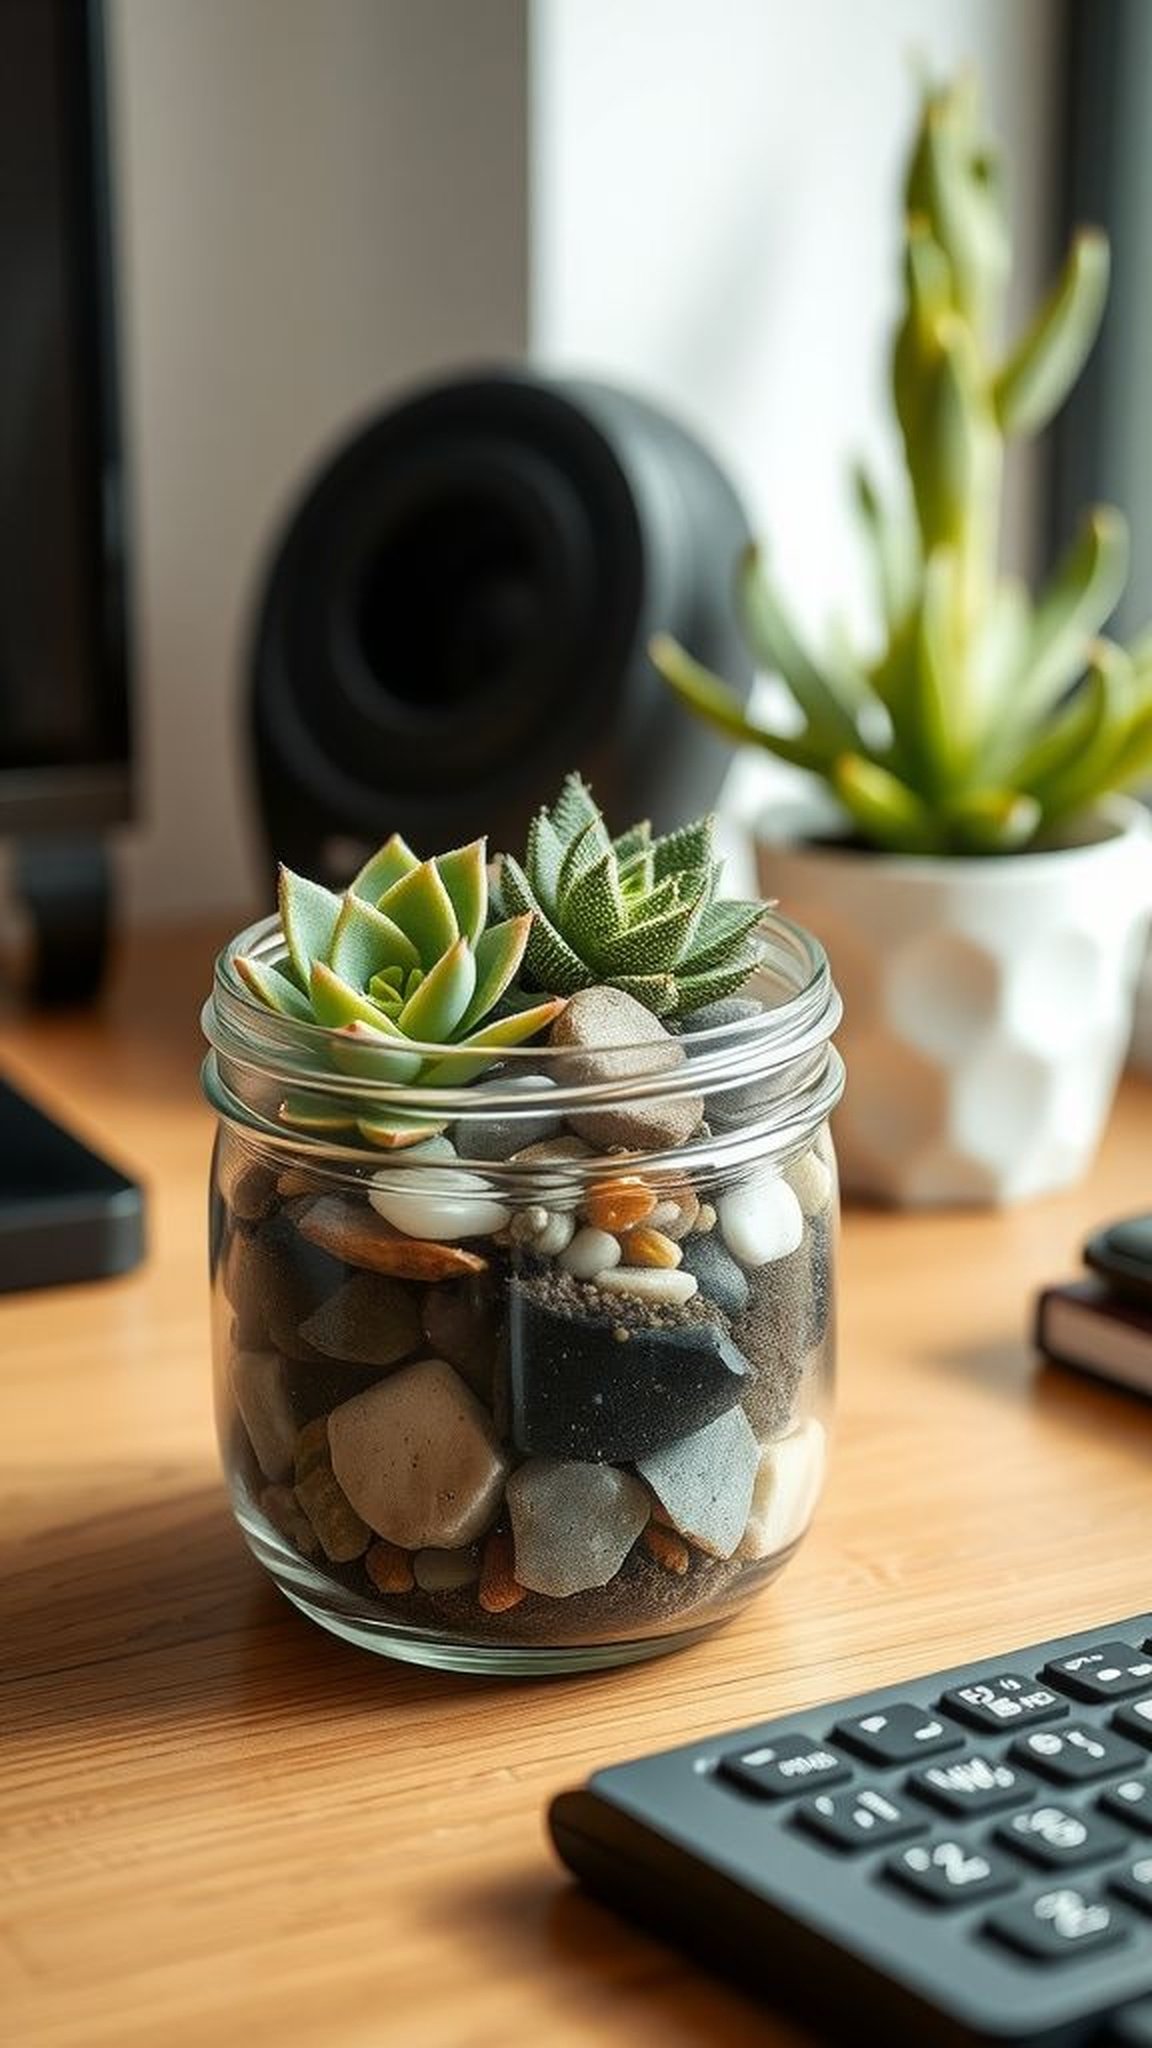
A tiny terrarium holds a calm, green world behind glass. The soil smells of earth, and the succulents’ plump leaves have a cool, waxy feel that invites a gentle touch.
Small pebbles and a sprinkle of sand create miniature landscapes, and the glass dome captures light that makes the plants glint like small jewels. On the desk it provides a quiet counterpoint to printed schedules and sticky notes, an alive object that anchors attention and brings a patch of slow growth into the rhythm of school days.
Steps
- Select a clear recycled jar, add a layer of small pebbles for drainage, then a layer of activated charcoal to keep the environment fresh.
- Top with a well-draining cactus or succulent potting mix, place small succulent cuttings or rosettes gently into the soil, and arrange decorative pebbles.
- Mist the terrarium lightly and provide bright, indirect light for healthy growth, advising minimal watering to avoid over-moisture.
- Place a small care note with sunlight and watering guidance for the recipient.
Custom certificate of appreciation in a simple frame

A handmade certificate framed simply carries weight without showiness. The paper’s fibers catch the ink differently than printer sheets, and calligraphy or hand-lettered flourishes settle into the page like a gentle badge.
The frame adds a quiet border and the whole piece sits on a shelf with the steadiness of an object meant to last. Unframed it might slip, but behind glass it takes on a ceremonial air that can be glanced at between meetings and bring a small, steady reassurance on a busy desk.
Steps
- Design a certificate layout on quality paper, hand-letter or use calligraphy flourishes to personalize the recipient’s name and a brief message.
- Allow all ink to dry thoroughly, then place the certificate into a simple frame with archival backing if desired.
- Ensure the glass is clean and the frame is secure before wrapping or presenting.
- Include a short note about the occasion on a separate card if wished.
Jar of soothing bath salts with citrus scent
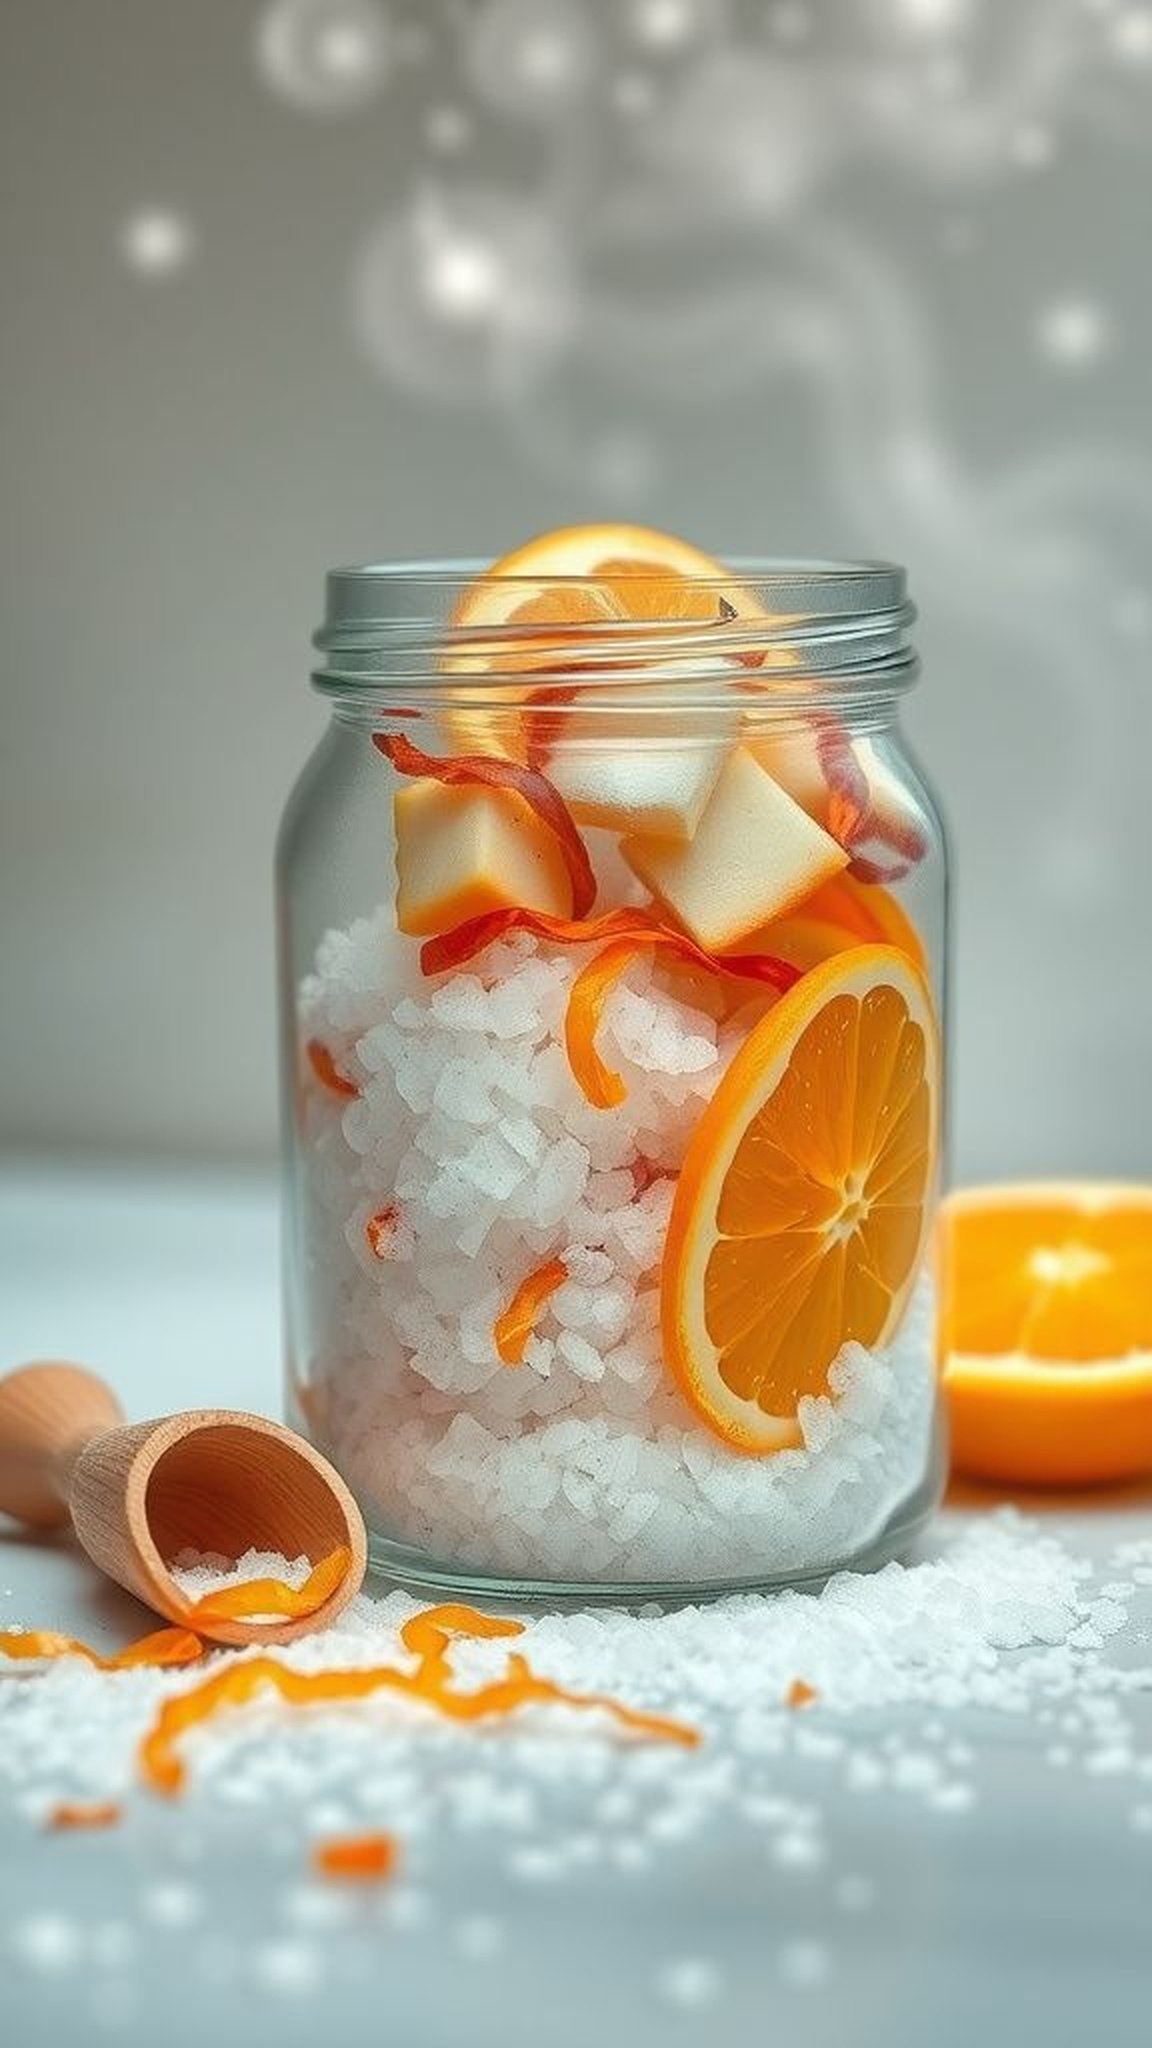
A jar of bath salts holds a delicate fragrance that lifts the air when opened. Coarse crystals shift against glass and catch the light like tiny facets, while citrus zest and dried peel float among the grains and add texture.
The scent is bright and cleanses the room for a moment, and the jar itself feels like a small promise of slow, restorative time. When poured into a warm bath the salts dissolve with a soft fizz and the scent unfurls into the steam, inviting a pause that feels quietly earned.
Steps
- Measure coarse Epsom or sea salts into a mixing bowl and stir in chosen essential oils, citrus zest, and a handful of dried petals for texture.
- Blend thoroughly so the fragrance disperses evenly, then spoon the mixture into a clean glass jar and seal tightly.
- Label the jar with scent notes and a suggested amount to add to a bath.
- Wrap the jar with a ribbon or tie a small wooden scoop to the neck for a finished look.
Magnet photo frame with candid classroom snapshot
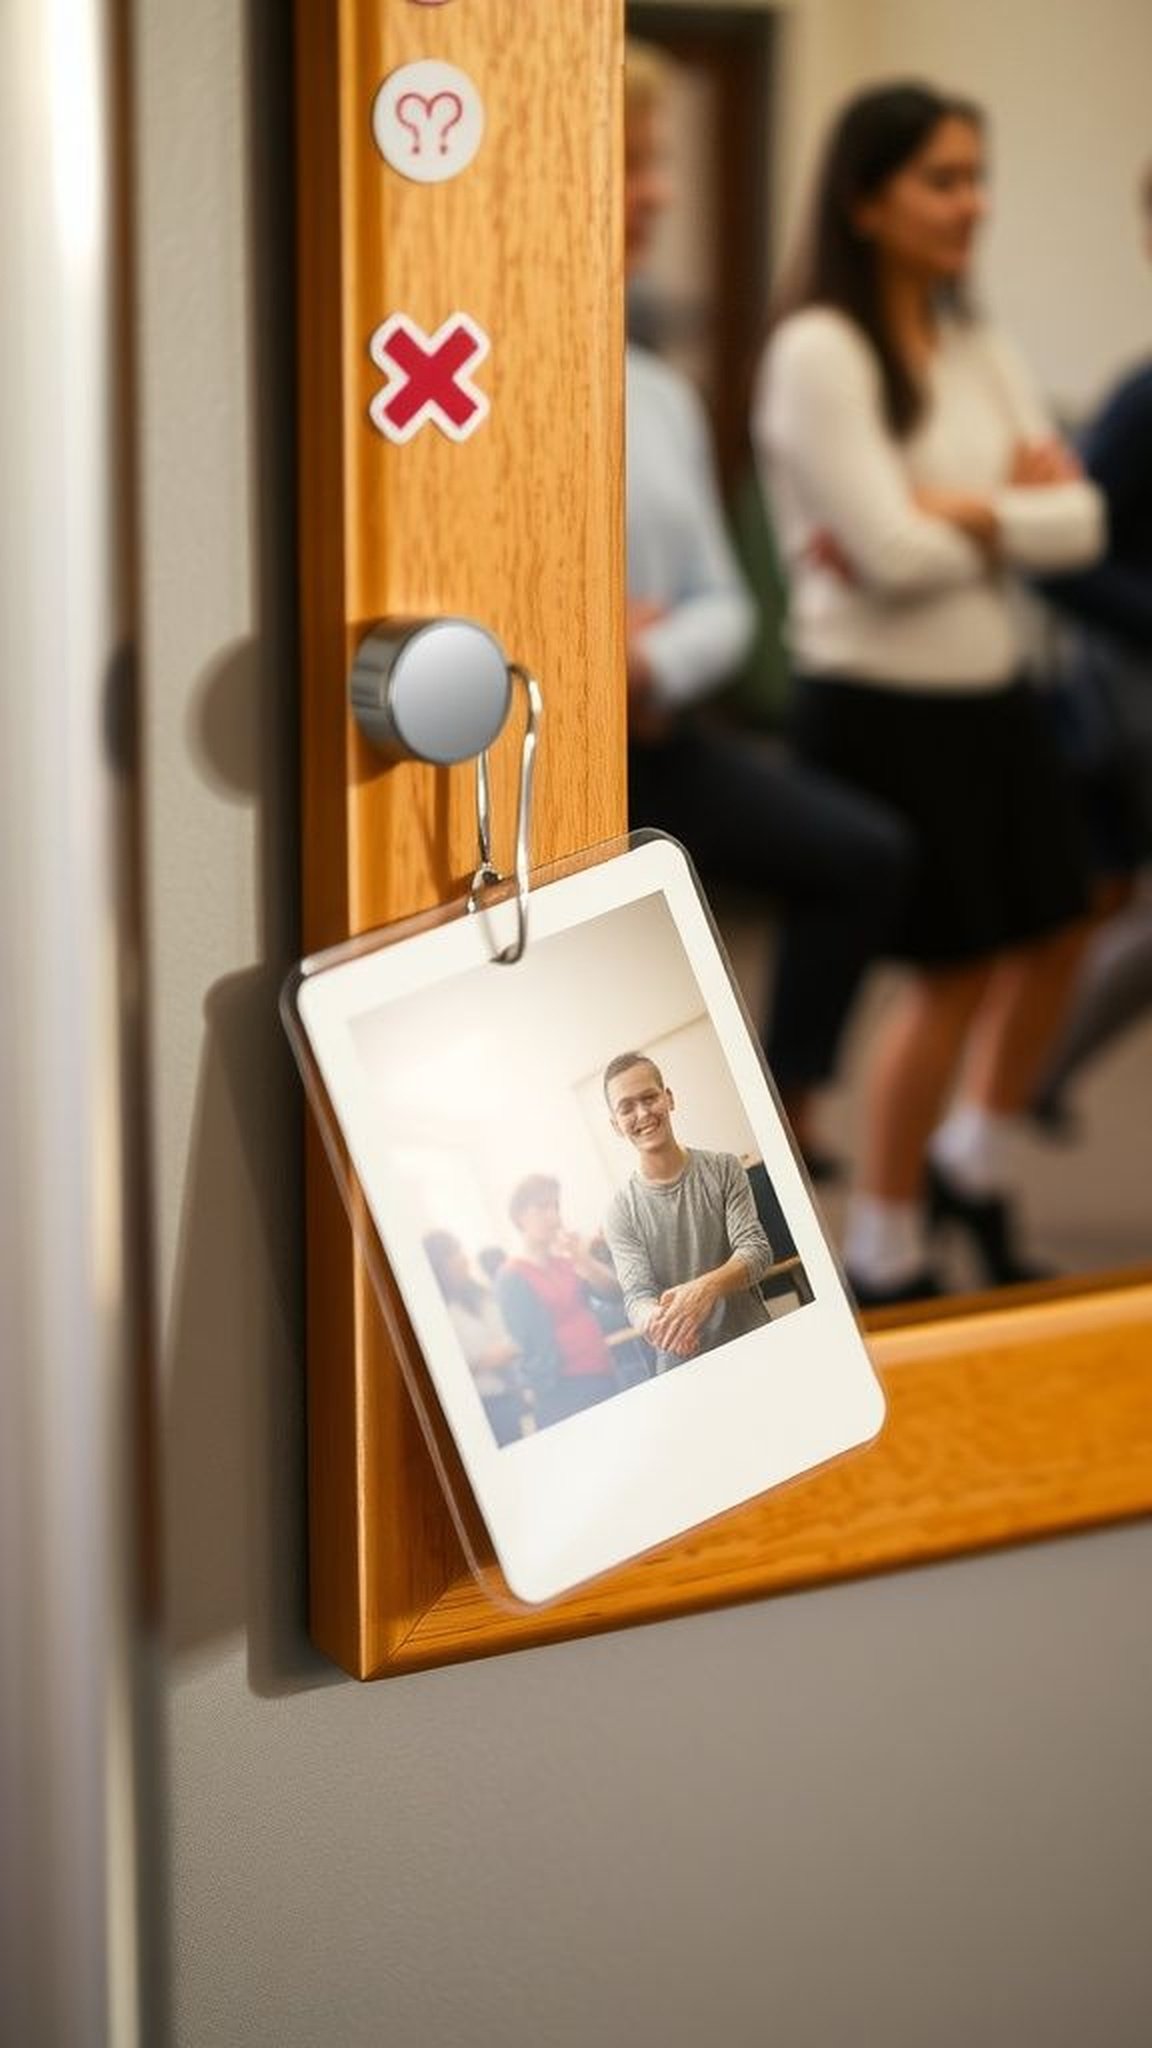
A small magnet frame holding a candid snapshot invites frequent glances from a locker or file cabinet. The image inside captures a crooked grin or a moment of concentration and the glossy photo surface reflects a tiny strip of light.
The magnet itself is slightly heavy and clings to metal with a reassuring pull. Surrounding the picture, a decorated border carries smudges of marker and tiny stickers that hint at hurried creativity.
That little pane of memory becomes a cheerful intruder amid administrative paperwork.
Steps
- Choose a small printed photograph with a candid classroom moment and trim it to fit a magnet frame.
- Decorate the frame edge with small stickers, a hand-lettered caption, or patterned paper, then secure the photo in place.
- Attach a strong magnet to the back if the frame lacks one, and ensure edges are neat for display.
- Present the frame with a small note about the captured moment.
Hand-printed tea towels in cheerful school motifs
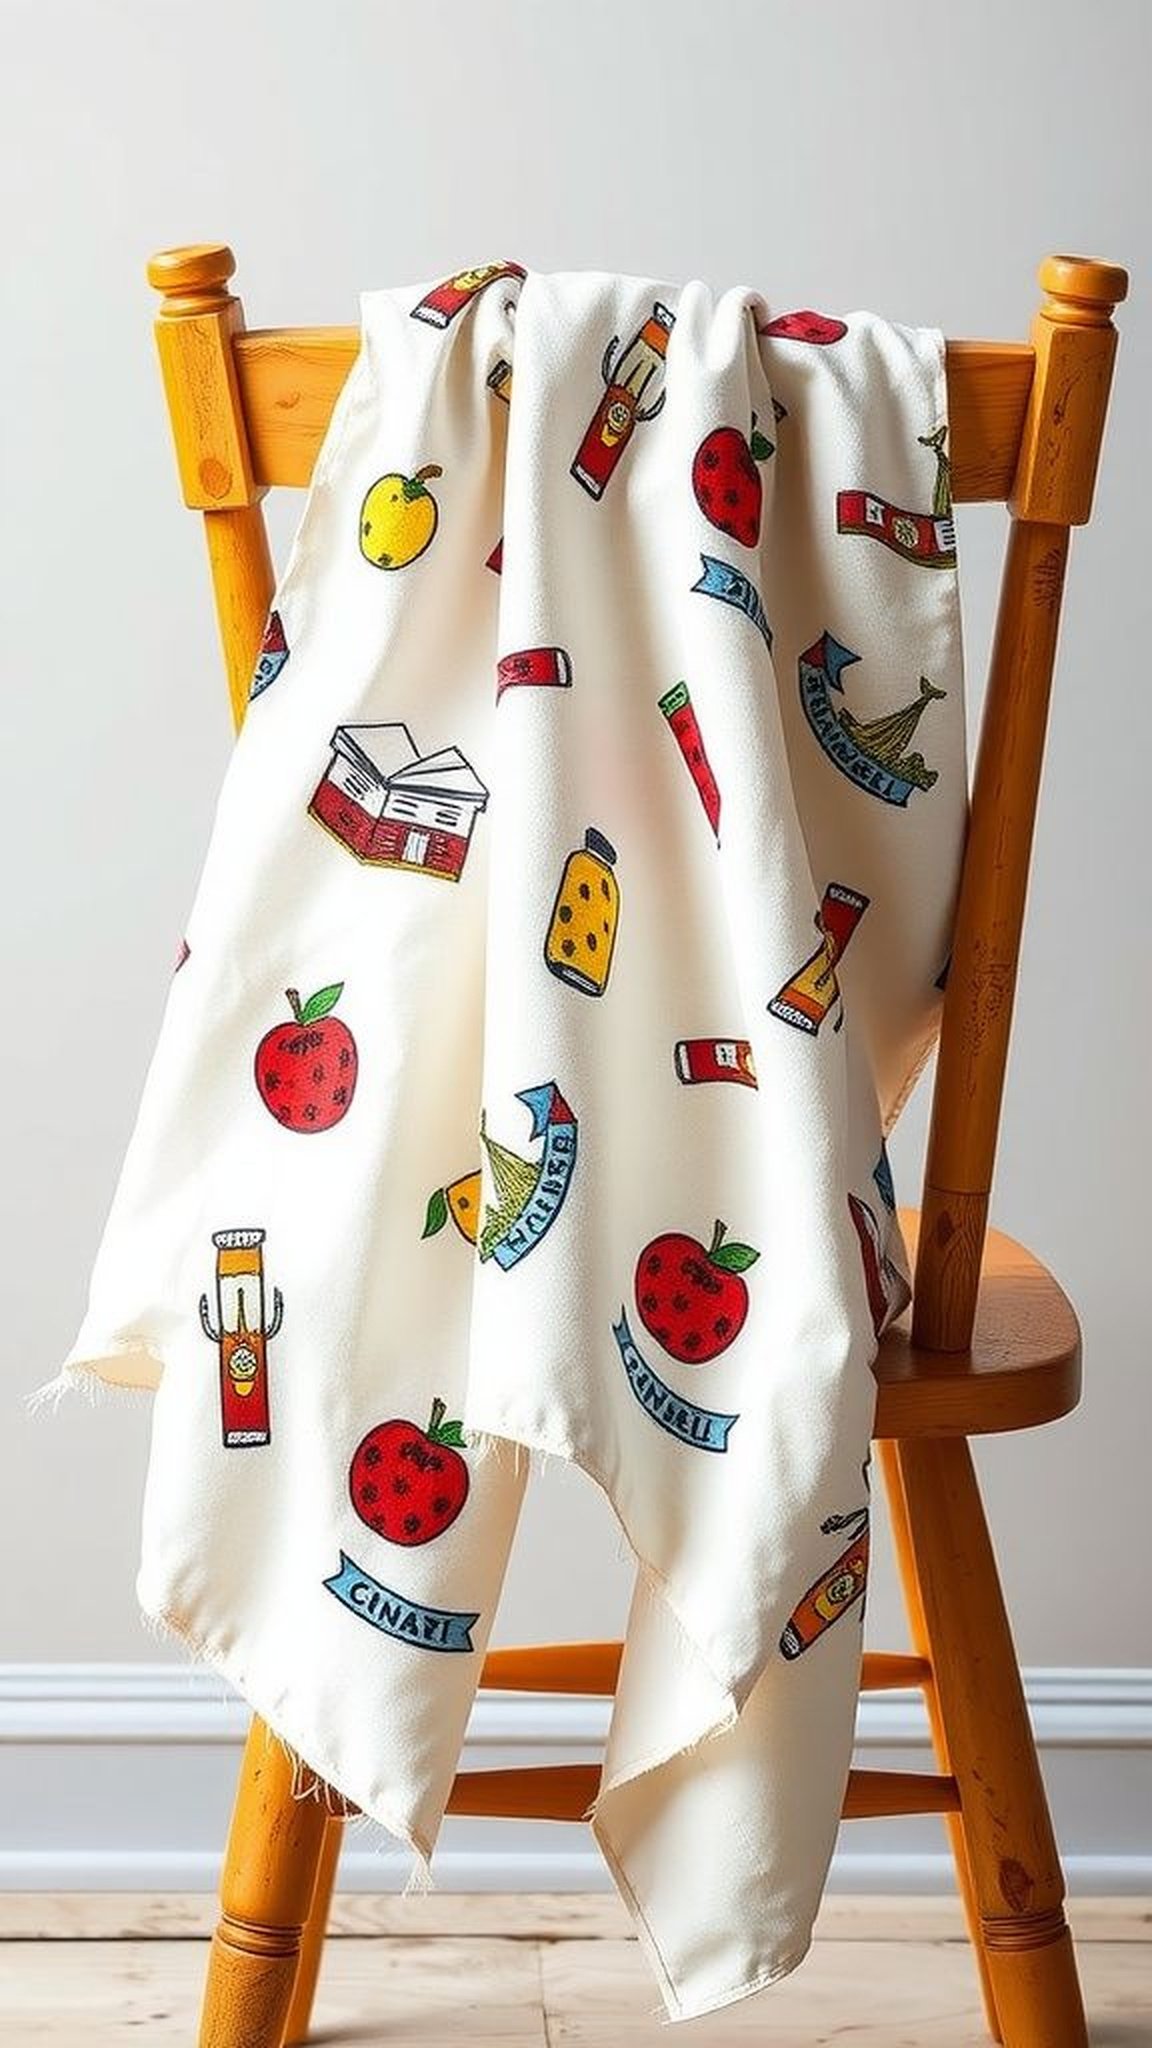
A hand-printed tea towel feels cottony and absorbent, and the prints press into fabric with a slightly uneven charm that machines miss. Ink colors have a slightly matte finish and the edges of motifs show gentle feathering that suggests the hand that pressed the block or stencil.
Draped over a chair, the towel flutters and reveals glimpses of apples, pencils, or chalkboard silhouettes. The fabric smells faintly of fresh wash and becomes useful in small kitchen moments while carrying the warmth of classroom imagery back into home routines.
Steps
- Select plain cotton tea towels and prepare fabric inks or paints suitable for textiles.
- Arrange a block stamp or stencil with school-themed motifs, apply ink evenly, and press onto the towel surface to transfer the design.
- Allow the ink to dry fully, then heat-set the design according to ink manufacturer guidelines to ensure durability.
- Fold the towel neatly and wrap with twine or place in a simple gift box.
Hand-lettered quote plaque with soft watercolor wash
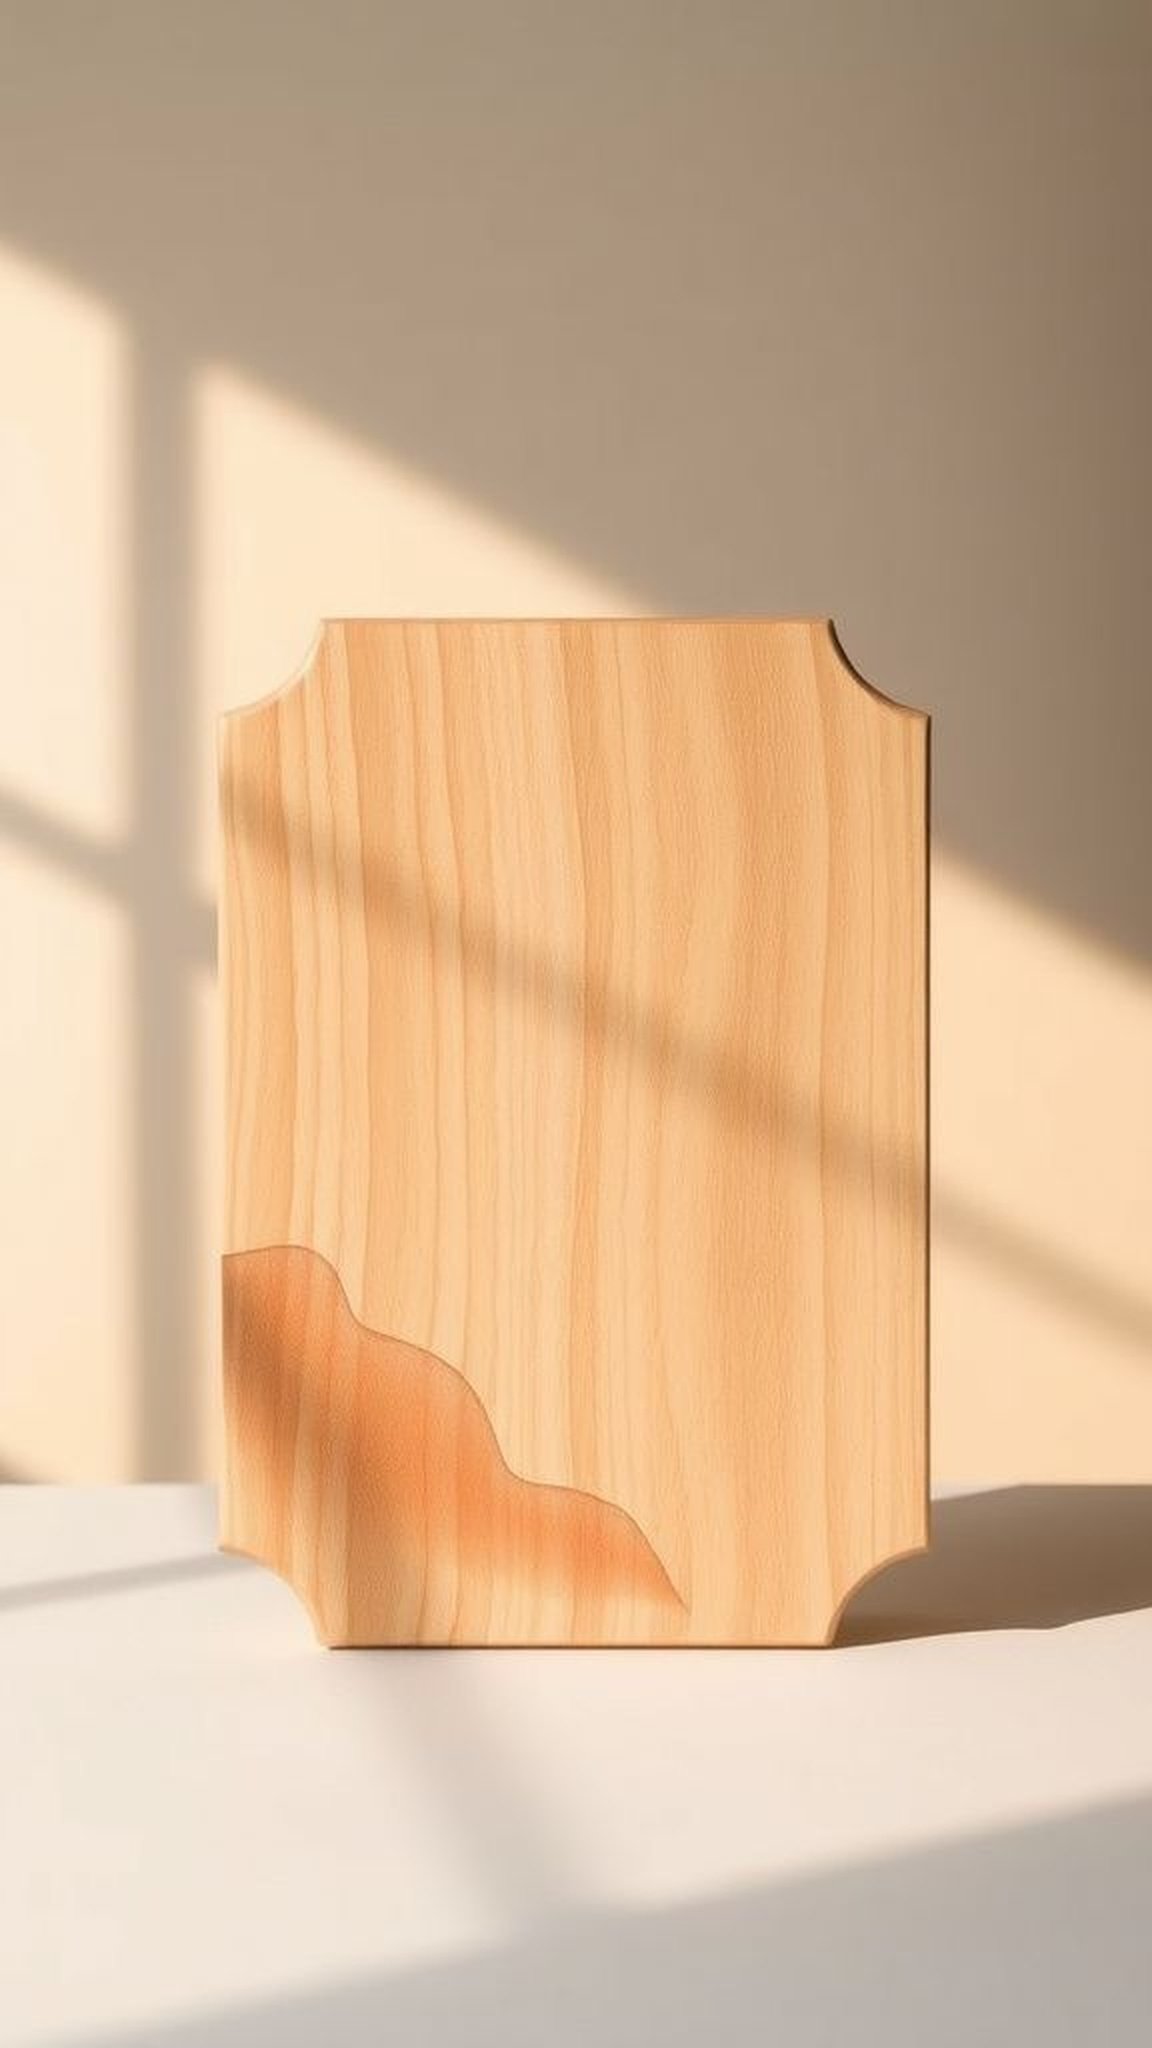
A small wooden plaque with hand-lettering and a muted watercolor wash feels contemplative. The grain of the wood peeks through the pigment, and the letters sit slightly raised where ink pooled at the strokes’ ends.
The watercolor background creates a soft horizon of color that calms the eye, and the plaque’s weight is reassuring when held. Positioned on a shelf it offers a quiet phrase to glance at between tasks, and the gentle palette blends with a classroom’s unpredictable palette without demanding attention.
Steps
- Prepare a small wooden plaque, sand lightly for a smooth surface, and apply a pale watercolor wash as a background.
- Once dry, hand-letter a short, meaningful phrase using a permanent ink pen or acrylic ink for contrast.
- Seal the finished piece with a clear, matte varnish to protect the surface.
- Attach a simple stand or sawtooth hanger to the back for display.
Wooden ruler memory box with student notes inside
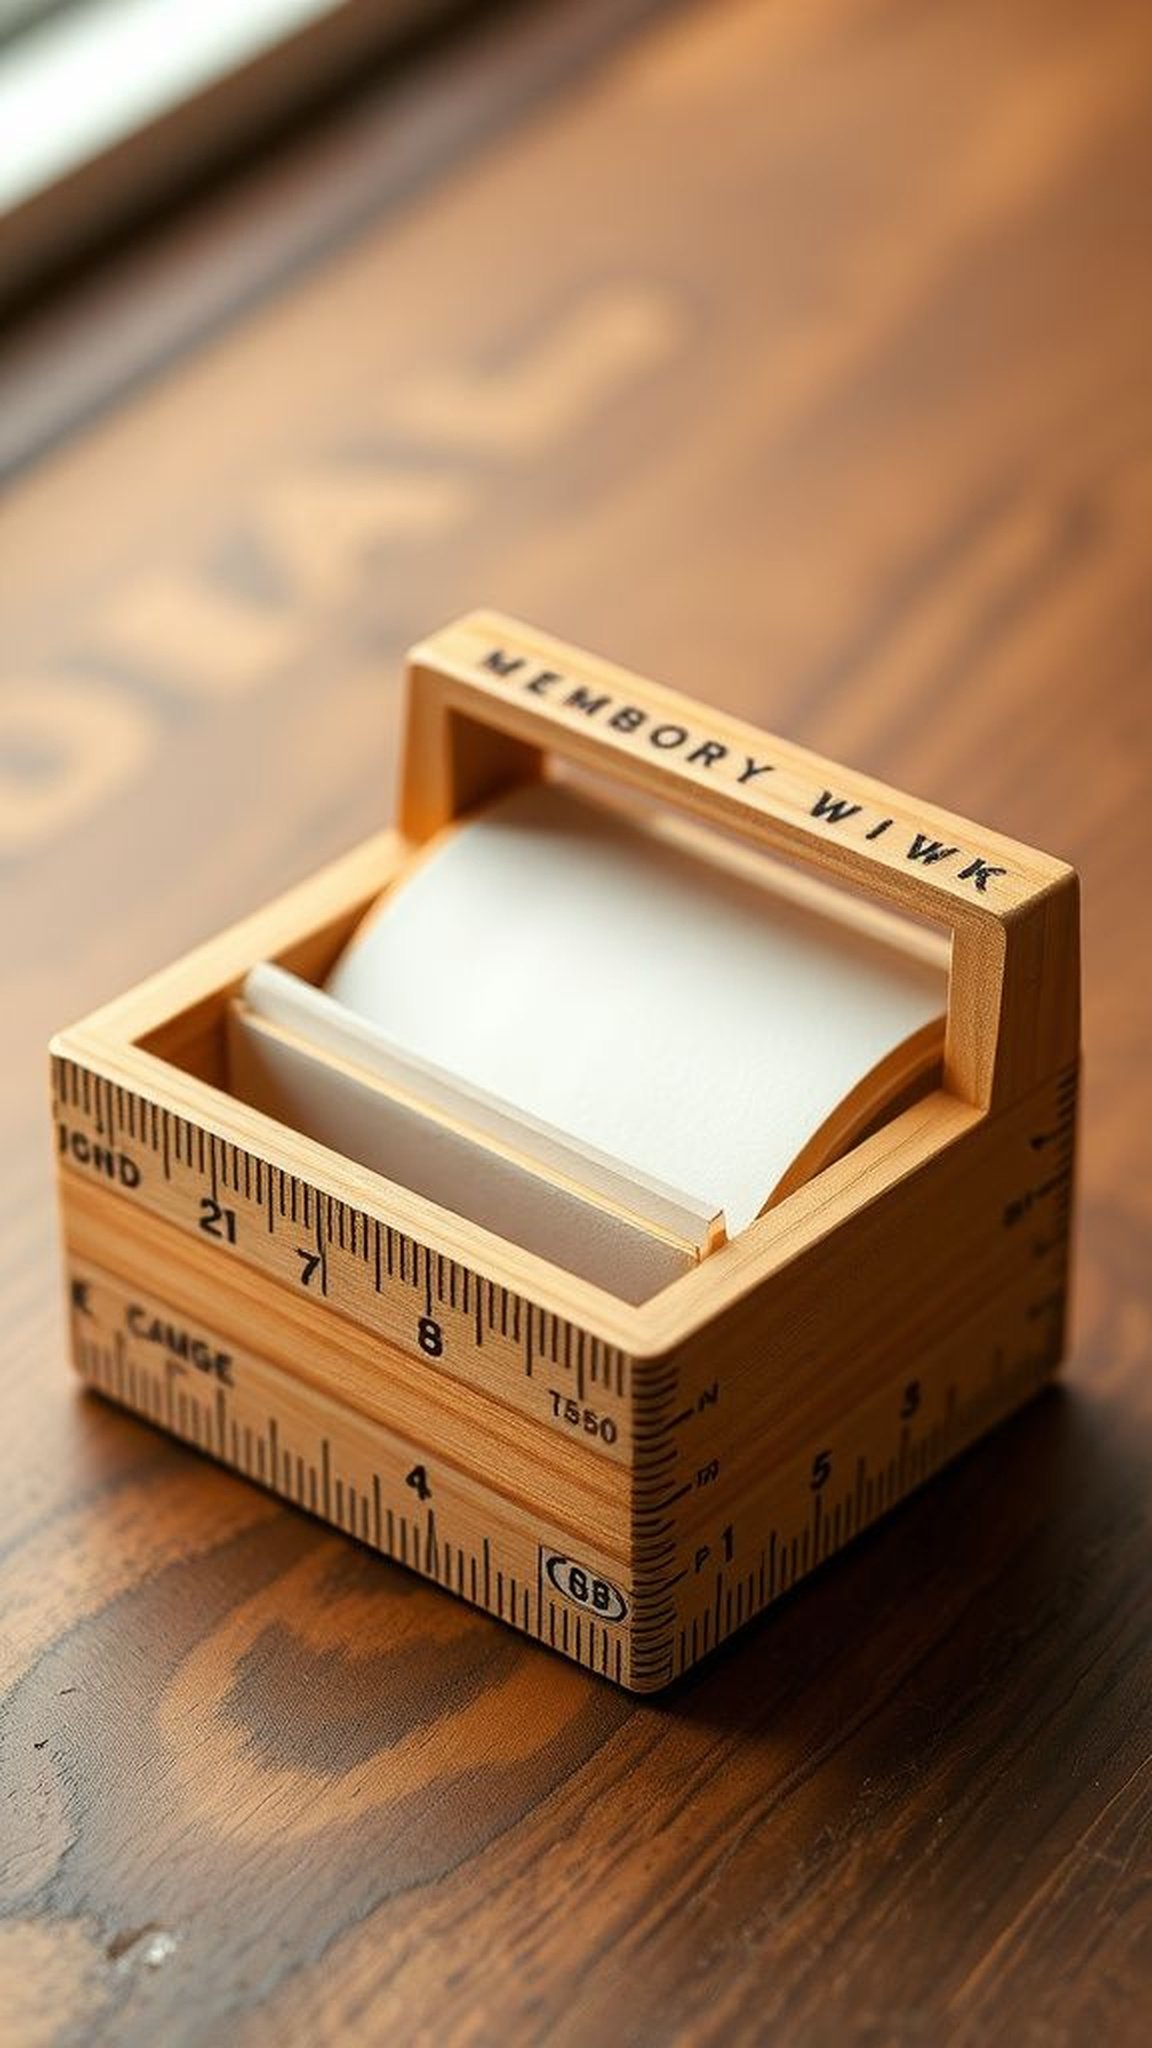
A small box crafted from reclaimed rulers carries the faint scent of varnish and old classrooms. The printed numbers and tiny scuffs on the rulers trace time and use, and the box’s corners fit together with a pleasing geometry.
Opening the lid reveals folded notes and little drawings that rustle like old paperbacks. The wood feels warm under the fingers and the ruler markings create a nostalgic pattern around the sides.
On a shelf the box looks modest but inside it holds a condensed history of a single school year.
Steps
- Source wooden rulers with character and construct a small box by joining pieces together at the corners with wood glue and small nails or screws.
- Sand the exterior gently to remove rough edges and apply a clear finish to protect the surface while preserving printed markings.
- Line the interior with soft paper or fabric to cradle notes, then place folded messages and small mementos inside.
- Close the lid securely and consider adding a small label indicating the year or class.