
Upcycled Sweater Mitten Crafts turn forgotten knits into cozy keepsakes with character. I fell for upcycled sweater mittens when a beloved but worn cardigan became a pair that matched my scarf, and the story stitched into every seam felt warmer than any store-bought pair.
These sweater mitten crafts invite small memories to stay close on brisk walks.
Whether felted, cable-knit, or Fair Isle, upcycling sweaters into mittens opens a playground of textures, linings, and trims. Upcycled sweater mitten crafts suit gifting, stocking stuffers, and winter décor, while upcycled sweater mittens bring gentle nostalgia to everyday routines.
Every stitch nods to a past life, and every pair carries a friendly wink of thrift and charm.
Felted Wool Mittens From Old Sweaters

A felted wool pair brings dense warmth and cushy structure, ideal for snowy errands and campfire evenings. Thrifted lambswool or merino transforms into a smooth, slightly fuzzy surface that resists wind and shows off soft heathering.
Blanket stitching in contrasting yarn frames each curve with a handmade look, while cuff bands from ribbing offer gentle grip at the wrist. Color choices range from charcoal and oatmeal to jewel-toned teal or cranberry, each one pairing well with plaid scarves.
Wrapped in tissue with a sprig of cedar, this pair lands beautifully as a winter birthday gift or hostess present.
Steps
- Machine-wash and dry a wool sweater on hot to felt the fabric firmly.
- Create a mitten template from paper, slightly larger than the hand, and trace two mirror-image pairs on the felted sweater.
- Cut pieces, pin right sides together, and sew around edges, leaving the cuff open.
- Turn right side out and blanket stitch the seams with contrasting wool yarn.
- Trim the cuff from ribbing and stitch to the wrist opening for a snug finish.
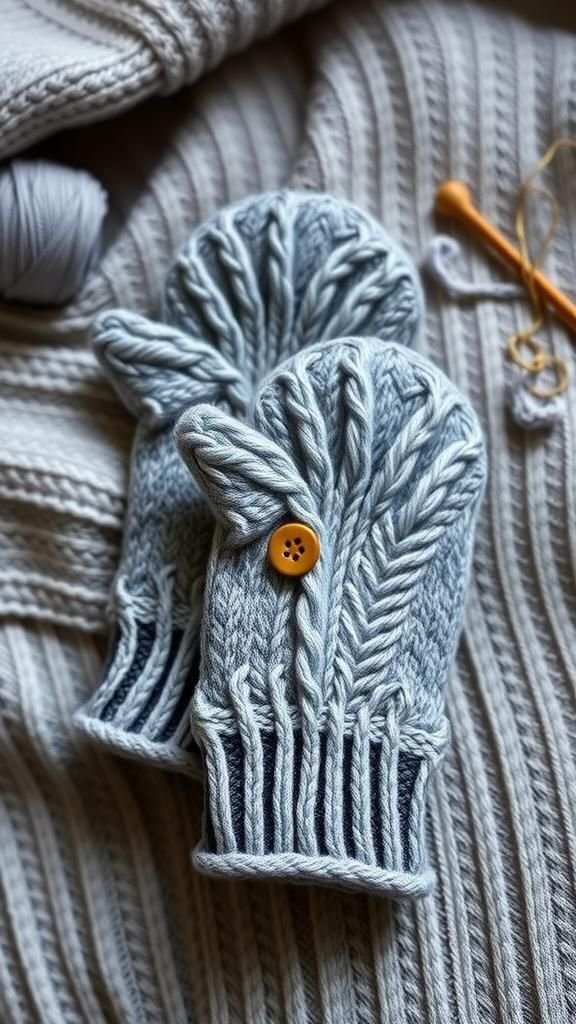
Cable-Knit Mittens With Cozy Fleece Lining
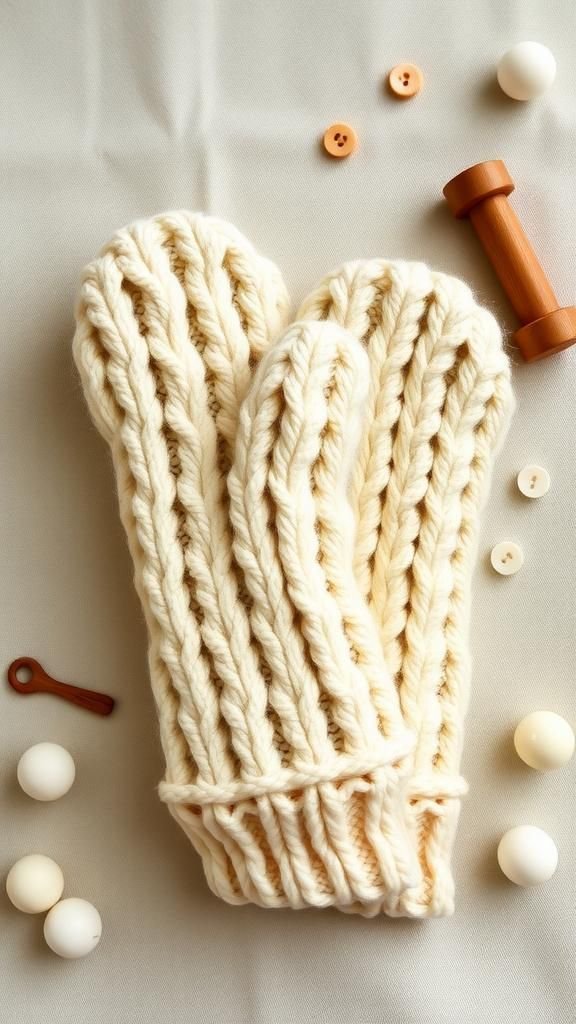
Chunky cable textures turn simple mittens into statement winter accessories with plenty of tactile appeal. The outer shell taken from an aran sweater shows braids and twists that catch light beautifully, while a plush fleece lining adds velvety softness inside.
Neutral creams feel classic, though moss green and soft taupe pair effortlessly with peacoats and parkas. Narrow leather loops at the cuff create a tidy hanging point on a hook or backpack.
Presented in a kraft box with tissue and a wool ribbon tie, this pair suits cabin weekends, sledding days, and snowy photo walks.
Steps
- Cut two mirrored outer mitten pieces from a cable-knit panel and two mirrored lining pieces from fleece.
- Sew outer pieces together and lining pieces together, both right sides facing.
- Slide lining into the knitted shell, wrong sides touching, and baste around the wrist opening.
- Finish with a folded ribbed cuff or bias tape, catching both layers securely.
- Hand-stitch a small leather loop inside each cuff for hanging.
Color-Block Mittens From Mixed Sweater Panels

Bold color-block mittens create crisp geometry from leftover sweater panels. Sleek bands of navy, mustard, and slate meet at seam lines that read modern yet cozy.
Ribbed cuffs in a contrasting hue anchor the palette while preventing slouch. A smooth jersey or microfleece lining delivers comfort without bulk.
The look works for city commutes and après-ski strolls alike, pairing beautifully with denim and tailored coats. Presented on kraft tags with swatch snippets, these mittens make a lively gift for design lovers who enjoy clean lines, saturated color, and playful winter accessories.
Steps
- Choose three coordinating sweater remnants and cut mitten fronts in separate color sections, backs in a single color.
- Join front color sections with narrow seams to create a unified front piece for each hand.
- Sew fronts to backs, right sides together, and trim seam allowances to reduce bulk.
- Insert a lightweight lining, baste, and finish the wrist with a ribbed cuff.
- Topstitch along the color joins to reinforce and add graphic definition.
Colorful Patchwork Crazy-Quilt Sweater Mitten Pair

Patchwork mittens celebrate scraps in a lively mosaic of stitches and textures. Tiny triangles of tweed, ribbing, and smooth stockinette form a painterly collage, while visible seams and decorative topstitching give a folk-art vibe.
A felt backing stabilizes the shape, and a soft flannel lining adds warmth. Jewel tones mingle with neutrals, inviting playful outfits and cheerful snow-day snapshots.
Displayed on a mantel with a matching patchwork scarf, the pair becomes winter décor that transitions easily to daily wear. A handwritten tag listing the sweater origins adds a sentimental, story-rich touch.
Steps
- Arrange small sweater scraps into mirrored patchwork layouts and secure them to felt with temporary stitches.
- Sew the patches together, pressing seams flat, and cut mitten shapes from the joined panels.
- Sew backs to fronts, turn right side out, and insert flannel linings cut from the same template.
- Edge-stitch around the mitten perimeter for stability and decorative detail.
- Finish with a soft ribbed cuff made from a coordinating sweater hem.
Fair Isle Statement Mittens From Vintage Pullovers
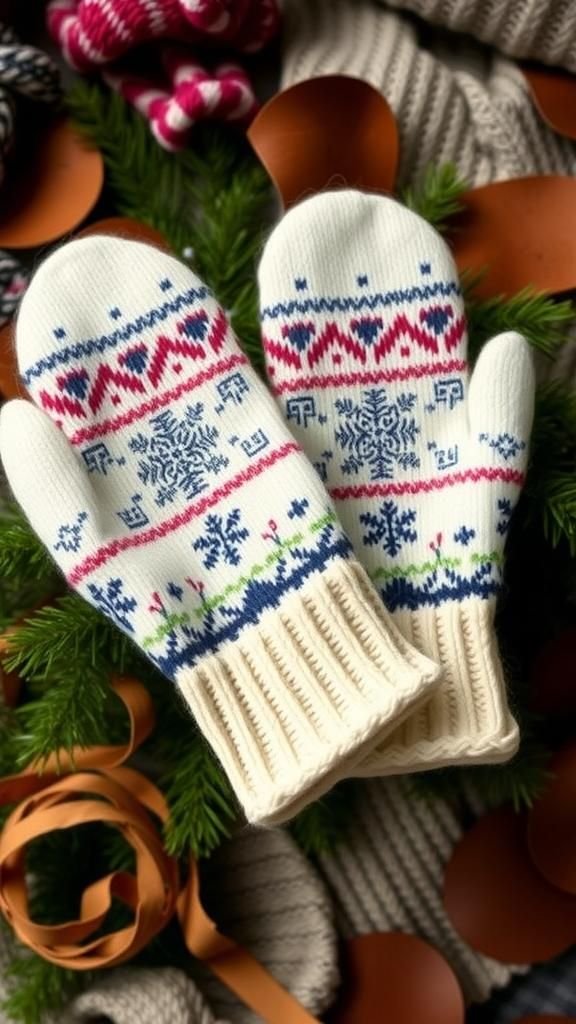
Fair Isle motifs turn mittens into wearable folklore, remixing snowflakes and starbursts into compact art. Panels from a vintage pullover deliver intricate colorwork that looks timeless with parkas and wool skirts alike.
Lighter yarn weight keeps bulk modest while still cozy, and a brushed lining creates comfort against skin. Palette options range from classic red-and-cream to moody forest and ash.
A small leather tab with stamped initials personalizes each pair for gifting. Draped over a pine bough or tucked in a basket with cocoa packets, they feel festive without leaning on holiday clichés.
Steps
- Cut mirrored mitten pieces from the most intact sections of the Fair Isle panel, centering motifs.
- Stitch fronts to backs, keeping pattern alignment along the top curve.
- Create a thin brushed-flannel lining and stitch to the interior at the wrist opening.
- Add a narrow folded cuff from ribbing, catching lining and exterior together.
- Rivet a tiny leather tab with initials near the cuff seam.
Leather-Palm Reinforced Upcycled Sweater Mittens
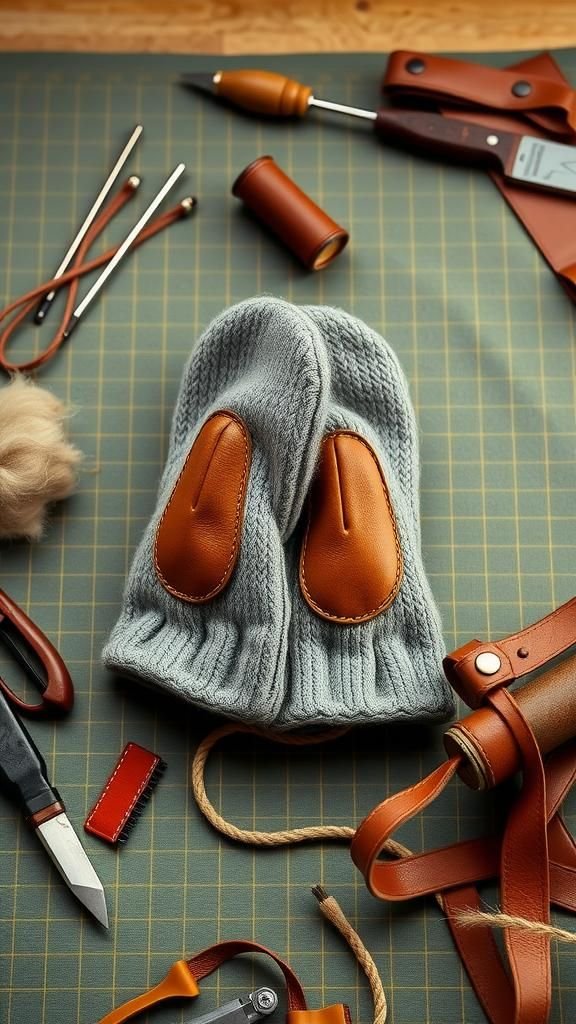
A leather palm panel gives wool mittens grip and durability for dog walks and woodpile duty. Contrasting textures create a refined utility look, with smooth or pebbled leather meeting soft knit.
Earth tones like cognac and walnut suit charcoal or navy wool, while bright saddle tan pops against lighter shades. A cozy lining tames the interior seams, and reinforced thumb curves increase longevity.
Gift-ready presentation comes easily with a small tin of leather conditioner and a hangtag describing materials. The finished pair lands between workwear and weekend casual, perfect for practical comfort.
Steps
- Cut wool mitten fronts and backs, plus mirrored leather palm overlays and thumb patches.
- Sew overlays to the wool fronts with a narrow edge stitch, shaping around the thumb area.
- Join fronts and backs, right sides together, and turn right side out.
- Insert a soft lining and secure at the wrist edge.
- Punch and set a tiny rivet at the cuff for a discreet, durable hanging point.
Embroidered Wildflower Upcycled Wool Mitten Set
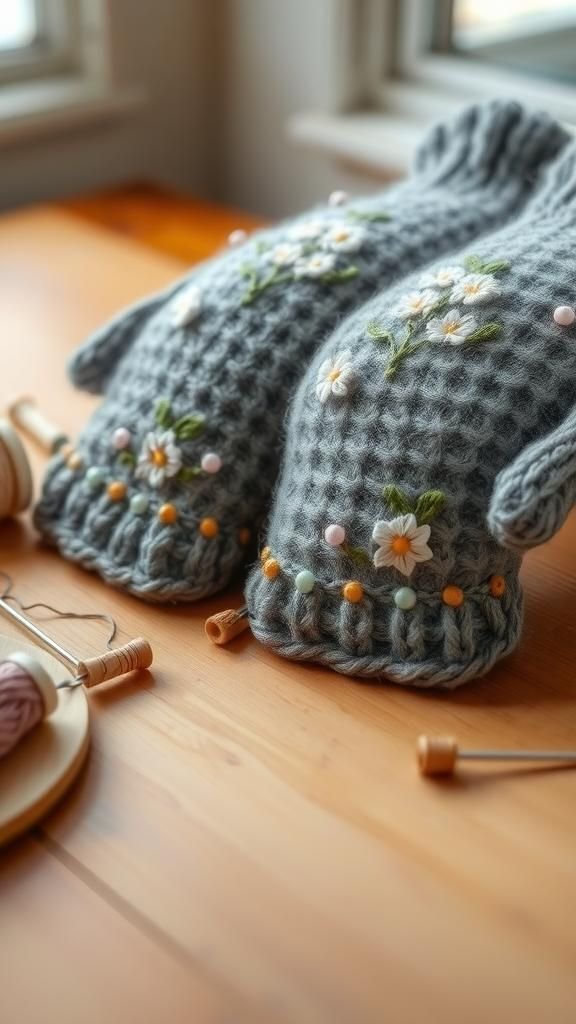
Delicate embroidery turns plain wool mittens into a flower-strewn meadow. Soft floss in coral, buttercream, and sage creates lazy daisies and tiny sprigs, while occasional seed beads add a dew-kissed sparkle.
Heathered gray or blush wool grounds the palette with gentle calm, and a slim cuff keeps attention on the stitched artwork. The look pairs beautifully with trench coats and knit berets for a bookish, romantic vibe.
Presented in a shallow box with dried blooms and tissue, the mittens feel like a keepsake from a country garden visit.
Steps
- Cut and sew simple wool mitten shells, leaving the wrist unfinished for easy handling.
- Sketch light floral guides on the exterior with washable pencil.
- Embroider daisies, leaves, and stems using satin stitch, lazy daisy, and backstitch.
- Add a few seed beads at flower centers and secure threads neatly inside.
- Finish the wrist with a narrow cuff or bias binding.
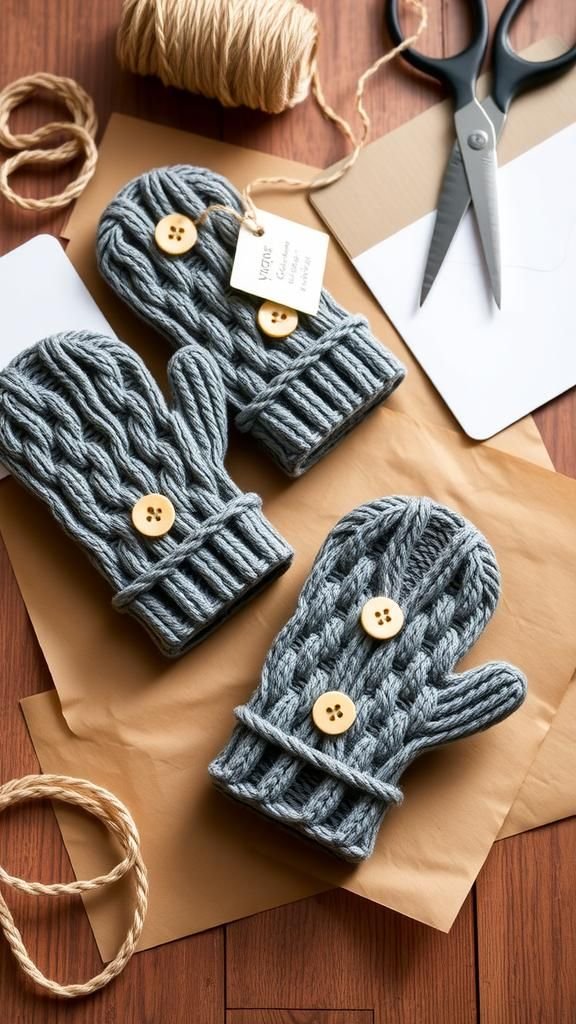
Button-Trim Mittens With Rustic Charm
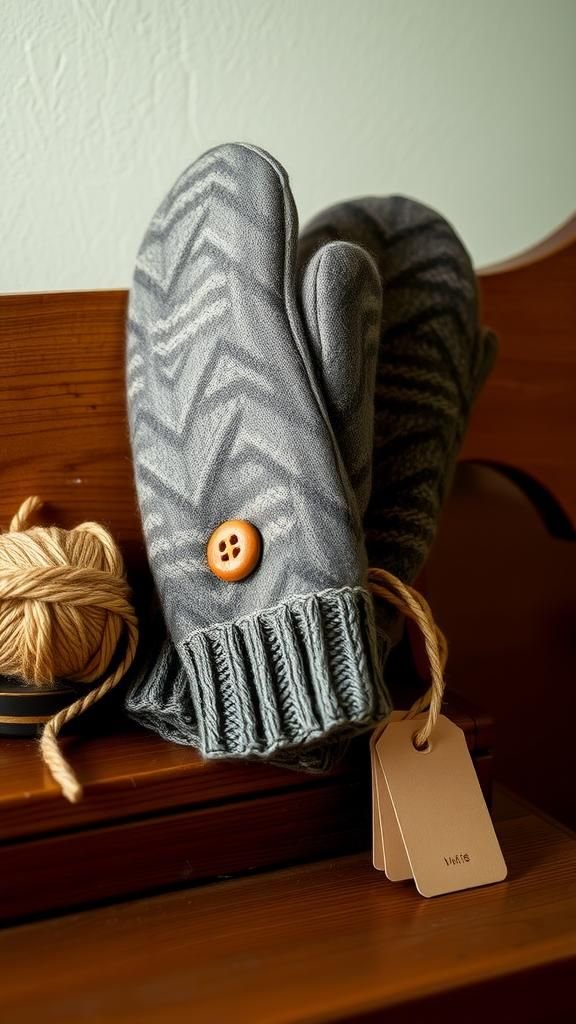
Button accents lend character to a simple pair, turning thrifted knits into storybook accessories. A trio of mismatched wooden and horn buttons near the cuff adds texture and echoes cabin interiors.
Tweedy wool with tiny flecks pairs well with denim coats, while solid forest green reads heritage and calm. A cozy lining balances structure, and understated topstitching frames the silhouette.
These mittens arrive gift-ready tied with twine and a kraft tag, and they display handsomely on a hallway peg rack beside scarves and beanies. The overall mood feels warm, practical, and a little nostalgic.
Steps
- Create the mitten shells from a tweedy sweater, keeping the cuff edge clean.
- Sew lining pieces and insert them into the shells, aligning wrist openings.
- Secure the lining with a neat seam or binding at the cuff.
- Hand-stitch three assorted buttons in a vertical row near each cuff.
- Knot threads securely and hide ends inside the lining.
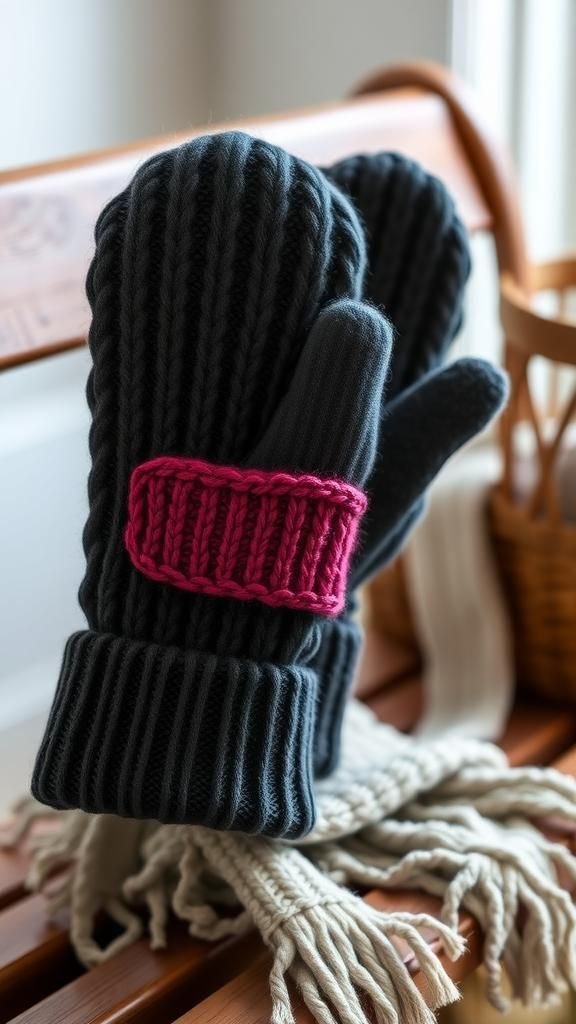
Convertible Flip-Top Sweater Mittens With Buttons
Convertible mittens switch between cozy coverage and fingertip freedom with a soft flip-top. A button anchor at the back keeps the top secured while writing notes or tapping a screen.
Ribbed cuffs hug the wrist, and the flip-top edge can feature blanket stitching for a handcrafted touch. Marled gray or indigo works with puffer jackets and fisherman sweaters, while scarlet delivers a confident pop.
They tuck neatly into a stocking and serve daily during errands and transit rides. A tiny care card explaining fiber content rounds out a thoughtful gift.
Steps
- Sew a standard mitten base with open fingertips and a finished thumb.
- Create a separate flip-top piece in matching fabric and hem the lower edge.
- Attach the flip-top along the backhand seam line and add a button near the wrist.
- Sew a small loop on the flip-top to fasten to the button when opened.
- Finish with a snug ribbed cuff for stability.
Phone-Friendly Conductive-Thread Tipped Sweater Mittens
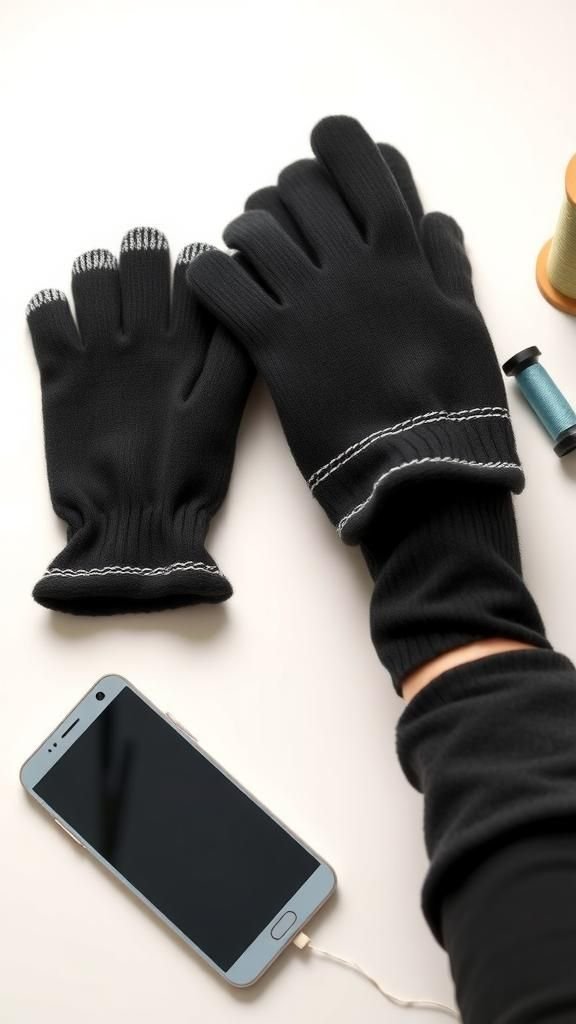
Tech-ready mittens bring warmth without sacrificing screen taps. Conductive thread stitched into the thumb and index areas enables quick swipes, while the rest of the mitten remains plush.
Smooth merino or cashmere blends feel luxurious and fold neatly into pockets. A minimal monochrome palette keeps the look sleek, though a contrast cuff adds a subtle wink.
Ideal for commuters and photographers, the pair arrives with a small swatch demonstrating the touch feature. On an entry table tray beside keys and chargers, they integrate seamlessly into daily routines.
Steps
- Sew standard sweater mittens in a slim silhouette for precision at the fingertips.
- Mark thumb and index tip zones and stitch dense zigzag patches with conductive thread.
- Test on a phone and adjust density or area coverage as needed.
- Reinforce the interior with a small felt patch to protect seams.
- Finish the wrists with narrow ribbing for a clean line.
Playful Kid-Sized Animal Face Sweater Mittens
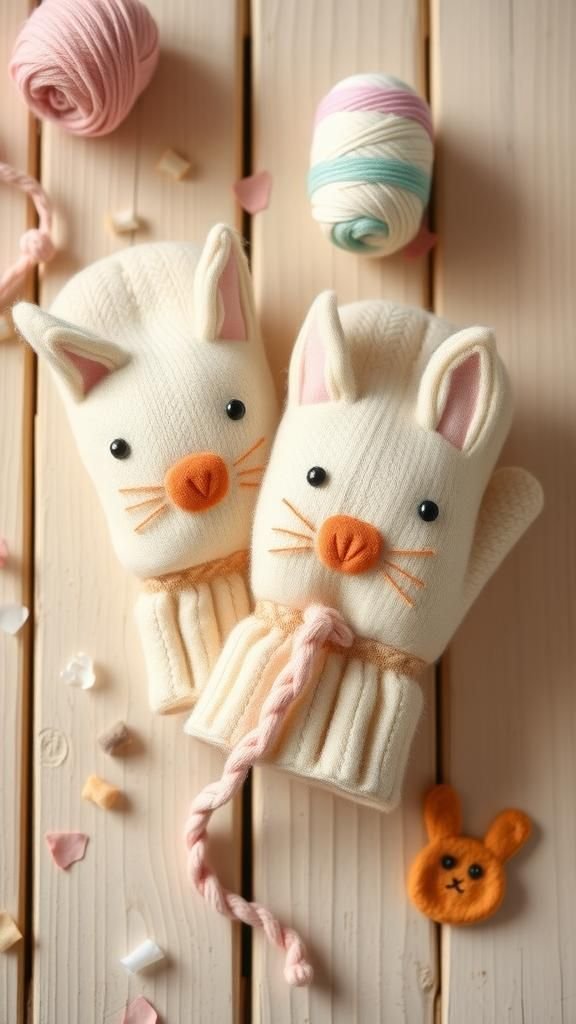
Child-friendly mittens brighten winter mornings with whiskers, ears, and gentle smiles. Soft wool from a shrunken sweater forms the base, while felt appliqués create eyes, ears, and noses.
Pastel bodies with charcoal features feel sweet, and brighter colorways spark lively energy. Shorter cuffs slip comfortably under jacket sleeves, and a woven cord connecting both mittens keeps them paired.
Presented inside a small tin pail with a name tag, they become a birthday hit and a parent-pleasing accessory for playground adventures. The vibe balances whimsy and warmth in equal measure.
Steps
- Sew kid-sized mitten shells from felted wool for durability.
- Cut felt ear shapes, eyes, and nose, and hand-stitch them onto the back of each mitten.
- Embroider whiskers and a small smile with sturdy thread.
- Add a woven cord that links the cuffs to prevent losses.
- Finish edges with soft blanket stitching for comfort.
Cozy Pocket Mittens For Hand Warmers
A discreet pocket on the backhand slips in a heat pack, turning mittens into tiny toasters on frosty days. The exterior comes from dense wool or felted cashmere, while the pocket flap in contrasting fabric adds graphic interest.
A brushed flannel or microfleece interior keeps everything plush. Neutral stone and espresso look refined, and brighter berry tones boost cheer during gray weather.
Packaged with reusable hand warmers, this set suits skiers, farmers’ market visits, and stadium seating. On an entry bench, they store neatly alongside hats and scarves while staying ready for sudden cold snaps.
Steps
- Cut mitten pieces and a small rectangular pocket with a curved flap.
- Stitch the pocket to the backhand piece, securing edges neatly.
- Assemble the mitten and lining, leaving the wrist open for finishing.
- Topstitch around the pocket for durability and polish.
- Finish with a ribbed cuff and tuck a hand warmer inside the pocket.
Luxe Lined Cashmere Sweater Mitten Upgrade
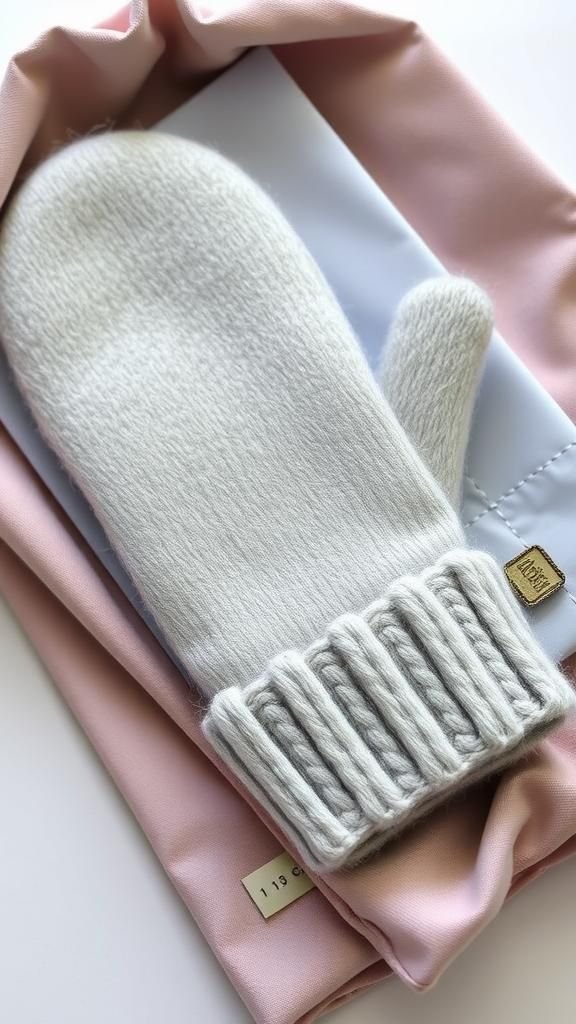
Cashmere mittens elevate everyday errands with cloud-soft comfort and understated sheen. A double-layer design pairs outer cashmere with a smooth satin or bamboo jersey lining that slides on effortlessly.
Pale stone, dove gray, or inky navy feels quietly elegant, while a slim profile slips under coat cuffs. A tiny metal tag at the edge lends a jewelry-like touch without fuss.
Wrapped in tissue inside a fabric pouch, this pair becomes a thoughtful gesture for winter birthdays, thank-you moments, or bridal parties during snowy seasons.
Steps
- Harvest the best panels from a cashmere sweater and cut mirrored mitten pieces.
- Sew exterior shells and lining shells separately for a sleek finish.
- Join lining and exterior at the wrist, right sides together, and turn through an opening.
- Close the opening with a ladder stitch and press lightly with a cool iron.
- Hand-stitch a small metal tag near the cuff seam.
Nordic Appliqué Mittens With Blanket Stitch Edges
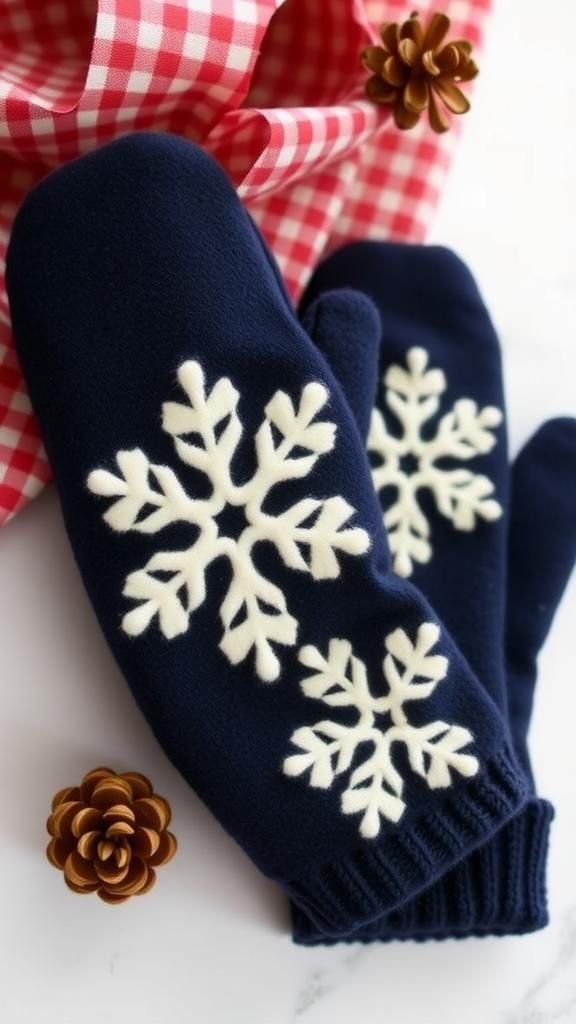
Appliquéd snowflakes and hearts bring Scandinavian charm to wool mittens with crisp shapes and cozy edges. Felt cutouts in ivory or icy blue contrast beautifully against navy or cranberry bases.
A wide blanket stitch frames every contour, giving a homespun border that stands out on brisk morning walks. Inside, flannel keeps things soft while staying breathable.
Display ideas include a hallway peg rail with pinecones or a gift box lined with gingham tissue. The overall effect feels festive yet neutral enough for the full winter season.
Steps
- Cut mitten shells from dense wool and felt appliqués in snowflake or heart shapes.
- Position appliqués on the backhand and secure with small hidden stitches.
- Sew the mitten shells together and turn right side out.
- Work a wide blanket stitch along edges with contrasting yarn.
- Add flannel linings and finish the wrists with matching ribbing.
Upcycled Mitten Ornaments For Holiday Trees
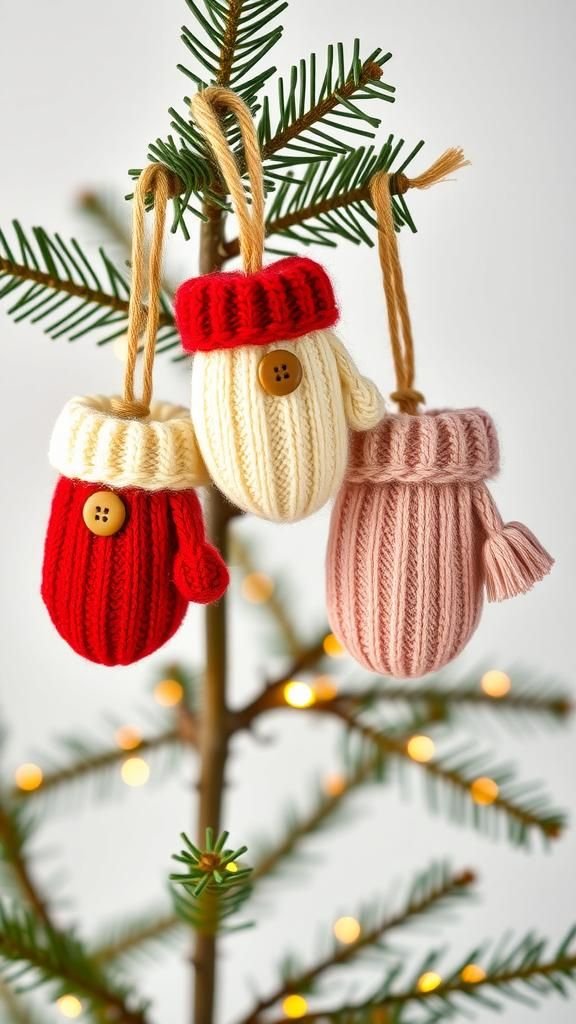
Mini mitten ornaments capture sweater nostalgia in palm-sized decorations. Snippets of cable, ribbing, and Fair Isle turn each pair into a tiny story, with twine hangers and bead accents.
Felt linings keep the shape crisp, while buttons or little tassels bring sparkle. Ivory and red evoke classic tradition, though soft blush and gold create an elegant twist.
Arranged on branches or tied to gift packages, the ornaments serve as keepsakes long after the season. A small box filled with tissue becomes a charming way to present a set.
Steps
- Create a small mitten template and cut two mirrored pieces per ornament from sweater scraps.
- Sew pieces together, add a felt lining, and turn right side out.
- Stitch a loop of twine inside the cuff for hanging.
- Embellish with a tiny button, bead, or tassel near the cuff.
- Repeat in coordinating fabrics to assemble a matching set.
Mini Mitten Garland From Sweater Scraps
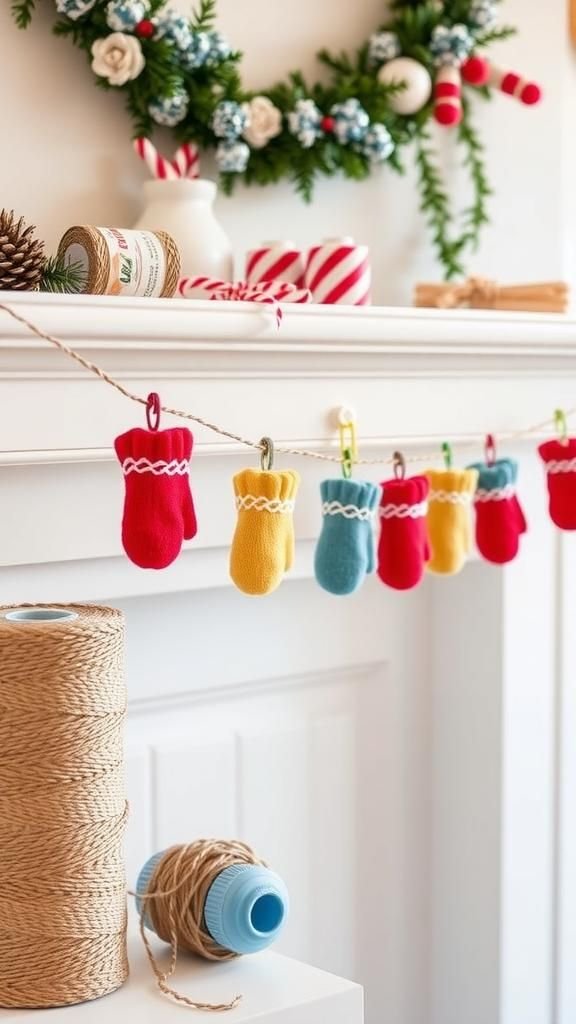
A garland of tiny mittens strings together color and texture across mantels, windows, or bookshelves. Each miniature showcases a different stitch, from cable to seed to smooth jersey, with cuff details that echo full-size designs.
Neutral stone mixed with winter green and cranberry builds a cohesive palette. Small labels with dates or initials transform the piece into a memory strand.
Coiled in a gift tin or wrapped around a spool, it becomes a sweet housewarming present. The finished garland keeps the cozy spirit alive through chilly months.
Steps
- Cut multiple mini mitten pairs from assorted sweater scraps with a small template.
- Sew each pair, turn right side out, and finish the cuffs neatly.
- Thread a cotton cord or baker’s twine through the cuffs or add small clips.
- Space mittens evenly and tie knots to hold positions.
- Add handwritten tags with dates or initials for personalization.
Mitten-Shaped Gift Card Holders From Sleeves
Gift cards feel warmer nestled in mitten-shaped sleeves cut from ribbed cuffs and soft sweater panels. The pocket format protects edges while offering a delightful reveal moment.
Color-block cuffs and tiny buttons add charm, and a felt backing keeps the silhouette crisp. This format pairs with bakery vouchers, bookshop cards, or coffee tokens.
Tucked into stockings or placed atop wrapped parcels, each holder doubles as a keepsake ornament afterward. A small tag noting the original sweater gives a wink to its past life.
Steps
- Trace a mitten shape slightly larger than a gift card and cut two pieces per holder.
- Sew around the sides and top, leaving the cuff edge open as a pocket.
- Add a felt backing for stability and trim neatly.
- Attach a small button or twine bow near the cuff.
- Slip the gift card inside and label with a tag.
Aromatic Mitten Sachets Filled With Lavender
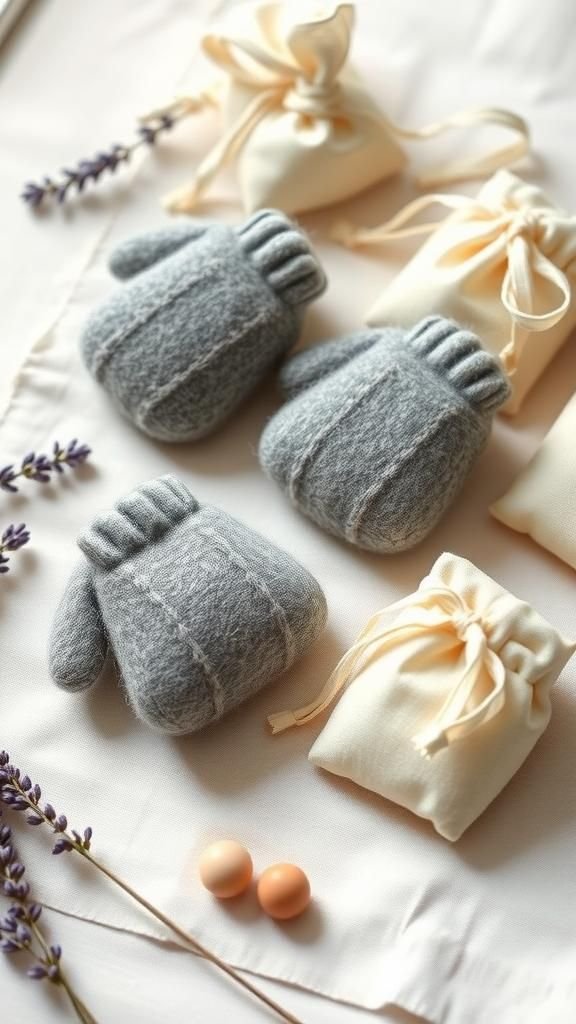
Mini mittens become fragrant sachets for drawers and closets, pairing sweater softness with botanical calm. Felted wool holds shape, while muslin pouches inside contain dried lavender or cedar shavings.
Soft gray and oatmeal blend with linen bedding, and a satin ribbon loop allows hanging from closet rods. Seed stitching or tiny appliquéd hearts add charm without bulk.
Bundled in sets of three with a small note on refreshed wardrobe scent, these sachets work as party favors, hostess gifts, or self-care treats during shorter days.
Steps
- Cut small mitten shapes from felted sweater fabric and sew pairs together, leaving an opening.
- Sew muslin pouches, fill with dried lavender, and tuck into each mitten shell.
- Close the opening with a ladder stitch for a neat finish.
- Add a satin ribbon loop to the cuff for hanging.
- Decorate with a tiny felt heart or seed stitches.
Oversized Mantel Mittens For Seasonal Décor

Gigantic mittens turn the fireplace into a playful winter scene. Bold texture from chunky sweater panels reads clearly across the room, while contrast cuffs with large buttons echo classic stockings.
Lined interiors keep the shape structured, inviting small treats or greenery sprigs. Colors like pine, cranberry, and cream suit a lodge aesthetic, while charcoal and ivory feel modern.
Hung from sturdy hooks, the pair becomes a centerpiece that bridges holiday and midwinter décor. A handwritten chalkboard label above each cuff offers a friendly greeting.
Steps
- Scale a mitten template to stocking size and cut mirrored panels from sweater fabric and lining.
- Sew outer shells and linings, then join at the cuff for a clean edge.
- Add a wide contrasting cuff with oversized buttons or toggles.
- Insert light interfacing if needed for structure.
- Attach a reinforced hanging loop and decorate with greenery.
Mug Cozy Mittens For Winter Cocoa Moments

Mug cozies shaped like mittens keep beverages warm and tabletops charming. Ribbed cuffs hug ceramic, while the mitten silhouette frames the cup with whimsy.
Felt or cork backing protects hands from heat, and a tiny button loop closure allows a snug fit around handles. Colors coordinate with kitchen palettes, from soft neutrals to cheerful stripes.
Tucked into a gift basket with cocoa mix and marshmallows, these cozies delight teachers, neighbors, and book-club friends. On open shelving, they display like miniature art between tea tins and saucers.
Steps
- Measure a favorite mug and draft a mitten-shaped cozy pattern with a handle gap.
- Cut outer sweater fabric and a heat-safe backing like felt or cork.
- Sew layers together and add a button loop and button near the cuff.
- Topstitch edges for durability and shape retention.
- Test the fit on the mug and adjust the loop length if needed.
Door Hanger Mitten Pair With Welcome Tag
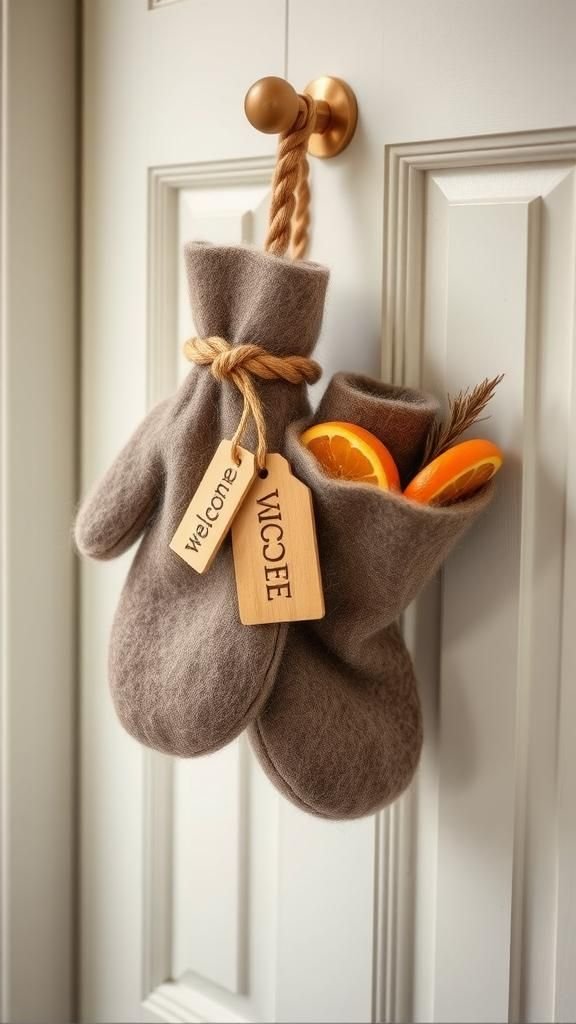
A mitten duo becomes a friendly door charm that greets guests with soft texture and seasonal cheer. Sturdy felted wool keeps the shapes crisp, while a braided cord connects both cuffs like a vintage coat-string memory.
A small wooden tag with a warm word hangs between them, and greenery or dried oranges tuck inside the cuffs for a fragrant accent. Neutral palettes suit farmhouse entryways, while plaid cuffs bring cottage charm.
Gift presentation shines with tissue, a flat box, and a little bag of extra botanicals for refreshing the display.
Steps
- Sew two slightly oversized mittens from felted wool and reinforce the cuffs.
- Attach a braided cord between cuffs, leaving a gentle drape for hanging.
- Add a wooden tag with hand-lettered wording on a short string between mittens.
- Tuck dried oranges or cedar sprigs into each cuff.
- Hang on a hook or over a wreath hanger at the door.